Epson WorkForce Pro WF-R5190 User Manual - Page 152
Removing and Installing Ink Packs, Ink color, Part number, Standard-capacity, High-capacity
 |
View all Epson WorkForce Pro WF-R5190 manuals
Add to My Manuals
Save this manual to your list of manuals |
Page 152 highlights
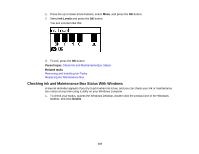
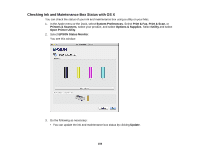
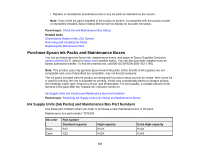
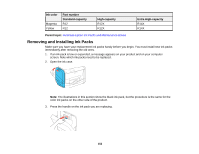
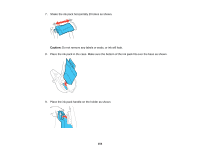
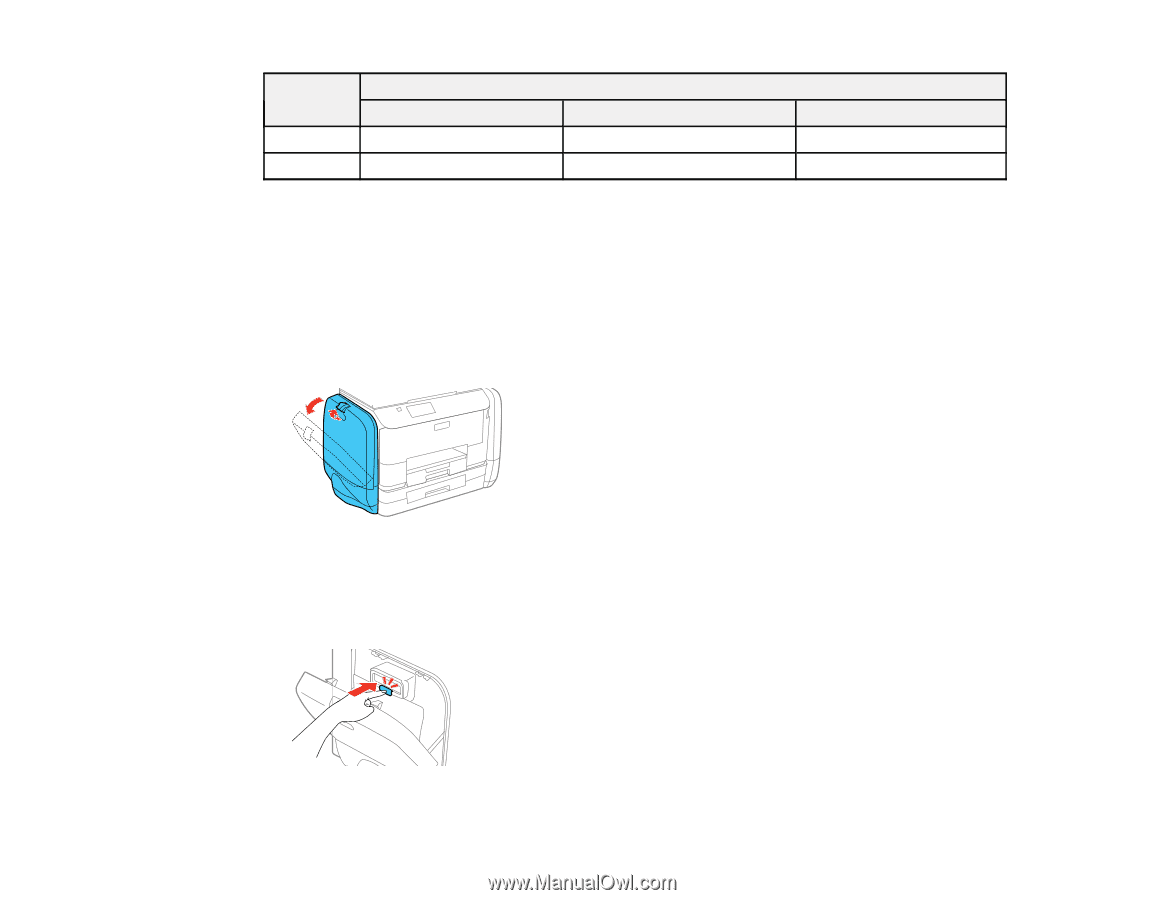
Ink color Magenta Yellow Part number Standard-capacity R12 R12 High-capacity R12X R12X Extra High-capacity R14X R14X Parent topic: Purchase Epson Ink Packs and Maintenance Boxes Removing and Installing Ink Packs Make sure you have your replacement ink packs handy before you begin. You must install new ink packs immediately after removing the old ones. 1. If an ink pack is low or expended, a message appears on your product and on your computer screen. Note which ink packs need to be replaced. 2. Open the ink case. Note: The illustrations in this section show the black ink pack, but the procedure is the same for the color ink packs on the other side of the product. 3. Press the handle on the ink pack you are replacing. 152
-
 1
1 -
2
-
3
-
4
-
5
-
6
-
7
-
8
-
9
-
10
-
11
-
12
-
13
-
14
-
15
-
16
-
17
-
18
-
19
-
20
-
21
-
22
-
23
-
24
-
25
-
26
-
27
-
28
-
29
-
30
-
31
-
32
-
33
-
34
-
35
-
36
-
37
-
38
-
39
-
40
-
41
-
42
-
43
-
44
-
45
-
46
-
47
-
48
-
49
-
50
-
51
-
52
-
53
-
54
-
55
-
56
-
57
-
58
-
59
-
60
-
61
-
62
-
63
-
64
-
65
-
66
-
67
-
68
-
69
-
70
-
71
-
72
-
73
-
74
-
75
-
76
-
77
-
78
-
79
-
80
-
81
-
82
-
83
-
84
-
85
-
86
-
87
-
88
-
89
-
90
-
91
-
92
-
93
-
94
-
95
-
96
-
97
-
98
-
99
-
100
-
101
-
102
-
103
-
104
-
105
-
106
-
107
-
108
-
109
-
110
-
111
-
112
-
113
-
114
-
115
-
116
-
117
-
118
-
119
-
120
-
121
-
122
-
123
-
124
-
125
-
126
-
127
-
128
-
129
-
130
-
131
-
132
-
133
-
134
-
135
-
136
-
137
-
138
-
139
-
140
-
141
-
142
-
143
-
144
-
145
-
146
-
 147
147 -
 148
148 -
 149
149 -
 150
150 -
 151
151 -
 152
152 -
 153
153 -
 154
154 -
 155
155 -
 156
156 -
 157
157 -
158
-
159
-
160
-
161
-
162
-
163
-
164
-
165
-
166
-
167
-
168
-
169
-
170
-
171
-
172
-
173
-
174
-
175
-
176
-
177
-
178
-
179
-
180
-
181
-
182
-
183
-
184
-
185
-
186
-
187
-
188
-
189
-
190
-
191
-
192
-
193
-
194
-
195
-
196
-
197
-
198
-
199
-
200
-
201
-
202
-
203
-
204
-
205
-
206
-
207
-
208
-
209
-
210
-
211
-
212
-
213
-
214
-
215
-
216
-
217
-
218
-
219
-
220
-
221
-
222
-
223
-
224
-
225
-
226
-
227
-
228
-
229
-
230
-
231
-
232
-
233
-
234
-
235
-
236
-
237
-
238
-
239
-
240
-
241
-
242
 |
 |
Ink color
Part number
Standard-capacity
High-capacity
Extra High-capacity
Magenta
R12
R12X
R14X
Yellow
R12
R12X
R14X
Parent topic:
Purchase Epson Ink Packs and Maintenance Boxes
Removing and Installing Ink Packs
Make sure you have your replacement ink packs handy before you begin. You must install new ink packs
immediately after removing the old ones.
1.
If an ink pack is low or expended, a message appears on your product and on your computer
screen. Note which ink packs need to be replaced.
2.
Open the ink case.
Note:
The illustrations in this section show the black ink pack, but the procedure is the same for the
color ink packs on the other side of the product.
3.
Press the handle on the ink pack you are replacing.
152