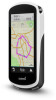
Garmin Edge 1030 Owners Manual - Page 15
Tips for Riding a Course, Using ClimbPro, Viewing Course Details, Stopping a Course, Deleting
 |
View all Garmin Edge 1030 manuals
Add to My Manuals
Save this manual to your list of manuals |
Page 15 highlights
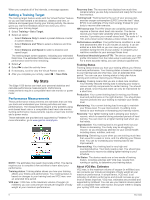
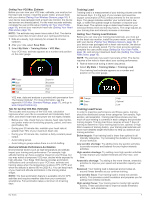
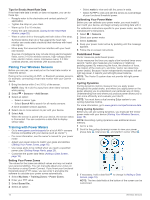
4 Select an option: • To select your current location on the map, select Current Location. • To select a location on the map, select Use Map, and select a location. • To select a saved location, select Saved Locations, and select a location. • To browse for and select a point of interest, select Search Tools > POI Categories, and select a nearby point of interest. • To select a city, select Search Tools > Cities, and select a nearby city. • To select an address, select Search Tools > Addresses, and enter the address. • To select an intersection, select Search Tools > Intersections, and enter the street names. • To use coordinates, select Search Tools > Coordinates, and enter the coordinates. 5 Select Start Direction, and select a direction heading. 6 Select Search. TIP: You can select to search again. 7 Select a course to view it on the map. TIP: You can select and to view the other courses. 8 Select Ride. Tips for Riding a Course • Use turn guidance (Course Options, page 11). • If you include a warmup, select to begin the course, and warm up as normal. • Stay away from your course path as you warm up. When you are ready to begin, head toward your course. When you are on any part of the course path, a message appears. NOTE: As soon as you select , your Virtual Partner starts the course and does not wait for you to warm up. • Scroll to the map to view the course map. If you stray from the course, a message appears. Using ClimbPro The ClimbPro feature helps you manage your effort for the upcoming climbs on a course. Before your ride, you can view details about the climbs, including when they occur, average gradient, and total ascent. The climb categories, based on length and gradient, are indicated by color. 1 Enable the ClimbPro feature for the activity profile (Updating Your Activity Profile, page 19). 2 Review the climbs and course details for the course (Viewing Course Details, page 11). 3 Start following a saved course (Courses, page 10). At the start of a climb, the ClimbPro screen appears automatically. Viewing Course Details 1 Select Navigation > Courses > Saved Courses. 2 Select a course. 3 Select an option: • Select Summary to view details about the course. • Select Map to view the course on the map. • Select Elevation to view an elevation plot of the course. • Select Climbs to view details and elevation plots for each climb. • Select Laps to select a lap and view additional information about each lap. Displaying a Course on the Map For each course saved to your device, you can customize how it appears on the map. For example, you can set your commute course to always display on the map in yellow. You can have an alternate course display in green. This allows you to see the courses while you are riding, but not follow or navigate a particular course. 1 Select Navigation > Courses > Saved Courses. 2 Select the course. 3 Select Settings. 4 Select Always Display to make the course appear on the map. 5 Select Color, and select a color. 6 Select Course Points to include course points on the map. The next time you ride near the course, it appears on the map. Stopping a Course 1 Scroll to the map. 2 Select > . Deleting a Course 1 Select Navigation > Courses > Saved Courses. 2 Select a course. 3 Select > . Course Options Select Navigation > Courses > Saved Courses > . Turn Guidance: Enables or disables turn prompts. Off Course Warnings: Alerts you if you stray from the course. Search: Allows you to search for saved courses by name. Filter: Allows you to filter by course type, such as Strava courses. Sort: Allows you to sort saved courses by name, distance, or date. Delete: Allows you to delete all or multiple saved courses from the device. Navigation 11
-
 1
1 -
2
-
3
-
4
-
5
-
6
-
7
-
8
-
9
-
 10
10 -
 11
11 -
 12
12 -
 13
13 -
 14
14 -
 15
15 -
 16
16 -
 17
17 -
 18
18 -
 19
19 -
 20
20 -
21
-
22
-
23
-
24
-
25
-
26
-
27
-
28
-
29
-
30
-
31
-
32
-
33
-
34
-
35
-
36
 |
 |
