Garmin Instinct Solar - Surf Edition Owners Manual - Page 8
Using the Metronome, Starting an Expedition, Going Hunting, Going Fishing, Viewing Tide Information
 |
View all Garmin Instinct Solar - Surf Edition manuals
Add to My Manuals
Save this manual to your list of manuals |
Page 8 highlights
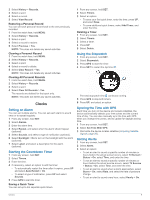
Using the Metronome The metronome feature plays tones at a steady rhythm to help you improve your performance by training at a faster, slower, or more consistent cadence. NOTE: This feature is not available for all activities. 1 From the watch face, press GPS. 2 Select an activity. 3 Hold MENU. 4 Select the activity settings. 5 Select Metronome > Status > On. 6 Select an option: • Select Beats / Minute to enter a value based on the cadence you want to maintain. • Select Alert Frequency to customize the frequency of the beats. • Select Sounds to customize the metronome tone and vibration. 7 If necessary, select Preview to listen to the metronome feature before you run. 8 Go for a run (Starting an Activity, page 2). The metronome starts automatically. 9 During your run, press UP or DOWN to view the metronome screen. 10If necessary, hold MENU to change the metronome settings. Starting an Expedition You can use the Expedition app to prolong the battery life while recording a multi-day activity. 1 From the watch face, press GPS. 2 Select Expedition. 3 Press GPS to start the activity timer. The device enters low power mode and collects GPS track points once an hour. To maximize battery life, the device turns off all sensors and accessories, including the connection to your smartphone. Changing the Track Point Recording Interval During an expedition, GPS track points are recorded once an hour by default. You can change how often GPS track points are recorded. Recording track points less frequently maximizes battery life. NOTE: To maximize battery life, GPS track points are not recorded after sunset. You can customize this option in the activity settings. 1 From the watch face, press GPS. 2 Select Expedition. 3 Hold MENU. 4 Select the activity settings. 5 Select Recording Interval. 6 Select an option. Recording a Track Point Manually During an expedition, track points are recorded automatically based on the selected recording interval. You can manually record a track point at any time. 1 During an expedition, press UP or DOWN to view the map page. 2 Press GPS. 3 Select Add Point. Viewing Track Points 1 During an expedition, press UP or DOWN to view the map page. 2 Press GPS. 3 Select View Points. 4 Select a track point from the list. 5 Select an option: • To start navigating to the track point, select Go To. • To view detailed information about the track point, select Details. Going Hunting You can save locations relevant to your hunt and view a map of saved locations. 1 From the watch face, press GPS. 2 Select Hunt. 3 From the time of day data screen, press GPS > Start Hunt. 4 From the time of day data screen, press GPS, and select an option: • To save your current location, select Save Location. • To view locations saved during this hunt activity, select Hunt Locations. • To view all previously saved locations, select Saved Locations. 5 After you complete your activity, scroll to the time of day data screen, press GPS, and select End Hunt. Going Fishing You can keep track of your daily fish count, count down your competition time, or set an interval timer to keep track of your fishing pace. 1 From the watch face, press GPS. 2 Select Fish. 3 From the time of day data screen, press GPS > Start Fish. 4 From the time of day data screen, press GPS, and select an option: • To add the catch to your fish count and save the location, select Log Catch. • To save your current location, select Save Location. • To set an interval timer, end time, or end time reminder for the activity, select Fish Timers. 5 After you complete your activity, scroll to the time of day data screen, press GPS, and select End Fish. Viewing Tide Information WARNING Tide information is for information purposes only. It is your responsibility to heed all posted water-related guidance, to remain aware of your surroundings, and to use safe judgment in, on, and around the water at all times. Failure to heed this warning could result in serious personal injury or death. You can view information about a tide station, including the tide height and when the next high and low tides will occur. 1 From the watch face, press GPS. 2 Select Tides. 3 Select an option: • To use your current location when you are near a tide station, select Current Location. • To select a recently used tide station, select Recent. • To select a saved location, select Saved. • To enter coordinates for a location, select Coordinates. A 24-hour tide chart appears for the current date with the current tide height and information about the next tide . 4 Activities and Apps
-
 1
1 -
2
-
 3
3 -
 4
4 -
 5
5 -
 6
6 -
 7
7 -
 8
8 -
 9
9 -
 10
10 -
 11
11 -
 12
12 -
 13
13 -
14
-
15
-
16
-
17
-
18
-
19
-
20
-
21
-
22
-
23
-
24
-
25
-
26
-
27
-
28
-
29
-
30
-
31
-
32
-
33
-
34
-
35
-
36
 |
 |
