Garmin vivoactive 4/4S Owners Manual - Page 9
Safety and Tracking Features, Heart Rate Features
 |
View all Garmin vivoactive 4/4S manuals
Add to My Manuals
Save this manual to your list of manuals |
Page 9 highlights
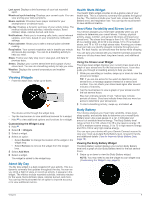
3 Follow the on-screen instructions. After the card is added, you can select the card on your watch when you make a payment. Managing Your Garmin Pay Cards You can temporarily suspend or delete a card. NOTE: In some countries, participating financial institutions may restrict the Garmin Pay features. 1 From the Garmin Connect app, select or . 2 Select Garmin Pay. 3 Select a card. 4 Select an option: • To temporarily suspend or unsuspend the card, select Suspend Card. The card must be active to make purchases using your vívoactive device. • To delete the card, select . Changing Your Garmin Pay Passcode You must know your current passcode to change it. If you forget your passcode, you must reset the Garmin Pay feature for your vívoactive device, create a new passcode, and reenter your card information. 1 From the vívoactive device page in the Garmin Connect app, select Garmin Pay > Change Passcode. 2 Follow the on-screen instructions. The next time you pay using your vívoactive device, you must enter the new passcode. Safety and Tracking Features CAUTION Incident detection and assistance are supplemental features and should not be relied on as a primary method to obtain emergency assistance. The Garmin Connect app does not contact emergency services on your behalf. The vívoactive device has safety and tracking features that must be set up with the Garmin Connect app. NOTICE To use these features, you must be connected to the Garmin Connect app using Bluetooth technology. You can enter emergency contacts in your Garmin Connect account. For more information about incident detection and assistance, go to www.garmin.com/safety. Assistance: Allows you to send an automated message with your name, LiveTrack link, and GPS location to your emergency contacts. Incident detection: When the vívoactive device detects an incident during an outdoor walk, run, or bike activity, the device sends an automated message, LiveTrack link, and GPS location to your emergency contacts. LiveTrack: Allows friends and family to follow your races and training activities in real time. You can invite followers using email or social media, allowing them to view your live data on a Garmin Connect tracking page. Adding Emergency Contacts Emergency contact phone numbers are used for the incident detection and assistance features. 1 From the Garmin Connect app, select or . 2 Select Safety & Tracking > Incident Detection & Assistance > Add Emergency Contact. 3 Follow the on-screen instructions. Adding Contacts You can add up to 50 contacts to the Garmin Connect app. Contact emails can be used with the LiveTrack feature. Three of these contacts can be used as emergency contacts (Adding Emergency Contacts, page 5). 1 From the Garmin Connect app, select or . 2 Select Contacts. 3 Follow the on-screen instructions. After you add contacts, you must sync your data to apply the changes to your vívoactive device (Using the Garmin Connect App, page 16). Turning Incident Detection On and Off Before you can enable incident detection on your device, you must set up emergency contacts in the Garmin Connect app (Adding Emergency Contacts, page 5). Your paired smartphone must be equipped with a data plan and be in an area of network coverage where data is available. Your emergency contacts must be able to receive emails or text messages (standard text messaging rates may apply). 1 From the watch face, hold . 2 Select > Safety & Tracking > Incident Detection. 3 Select an activity. NOTE: Incident detection is available only for outdoor walk, run, and bike activities. When an incident is detected by your vívoactive device with GPS enabled, the Garmin Connect app can send an automated text message and email with your name and GPS location to your emergency contacts. A message appears indicating your contacts will be informed after 30 seconds have elapsed. You can select Cancel before the countdown is complete to cancel the message. Requesting Assistance Before you can request assistance, you must set up emergency contacts (Adding Emergency Contacts, page 5). 1 Hold . 2 When you feel three vibrations, release the button to activate the assistance feature. The countdown screen appears. TIP: You can select Cancel before the countdown is complete to cancel the message. Heart Rate Features The vívoactive device has a wrist-based heart rate monitor and is also compatible with chest heart rate monitors (sold separately). You can view heart rate data on the heart rate widget. If both wrist-based heart rate and chest heart rate data are available when you start an activity, your device uses the chest heart rate data. Wrist-based Heart Rate Wearing the Device • Wear the device above your wrist bone. NOTE: The device should be snug but comfortable. For more accurate heart rate readings, the device should not move while running or exercising. For pulse oximeter readings, you should remain motionless. Safety and Tracking Features 5
-
 1
1 -
2
-
3
-
 4
4 -
 5
5 -
 6
6 -
 7
7 -
 8
8 -
 9
9 -
 10
10 -
 11
11 -
 12
12 -
 13
13 -
 14
14 -
15
-
16
-
17
-
18
-
19
-
20
-
21
-
22
-
23
-
24
-
25
-
26
-
27
-
28
-
29
-
30
-
31
-
32
 |
 |