Gigabyte GA-970A-UD3P Manual - Page 53
C-1. UEFI RAID Configuration, BIOS Features, OS Type, Windows 8, CSM Support, Never
 |
View all Gigabyte GA-970A-UD3P manuals
Add to My Manuals
Save this manual to your list of manuals |
Page 53 highlights
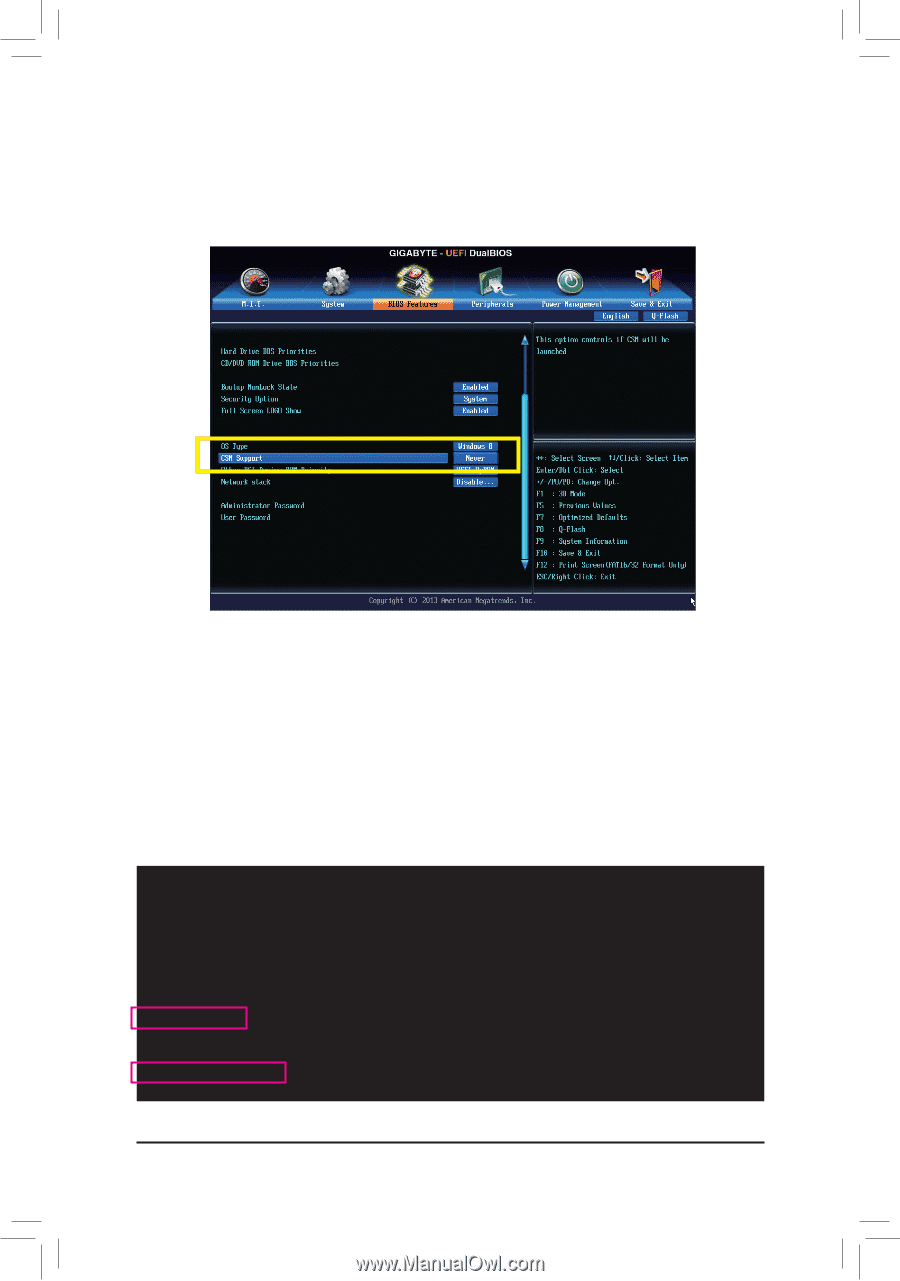
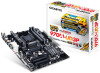
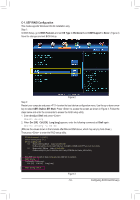
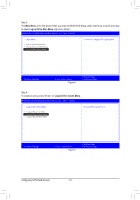
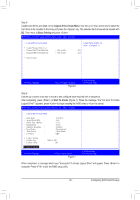
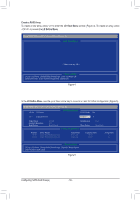
C-1. UEFI RAID Configuration This mode supports Windows 8 64-bit installation only. Step 1: In BIOS Setup, go to BIOS Features and set OS Type to Windows 8 and CSM Support to Never. (Figure 2) Save the changes and exit BIOS Setup. Figure 2 Step 2: Restart your computer and press to enter the boot device configuration menu. Use the up or down arrow key to select UEFI: Built-in EFI Shell. Press to access the screen as shown in Figure 3. Follow the steps below and enter the commands to access the RAID setup utility. 1. Enter drvcfg at Shell and press : Shell> drvcfg 2. When Drv [XX] Ctrl [XX] Lang [eng] appears, enter the following commands at Shell again: Shell> drvcfg -s XX XX (XXs are the values shown in the brackets after Drv and Ctrl above, which may vary by hard drives.) Then press to enter the RAID setup utility. EFI Shell version 2.31 [4.653] Current running mode 1.1.2 Device mapping table fs0 : Removable HardDisk Alias hd12d0b blk0 PciRoot (0x0)/Pci (0x10, 0x0)/USB (0x3, 0x0)/HD (1.MBR,0x016777a6, 0x3f, 0x1e1fc0) fs1 : Removable CDRom Alias cd14c0b blk1 PciRoot (0x0)/Pci (0x11, 0x0)/Scsi (0x2, 0x0)/CDROM (0x1,0x6e, 0X1A0263) ...... Press ESC in 1 seconds to skip startup.nsh, any other key to continue. Shell> drvcfg Configurable Components Drv [59] Ctrl [CF] Lang [eng] Shell> drvcfg -s 59 cf Figure 3 - 53 - Configuring SATA Hard Drive(s)
-
 1
1 -
2
-
3
-
4
-
5
-
6
-
7
-
8
-
9
-
10
-
11
-
12
-
13
-
14
-
15
-
16
-
17
-
18
-
19
-
20
-
21
-
22
-
23
-
24
-
25
-
26
-
27
-
28
-
29
-
30
-
31
-
32
-
33
-
34
-
35
-
36
-
37
-
38
-
39
-
40
-
41
-
42
-
43
-
44
-
45
-
46
-
47
-
 48
48 -
 49
49 -
 50
50 -
 51
51 -
 52
52 -
 53
53 -
 54
54 -
 55
55 -
 56
56 -
 57
57 -
 58
58 -
59
-
60
-
61
-
62
-
63
-
64
-
65
-
66
-
67
-
68
-
69
-
70
-
71
-
72
-
73
-
74
-
75
-
76
-
77
-
78
-
79
-
80
-
81
-
82
-
83
-
84
-
85
-
86
-
87
-
88
 |
 |