Gigabyte GA-970A-UD3P Manual - Page 55
Logical Drive Create Menu, Basic Setting, Start To Create - rev 2 x
 |
View all Gigabyte GA-970A-UD3P manuals
Add to My Manuals
Save this manual to your list of manuals |
Page 55 highlights
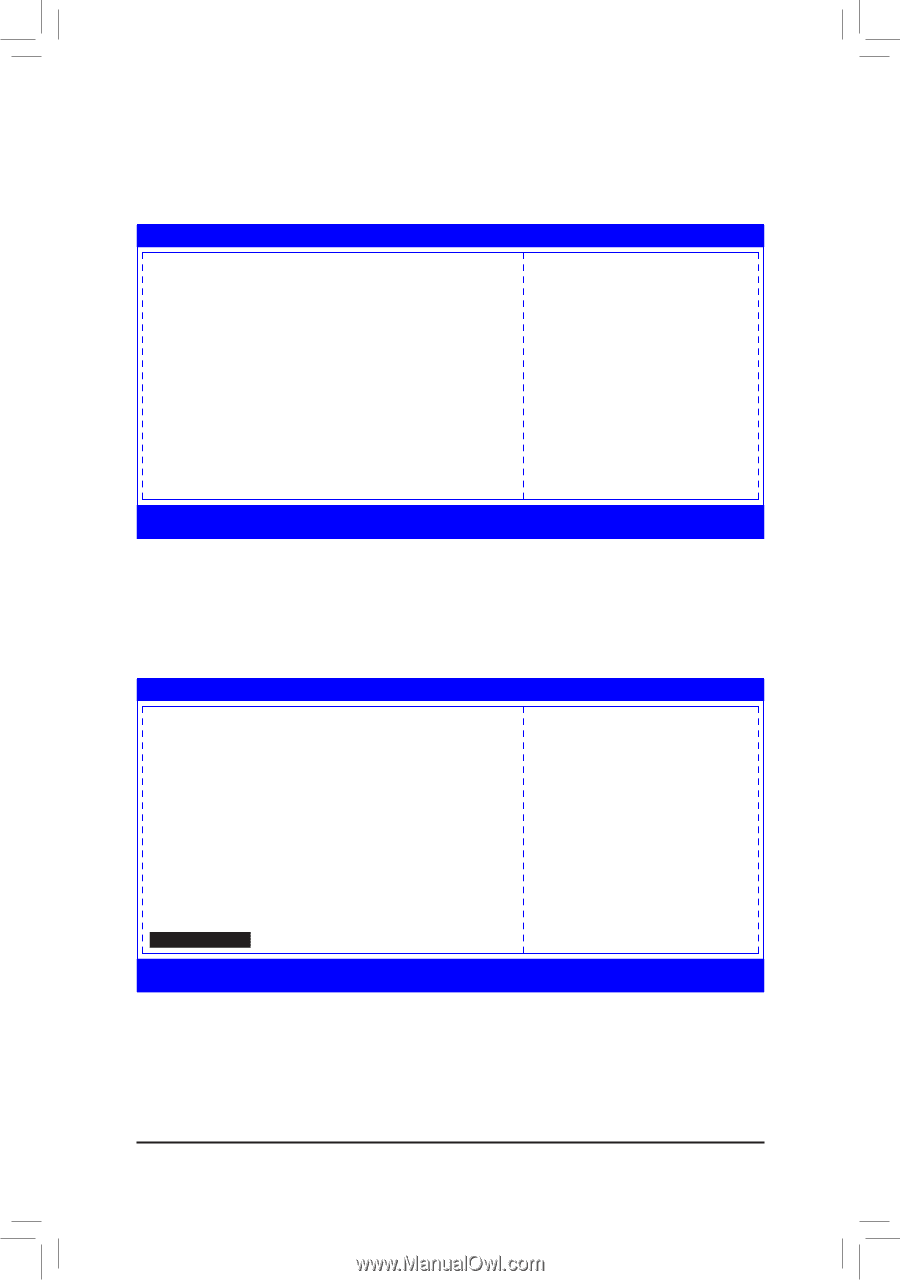
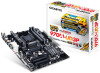
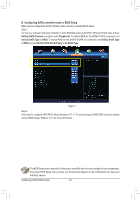
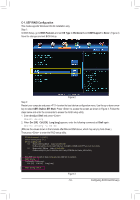
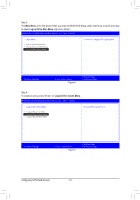
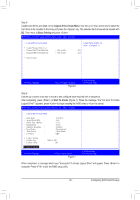
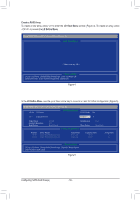
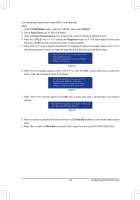
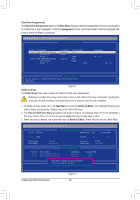
Step 5: Usable hard drives are listed on the Logical Drive Create Menu. Use the up or down arrow key to select the hard drive to be included in the array and press the key. The selected hard drives will be marked with [X]. Then move to Basic Setting and press . RAID Utility (C) 2012 Advanced Micro Devices, Inc. [Rev. 1.0.0.45] + Logical Drive Create Menu + Usable Physical Drive List - Hitachi HDT721032SLA360 - Hitachi HDT721032SLA360 + Basic Setting | 500.10 GB | 500.10 GB Usable Physical Disk On (Port : 4, TargetId : 1) [X] [X] hi=Move Highlight =Toggle Checkbox Figure 6 F10=Exit Utility Esc=Previous Page Step 6: Use the up or down arrow key to move to and configure each required item in sequence. After completing, press on Start To Create (Figure 7). When the message "Are You Sure To Create Logical Drive?" appears, press to begin creating the RAID array or to cancel. RAID Utility (C) 2012 Advanced Micro Devices, Inc. [Rev. 1.0.0.45] + Logical Drive Create Menu - Raid Mode : - Stripe Block (KB) : - Setcor Size (Bytes) : - Initialization : - Gigabyte Boundary : - Read Policy : - Write Policy : - Ld Name : GBT + Ld Size Setting - Ld Max Size - Ld Size (GB) : 1000.21 GB : [0] + Start To Create hi=Move Highlight =Select Option Figure 7 F10=Exit Utility Esc=Previous Page When completed, a message which says "Successful To Create Logical Drive" will appear. Press to complete. Press to exit the RAID setup utility. - 55 - Configuring SATA Hard Drive(s)
-
 1
1 -
2
-
3
-
4
-
5
-
6
-
7
-
8
-
9
-
10
-
11
-
12
-
13
-
14
-
15
-
16
-
17
-
18
-
19
-
20
-
21
-
22
-
23
-
24
-
25
-
26
-
27
-
28
-
29
-
30
-
31
-
32
-
33
-
34
-
35
-
36
-
37
-
38
-
39
-
40
-
41
-
42
-
43
-
44
-
45
-
46
-
47
-
48
-
49
-
 50
50 -
 51
51 -
 52
52 -
 53
53 -
 54
54 -
 55
55 -
 56
56 -
 57
57 -
 58
58 -
 59
59 -
 60
60 -
61
-
62
-
63
-
64
-
65
-
66
-
67
-
68
-
69
-
70
-
71
-
72
-
73
-
74
-
75
-
76
-
77
-
78
-
79
-
80
-
81
-
82
-
83
-
84
-
85
-
86
-
87
-
88
 |
 |