HTC Advantage User Manual - Page 87
Calendar, Create appointments - after 6 months
 |
View all HTC Advantage manuals
Add to My Manuals
Save this manual to your list of manuals |
Page 87 highlights
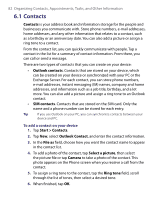
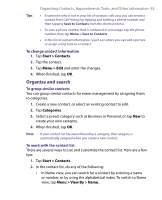
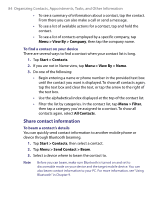
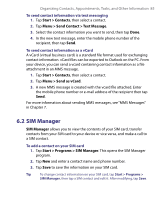
Organizing Contacts, Appointments, Tasks, and Other Information 87 4. After modifying, tap OK. 5. Tap Menu > Contacts to SIM. 6. Select the check boxes of the contact's phone numbers that you want to copy to your SIM card, then tap Save. To store the SIM card's phone number If you have saved contacts on your SIM card, you can copy them into Contacts on your device. 1. On the SIM Manager screen, tap Menu > Tools > List of Own Numbers. 2. Tap Voice Line 1. 3. Change the name, if desired, then enter your mobile phone number. 4. Tap Save. When your phone number is stored on the SIM card, it will show on the SIM Manager screen. 6.3 Calendar Use Calendar to schedule appointments, including meetings and other events. Your appointments for the day can be displayed on the Today screen. If you use Outlook on your PC, you can synchronize appointments between your device and PC. You can also set Calendar to remind you of appointments with a sound or flashing light, for example. You can look at your appointments in several different views (Day, Week, Month, Year, and Agenda). To see detailed appointment information in any view, tap the appointment. Create appointments To schedule an appointment 1. Tap Start > Calendar. 2. Tap Menu > New Appointment. 3. Enter a name for the appointment 4. Do one of the following:
-
 1
1 -
2
-
3
-
4
-
5
-
6
-
7
-
8
-
9
-
10
-
11
-
12
-
13
-
14
-
15
-
16
-
17
-
18
-
19
-
20
-
21
-
22
-
23
-
24
-
25
-
26
-
27
-
28
-
29
-
30
-
31
-
32
-
33
-
34
-
35
-
36
-
37
-
38
-
39
-
40
-
41
-
42
-
43
-
44
-
45
-
46
-
47
-
48
-
49
-
50
-
51
-
52
-
53
-
54
-
55
-
56
-
57
-
58
-
59
-
60
-
61
-
62
-
63
-
64
-
65
-
66
-
67
-
68
-
69
-
70
-
71
-
72
-
73
-
74
-
75
-
76
-
77
-
78
-
79
-
80
-
81
-
 82
82 -
 83
83 -
 84
84 -
 85
85 -
 86
86 -
 87
87 -
 88
88 -
 89
89 -
 90
90 -
 91
91 -
 92
92 -
93
-
94
-
95
-
96
-
97
-
98
-
99
-
100
-
101
-
102
-
103
-
104
-
105
-
106
-
107
-
108
-
109
-
110
-
111
-
112
-
113
-
114
-
115
-
116
-
117
-
118
-
119
-
120
-
121
-
122
-
123
-
124
-
125
-
126
-
127
-
128
-
129
-
130
-
131
-
132
-
133
-
134
-
135
-
136
-
137
-
138
-
139
-
140
-
141
-
142
-
143
-
144
-
145
-
146
-
147
-
148
-
149
-
150
-
151
-
152
-
153
-
154
-
155
-
156
-
157
-
158
-
159
-
160
-
161
-
162
-
163
-
164
-
165
-
166
-
167
-
168
-
169
-
170
-
171
-
172
-
173
-
174
-
175
-
176
-
177
-
178
-
179
-
180
-
181
-
182
-
183
-
184
-
185
-
186
-
187
-
188
-
189
-
190
-
191
-
192
-
193
-
194
-
195
-
196
-
197
-
198
-
199
-
200
-
201
-
202
-
203
-
204
-
205
-
206
-
207
-
208
-
209
-
210
-
211
-
212
-
213
-
214
-
215
-
216
-
217
-
218
-
219
-
220
-
221
-
222
-
223
-
224
-
225
-
226
-
227
-
228
-
229
-
230
-
231
-
232
-
233
-
234
-
235
-
236
-
237
-
238
-
239
-
240
-
241
-
242
-
243
-
244
-
245
-
246
-
247
-
248
-
249
-
250
 |
 |