HTC Advantage User Manual - Page 94
Voice Recorder, Start > Settings >, Personal, > Input, Options, Voice recording format
 |
View all HTC Advantage manuals
Add to My Manuals
Save this manual to your list of manuals |
Page 94 highlights
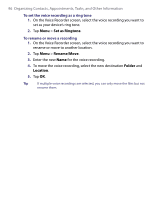
94 Organizing Contacts, Appointments, Tasks, and Other Information 6. Tap the Stop icon ( ) when finished recording. 7. If you are adding a recording to a note, tap OK to return to the note list when finished. 8. If you are recording in an open note, an icon will appear in the note. 9. If you are creating a stand-alone recording, the recording will appear in the note list. Tip To quickly create a recording, press and hold the VOICE COMMAND button, then you can begin to record after a beep sound. Release the button when you are finished. To change recording formats 1. Tap Start > Settings > Personal tab > Input. 2. Tap the Options tab, and select the desired format you want in the Voice recording format list. 3. Tap OK. Note You can also change recording formats from within Notes. In the note list, tap Menu > Options > Global Input Options link (at the bottom of the page), then tap the Options tab. 6.6 Voice Recorder Voice Recorder lets you record your voice and then quickly send it via MMS or e-mail, beam it or set the recorded voice as your ringtone. Voice Recorder saves the audio file in the AMR-NB format. To record your voice 1. On the Today screen, tap Start > Programs > Voice Recorder. 2. Hold the device's microphone near your mouth. 3. Tap Record or to start recording a voice clip. You can tap Pause to temporarily stop recording. When you want to continue recording, tap Resume. 4. Tap Stop to stop recording.
-
 1
1 -
2
-
3
-
4
-
5
-
6
-
7
-
8
-
9
-
10
-
11
-
12
-
13
-
14
-
15
-
16
-
17
-
18
-
19
-
20
-
21
-
22
-
23
-
24
-
25
-
26
-
27
-
28
-
29
-
30
-
31
-
32
-
33
-
34
-
35
-
36
-
37
-
38
-
39
-
40
-
41
-
42
-
43
-
44
-
45
-
46
-
47
-
48
-
49
-
50
-
51
-
52
-
53
-
54
-
55
-
56
-
57
-
58
-
59
-
60
-
61
-
62
-
63
-
64
-
65
-
66
-
67
-
68
-
69
-
70
-
71
-
72
-
73
-
74
-
75
-
76
-
77
-
78
-
79
-
80
-
81
-
82
-
83
-
84
-
85
-
86
-
87
-
88
-
 89
89 -
 90
90 -
 91
91 -
 92
92 -
 93
93 -
 94
94 -
 95
95 -
 96
96 -
 97
97 -
 98
98 -
 99
99 -
100
-
101
-
102
-
103
-
104
-
105
-
106
-
107
-
108
-
109
-
110
-
111
-
112
-
113
-
114
-
115
-
116
-
117
-
118
-
119
-
120
-
121
-
122
-
123
-
124
-
125
-
126
-
127
-
128
-
129
-
130
-
131
-
132
-
133
-
134
-
135
-
136
-
137
-
138
-
139
-
140
-
141
-
142
-
143
-
144
-
145
-
146
-
147
-
148
-
149
-
150
-
151
-
152
-
153
-
154
-
155
-
156
-
157
-
158
-
159
-
160
-
161
-
162
-
163
-
164
-
165
-
166
-
167
-
168
-
169
-
170
-
171
-
172
-
173
-
174
-
175
-
176
-
177
-
178
-
179
-
180
-
181
-
182
-
183
-
184
-
185
-
186
-
187
-
188
-
189
-
190
-
191
-
192
-
193
-
194
-
195
-
196
-
197
-
198
-
199
-
200
-
201
-
202
-
203
-
204
-
205
-
206
-
207
-
208
-
209
-
210
-
211
-
212
-
213
-
214
-
215
-
216
-
217
-
218
-
219
-
220
-
221
-
222
-
223
-
224
-
225
-
226
-
227
-
228
-
229
-
230
-
231
-
232
-
233
-
234
-
235
-
236
-
237
-
238
-
239
-
240
-
241
-
242
-
243
-
244
-
245
-
246
-
247
-
248
-
249
-
250
 |
 |
