Haier HMV1630DBWW HMV1630 Installation Guide - Page 25
C5. Installing Or Change The Charcoal Filter - microwave model
 |
View all Haier HMV1630DBWW manuals
Add to My Manuals
Save this manual to your list of manuals |
Page 25 highlights
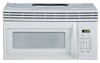
3. Insert a self-aligning screw through top center cabinet hole. Temporarily secure the oven by turning the screw at least two full turns after the threads have engaged. (It will be completely tightened later.) Be sure to keep power cord tight. Be careful not to pinch the cord, especially when mounting flush to bottom of cabinet. 4. Attach the microwave oven to the top cabinet. 5. Insert 2 self-aligning screws through outer top cabinet holes. Turn two full turns on each screw. 6. Tighten center screw completely. 7. Tighten the outer two screws to the top of the microwave oven. (While tightening screws, hold the microwave oven in place against the wall and the top cabinet.) 8. Install grease filters. See the Owner's Manual packed with the microwave. English Cabinet Front Cabinet Bottom Shelf Filler Block Equivalent to Depth of Cabinet Recess Self-Aligning Screw Microwave Oven Top 5 6 C5. INSTALLING OR CHANGE THE CHARCOAL FILTER NOTE: The charcoal filter is factory installed. Follow these steps to replace a filter or to install a filter after converting a vented model to recirculating operation. 1. Remove screws on top of grille using a #1 Phillips screwdriver. 2. Open the door. 3. Remove the grille. Pull the grille straight off. 4. Install the charcoal filter. When properly installed, the wire mesh of the filter should be visible from the front. 5. Replace the grille and the screws. 6. Close the door. Charcoal Filter Insert mesh-side up 24
-
 1
1 -
2
-
3
-
4
-
5
-
6
-
7
-
8
-
9
-
10
-
11
-
12
-
13
-
14
-
15
-
16
-
17
-
18
-
19
-
 20
20 -
 21
21 -
 22
22 -
 23
23 -
 24
24 -
 25
25 -
 26
26 -
 27
27 -
 28
28 -
 29
29 -
 30
30 -
31
-
32
-
33
-
34
-
35
-
36
-
37
-
38
-
39
-
40
-
41
-
42
-
43
-
44
-
45
-
46
-
47
-
48
-
49
-
50
-
51
-
52
-
53
-
54
-
55
-
56
-
57
-
58
-
59
-
60
-
61
-
62
-
63
-
64
-
65
-
66
-
67
-
68
-
69
-
70
-
71
-
72
-
73
-
74
-
75
-
76
 |
 |
