Haier HMV1630DBWW HMV1630 Installation Guide - Page 70
B6. Montaje Del Horno Microondas - parts
 |
View all Haier HMV1630DBWW manuals
Add to My Manuals
Save this manual to your list of manuals |
Page 70 highlights
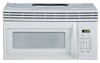
Español 8. Asegure la unidad del ventilador al microondas con el tornillo original. 9. Vuelva a colocar la placa del ventilador en la misma posición que antes con el tornillo. Asegúrese de que el tornillo esté ajustado. 10. Attach the exhaust adaptor to the rear of the oven by sliding it into the guides at the top center of the back of the oven. Push in securely until it is in the lower locking tabs. Take care to assure that the damper hinge is installed so that it is at the top and that the damper swings freely. Placa del ventilador Parte trasera del Microondas Tornillo del motor del ventilador Adaptador Parte trasera del microondas Guía Guía Lengüetas de cierre B6. MONTAJE DEL HORNO MICROONDAS PARA QUE LA INSTALACIÓN SEA MÁS FÁCIL Y POR MOTIVOS DE SEGURIDAD PERSONAL, RECOMENDAMOS QUE DOS PERSONAS INSTALEN EL HORNO MICROONDAS IMPORTANTE: No agarre ni utilice la manija durante la instalación. NOTA: Recomendamos el uso de bloques de relleno si el frente del gabinete cuelga por debajo del estante inferior del gabinete NOTA: Si su gabinete es de metal, utilice la arandela aislante de nylon para rodear el agujero para el cable de IMPORTANTE: Si no se utilizan bloques de relleno, pueden producirse daños por ajustar los tornillos en demasía. energía para evitar que se corte el cable. 1. Lift microwave, tilt it forward, and hook slots at back bottom edge onto four lower tabs of mounting plate. NOTE: When mounting the microwave oven, thread power cord through hole in bottom of top cabinet. Keep it tight throughout Steps 1-3. Do not pinch cord or lift oven by pulling cord. 2. Rotate front of oven up against cabinet bottom. 1 3. Insert a self-aligning screw through top center cabinet hole. Temporarily secure the oven by turning the screw at least two full turns after the threads have engaged. (It will be completely tightened later.) Be sure to keep power cord tight. Be careful 2 not to pinch the cord, especially when mounting flush to bottom of cabinet. 20
-
 1
1 -
2
-
3
-
4
-
5
-
6
-
7
-
8
-
9
-
10
-
11
-
12
-
13
-
14
-
15
-
16
-
17
-
18
-
19
-
20
-
21
-
22
-
23
-
24
-
25
-
26
-
27
-
28
-
29
-
30
-
31
-
32
-
33
-
34
-
35
-
36
-
37
-
38
-
39
-
40
-
41
-
42
-
43
-
44
-
45
-
46
-
47
-
48
-
49
-
50
-
51
-
52
-
53
-
54
-
55
-
56
-
57
-
58
-
59
-
60
-
61
-
62
-
63
-
64
-
 65
65 -
 66
66 -
 67
67 -
 68
68 -
 69
69 -
 70
70 -
 71
71 -
 72
72 -
 73
73 -
 74
74 -
 75
75 -
76
 |
 |
