Hayward Aqua Connect Aqua Connect Operations Manual - Page 14
Using the Accounts Settings - support
 |
View all Hayward Aqua Connect manuals
Add to My Manuals
Save this manual to your list of manuals |
Page 14 highlights
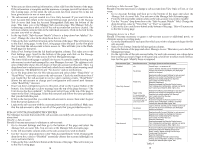
There are several differences between a physical remote control unit and the Remote Control page that need to be noted. First, the physical remote controls have small round pool control buttons with one or more LEDs next to each button. The Remote Control page has large rectangular buttons with the LED function built into the button itself. LED functionality is explained in Table 3 below. Button Color Meaning Gray Button Light Green Button Corresponds to LED OFF, but is also the color used when no LED is associated with a button. Corresponds to LED ON. Light Blue Button Corresponds to LED blinking Black "SENT" Button A temporary state showing that a key press has been accepted. Table 3 When you push a button on the Remote Control page the button will momentarily turn black and the word "SENT" will be displayed on the button. This is to give you positive feedback that your button push was forwarded to the pool controller. This immediate feedback is given because it may take several seconds to receive actual feedback (an LED state change or a two line text display update). The Pro Logic series of pool controllers includes support for button naming. For example, if the Aux 6 button is used to turn on the waterfall, the button can be renamed "Waterfall". When buttons are renamed at the pool controller, the names will appear on the Remote Control page. Figure 2 shows many renamed buttons. Note that on actual remote control terminals there are three LEDs (Pool/Spa/Spillover) associated with one button. On the Remote Control page there are three separate buttons that are displayed, to implement the three LEDs. Be aware that this is really ONLY ONE BUTTON. Pushing ANY of these buttons (Pool, Spa, Spillover) will advance the Pool/Spa/Spillover state TO THE NEXT AVAILABLE STATE. Pushing the Spa button will NOT always put the controller into Spa state. On actual remote controls there is a Check System LED to the right of the LCD display. On the Remote Control page the words "Check System!" appear in yellow text below the two line text display when a check system error is active. There is an inactivity timeout on the Remote Control page. After 5 minutes of inactivity (no button presses) you will be taken to the Dashboard page for that pool. Using the Accounts Settings page CREATING AND MANAGING SUB-ACCOUNTS If you have a Manager Account (if you've created the account yourself and then registered one or more ACHN devices to the account), then you are capable of creating subaccounts beneath your Manager Account. These sub-accounts are separate login accounts with their own username and password that you can provide to other people (your customer/your neighbor/your relative/your spouse/your child). The sub-account can be given access to one or all of the pools that are registered to your account, at your discretion. The type and level of access to each pool that a sub-account has is also at your discretion (on a pool by pool basis). 12 it sit for 5 - 10 minutes sending telemetry to the web site. The ACHN must register itself with the web site before you can register it to an account. • Log into your account. If you already have multiple ACHN units registered you will go to the Site Listing page and you can select Add a Pool from the bottom of the page. If you only have one ACHN unit registered you will go to the Dashboard page for that the ACHN and you can select Add a Pool from the left navigation column buttons. • This will take you to the Add a Pool page. If the new ACHN is eligible for a free trial an option will be shown. If not, you will only have paid subscription options. • Now select Add a Pool at the bottom of the page. • At the end of the free trial (if applicable), you will have to call Hayward Tech Support and provide your credit card information over the phone. Setting up/Managing Emailed Alarm Messages An alarm is a situation that requires your attention. Most alarms are generated by the pool controller and indicate an issue with either the pool water or the pool equipment. Some alarms are generated directly by the Aqua Connect web site (relating to pool survey data and water balance). All alarms relate to a specific pool. The Aqua Connect web site can be configured to send emails notifying and reminding you of an alarm. These emails are configured on a pool by pool basis and can be sent to a single email address or a list of email addresses. Each pool has an Alarm Notifications email list. Alarm notifications can only be controlled by the login account to which the pool (ACHN) is registered. A sub-account that is allowed to access a pool has no control over alarm notifications. Setting up the Alarm Notifications list is a two step process (for the pool manager): • Select Account Settings from the left hand column of buttons on the Dashboard or the bottom of the Site Listing. This will take you to the Account Settings page. • The third field on the Account Settings page is the Alarm Notifications list. You are allowed to add or delete email addresses from this list. This is a global list - it applies to ALL of the pools registered to this account. We will deal with specific pools in the next step. • Then go to the Pool Settings page for each pool and select Manage Access. This will take you to the Pool Management page. • The Pool Management page contains a table containing every sub-account created by this Manager Account. The rightmost column of this table are checkboxes that enable "notifications" (alarm warning emails) when checked. This second step must be done on a pool by pool basis. Silencing Alarm Warning Emails All alarms appear at the bottom of the Dashboard page for the pool that they relate to. This is a static display, until the condition causing the alarm is removed. Pool controller generated alarms will also appear on the display on the Remote Control page. 17
-
 1
1 -
2
-
3
-
4
-
5
-
6
-
7
-
8
-
 9
9 -
 10
10 -
 11
11 -
 12
12 -
 13
13 -
 14
14 -
 15
15 -
 16
16
 |
 |
