HP 2200 HP LaserJet 2200 series printer - Getting Started Guide - Page 11
Step 4: Load Media into the Trays, Tray 2 or Optional 250-Sheet Tray 3, Tray 2 or Optional - laserjet not pulling paper from tray
 |
View all HP 2200 manuals
Add to My Manuals
Save this manual to your list of manuals |
Page 11 highlights
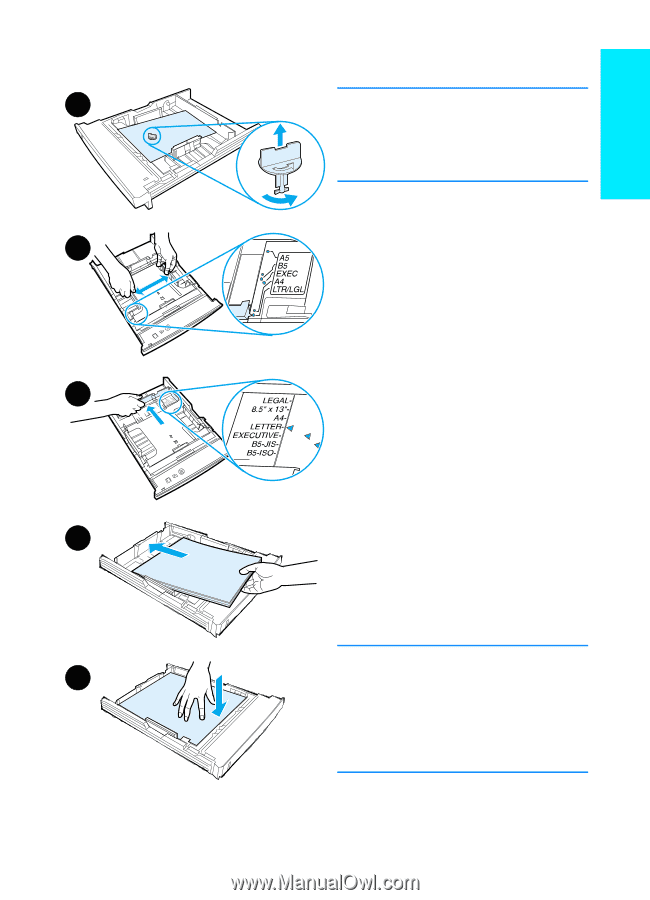
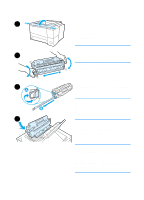
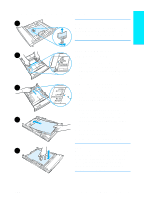
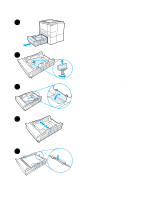
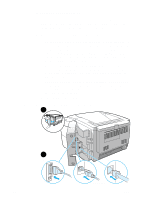
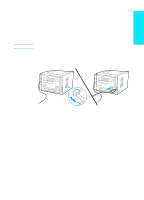
English Step 4: Load Media into the Trays 1 Note To learn how to print envelopes or other special media from Tray 1, see your electronic user guide, located on the HP LaserJet 2200 CD. Tray 2 or Optional 2 250-Sheet Tray 3 1 Pull the desired tray out of the printer and locate the orange plastic packaging piece that is holding down the tray. Turn it counter-clockwise and lift up to remove. 2 Move the side width guides outward 3 to match the desired paper size. 3 On the rear paper length guide, press on the blue tab and adjust it so the pointer matches the desired paper size. 4 Add the media and make sure it is flat in the tray at all four corners. Keep the media below the height tabs on 4 the paper length guide in the rear of the tray. 5 Push down on the metal paper lift plate to lock it in place. 6 Slide the tray back into the printer. Note 5 Whenever you remove a 250-sheet tray from the printer, always push down the metal paper lift plate before you put it back. The metal paper lift plate will release and lift the paper up when you push the tray into the printer. ENWW Step 4: Load Media into the Trays 7
-
 1
1 -
2
-
3
-
4
-
5
-
 6
6 -
 7
7 -
 8
8 -
 9
9 -
 10
10 -
 11
11 -
 12
12 -
 13
13 -
 14
14 -
 15
15 -
 16
16 -
17
-
18
-
19
-
20
-
21
-
22
-
23
-
24
-
25
-
26
-
27
-
28
-
29
-
30
-
31
-
32
-
33
-
34
-
35
-
36
-
37
-
38
-
39
-
40
-
41
-
42
-
43
-
44
-
45
-
46
-
47
-
48
-
49
-
50
-
51
-
52
-
53
-
54
-
55
-
56
-
57
-
58
-
59
-
60
-
61
-
62
-
63
-
64
-
65
-
66
-
67
-
68
-
69
-
70
-
71
-
72
-
73
-
74
-
75
-
76
-
77
-
78
-
79
-
80
-
81
-
82
-
83
-
84
-
85
-
86
-
87
-
88
 |
 |