HP 2200 HP LaserJet 2200 series printer - Getting Started Guide - Page 20
Windows, Millennium, In Windows 2000, if the Found New Hardware Wizard window reappears before
 |
View all HP 2200 manuals
Add to My Manuals
Save this manual to your list of manuals |
Page 20 highlights
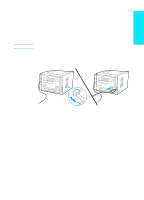
Windows 2000 and Windows XP Windows Millennium a The "Found New Hardware Wizard" window should appear on the computer display. Click Next>. b Select "Search for a suitable driver for my device (recommended)" and then click Next>. c Under "Optional search locations:", click the locations as needed so that there is a check mark next to "Specify a location:" (and NO check marks next to "Floppy disk drives" and "CD-ROM drives"). Click Next>. d Place the HP LaserJet 2200 CD in the CD-ROM drive. e Under "Copy manufacturer's files from:", type D:\2000_XP (where D is the letter of your CD-ROM drive) and then click OK. f The Wizard should display a window indicating that it has found the driver; click Next>. a The "Add New Hardware Wizard" window should appear on the computer display. b Select "Specify the location of the driver (Advanced)" and then click Next>. c Select "Search for the best driver for your device. (Recommended)" and then click the boxes as needed so that there is a check mark next to "Specify a location:" (and NO check mark next to "Removable Media"). d Place the HP LaserJet 2200 CD in the CD-ROM drive. e Under "Specify a location:", type D:\98ME_USB (where D is the letter of your CD-ROM drive). Click Next>. Note 3 Follow the instructions on the screen to install the software. Before installation is complete, make sure that there is a check mark next to "Print a test page" (when the prompt appears). In Windows 2000, if the "Found New Hardware Wizard" window reappears before installation is complete, click Cancel. 4 Click Finish. 5 If you are prompted to restart your computer, click Yes. The test page should print after your computer restarts. If you are not prompted to restart your computer, a test page should print immediately. 6 If the test page printed correctly, installation is complete. Continue to "Step 8: Record and Store Important Information" on page 20. (If nothing prints or if the test page does not print correctly, see "If You Have Problems" on page 21.) 16 ENWW
-
 1
1 -
2
-
3
-
4
-
5
-
6
-
7
-
8
-
9
-
10
-
11
-
12
-
13
-
14
-
 15
15 -
 16
16 -
 17
17 -
 18
18 -
 19
19 -
 20
20 -
 21
21 -
 22
22 -
 23
23 -
 24
24 -
 25
25 -
26
-
27
-
28
-
29
-
30
-
31
-
32
-
33
-
34
-
35
-
36
-
37
-
38
-
39
-
40
-
41
-
42
-
43
-
44
-
45
-
46
-
47
-
48
-
49
-
50
-
51
-
52
-
53
-
54
-
55
-
56
-
57
-
58
-
59
-
60
-
61
-
62
-
63
-
64
-
65
-
66
-
67
-
68
-
69
-
70
-
71
-
72
-
73
-
74
-
75
-
76
-
77
-
78
-
79
-
80
-
81
-
82
-
83
-
84
-
85
-
86
-
87
-
88
 |
 |