HP 2500c HP 2500C/C+/CM Professional Series Color Printer - (English) Network - Page 13
Option 2 - Using the HP 2500C Printer Software, Step 1 - Install HP 2500C Series Printer Software - postscript driver
 |
View all HP 2500c manuals
Add to My Manuals
Save this manual to your list of manuals |
Page 13 highlights
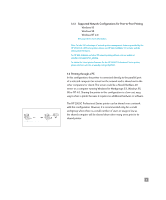
2. Click the right mouse button and select Properties. 3. Select the Details tab, click Add Port, and click OK. 4. Select a new port to assign it to the JetDirect printer and click OK. Ensure that the printer has been set up as shared. Please refer to section 6.6.1, Step 2 - Share the Printer on the Network, for the procedure, if the printer is not set up as shared. The Installation Option screen appears for you to select the print features. 6.1.2 Option 2 - Using the HP 2500C Printer Software Step 1 - Install HP 2500C Series Printer Software 1. If you are running Windows NT 4.0, log on to the computer as the system administrator. 2. Insert the Starter CD into the CD-ROM drive to install the PCL 3 printer software. If the installation program does not run automatically, access the File Manager or Explorer and run INSTALL.EXE from the CD-ROM. The Starter CD allows you to either install or download the printer driver onto the network drive. Choose Download if you wish to customize your printer software for future quick installation. The next screen appears to prompt you to select the port. 3. Windows 95/98/NT 4.0: Select Local/Existing (this selection assumes that the port is a local (LPT) or defined print server port). Note: The other two port options that are available for selection are: Network (Client):If you wish to connect a PC (client) to the shared or server PC in the network. Network (Server/Peer-to-Peer): If you wish to connect a PC to print directly to the printer server port without sharing through a server PC. Windows for Workgroups 3.11: 3a. Click Connect when prompted to select a printer port. 3b. Type in the path that the printer has been mapped to and select the shared printer. 3c. Select the LPT port that you have just mapped and click OK. If you wish to install the PostScript printer software, refer to the section on Installing PostScript Driver for the procedure. If you wish to install the PCL 5 printer software, refer to the PCL 5 Supplementary Network Guide. 10
-
 1
1 -
2
-
3
-
4
-
5
-
6
-
7
-
 8
8 -
 9
9 -
 10
10 -
 11
11 -
 12
12 -
 13
13 -
 14
14 -
 15
15 -
 16
16 -
 17
17 -
 18
18 -
19
-
20
-
21
-
22
-
23
-
24
 |
 |