HP 2500c HP 2500C/C+/CM Professional Series Color Printer - (English) Network - Page 14
Option 2 - Using the Add Printer Wizard for PCL 3 drivers only - windows 7 driver
 |
View all HP 2500c manuals
Add to My Manuals
Save this manual to your list of manuals |
Page 14 highlights
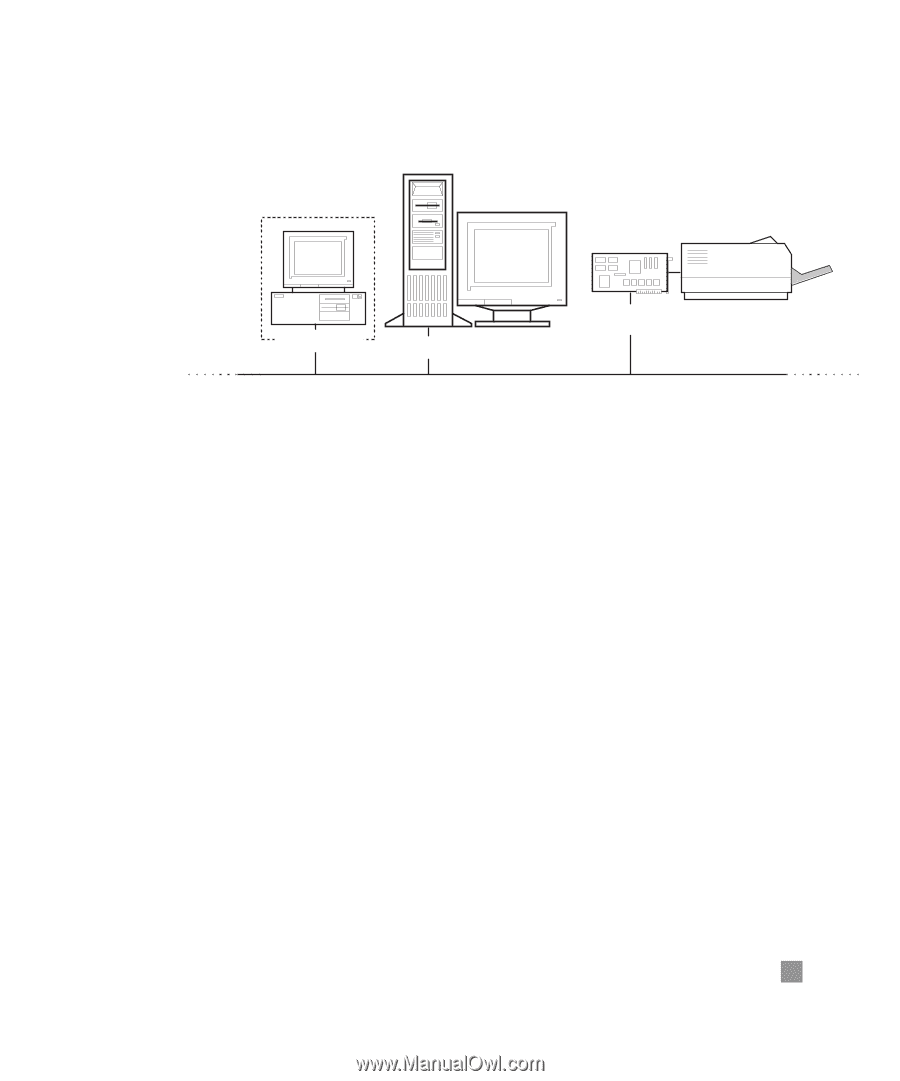
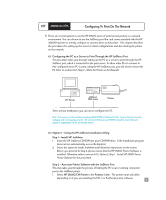
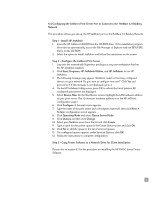
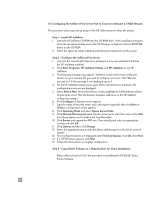
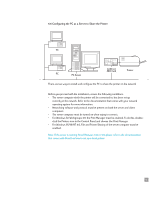
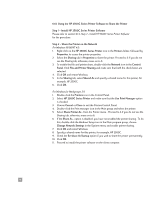
6.2 Configuring the PC (Client) to Connect to the Print Server via a Server PC (Client) PC Server JetDirect MIO Card Printer There are three methods to set up the PC as a client to a configured print server on the network. 6.2.1 Option 1 - Using the HP 2500C Series Printer Software 1. Refer to the section 6.1.2, Step 1 - Install HP 2500C Series Printer Software, for the procedure on installing the printer software. Instead of selecting Local/Existing, select Network (Client). 2. Type in the name of the shared printer, like, \\Computer\Name\PrinterName, in the Select Network Port field. If you do not know the computer name or printer name, browse the network to help you find the printer. The Installation Option screen appears. 6.2.2 Option 2 - Using the Add Printer Wizard (for PCL 3 drivers only) You may use the Microsoft Windows Add Printer Wizard to install the printer software. 1. Click on Start and select Settings, followed by Printers. 2. Double-click Add Printer. 3. For Windows 95/98, select Network Printer. For Windows NT 4.0, select Network Printer Server, when prompted. 4. Type in the network part or queue name of the shared printer, for example, \\ComputerName\PrinterName. If you do not know the name, you can click on Have Disk..., when prompted to select printer model. 5. Click on Browse... and locate the hp2500c.inf file. This file contains the printer name for you to select. The file is located in the Starter CD or on your network server if the System Administrator had copied the files onto the server. 6. The Installation Option screen appears. Follow the instructions on the screen to complete the PC configuration process. 11
-
 1
1 -
2
-
3
-
4
-
5
-
6
-
7
-
8
-
 9
9 -
 10
10 -
 11
11 -
 12
12 -
 13
13 -
 14
14 -
 15
15 -
 16
16 -
 17
17 -
 18
18 -
 19
19 -
20
-
21
-
22
-
23
-
24
 |
 |