HP 310 HP iPAQ 300 Series Travel Companion - Product Guide - Page 65
Smart Powersave, Map settings, Alternative Road Names, Show Street Labels, 2D/3D map view
 |
UPC - 883585309559
View all HP 310 manuals
Add to My Manuals
Save this manual to your list of manuals |
Page 65 highlights
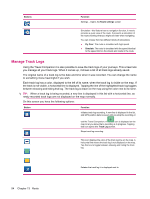
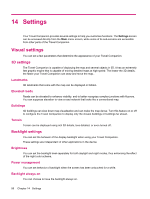
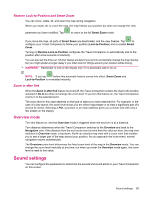
Smart Powersave When running on battery, Smart Powersave lights up the screen only when you press a button or tap the screen. After a few seconds, the light level decreases, and after another few seconds, the backlight turns off. This helps you conserve the battery and achieve a longer battery life. Map settings These settings determine how maps are displayed on the Travel Companion. Alternative Road Names Some highways have an international name or number for foreign travelers. You can decide whether to show only the local name or both. Show Street Labels You can set whether or not to see the names of the streets and the POI icons on the map while driving. Based on the current zoom and tilt levels, street names are displayed either aligned with the street or on signposts on the streets (Streets and roads). If you switch these signs on, it is easier to recognize your location on the map. If you turn them off, it is easier to see the road geometry. NOTE: You can only disable street names and POI icons if the Travel Companion follows your position. As soon as you move the map and Lock-to-Position is disabled, street names and icons become visible again. Tap to re-enable Lock-to-Position and have the labels and icons disappear again. 2D/3D map view In 2D map view mode, the map is displayed in a conventional top-down view with a fixed North-up orientation. You cannot tilt or rotate the map. The elevation of the map is displayed with colors and shading similar to a topographic map. In 3D map view mode, the map shows a perspective view. You can change the vertical angle of the view, you can rotate the map, and turn 3D map elements on or off. POI visibility The maps in the Travel Companion come with a huge number of POIs. Displaying all of them would make the screen too crowded. In order to avoid this, you can decide which POI groups to show and which ones to hide on the map, and how close you need to zoom in to start seeing a particular POI group. Your Travel Companion has a multi-level POI category system. You can set the visibility of all levels. Subgroups can inherit the visibility settings of the group, but you can also assign different settings to any subgroup. To view POIs: 1. When you tap the button, you will see the list of the top-level POI groups is displayed: 2. Tap any of the group names to see the list of its subgroups. The two screens are similar. You have the following buttons on these screens: Button Function This POI group has subgroups. Tap this, or the name of the groups to see the list of its subgroups. Visual settings 57
-
 1
1 -
2
-
3
-
4
-
5
-
6
-
7
-
8
-
9
-
10
-
11
-
12
-
13
-
14
-
15
-
16
-
17
-
18
-
19
-
20
-
21
-
22
-
23
-
24
-
25
-
26
-
27
-
28
-
29
-
30
-
31
-
32
-
33
-
34
-
35
-
36
-
37
-
38
-
39
-
40
-
41
-
42
-
43
-
44
-
45
-
46
-
47
-
48
-
49
-
50
-
51
-
52
-
53
-
54
-
55
-
56
-
57
-
58
-
59
-
 60
60 -
 61
61 -
 62
62 -
 63
63 -
 64
64 -
 65
65 -
 66
66 -
 67
67 -
 68
68 -
 69
69 -
 70
70 -
71
-
72
-
73
-
74
-
75
-
76
-
77
-
78
-
79
-
80
-
81
-
82
-
83
-
84
-
85
-
86
-
87
 |
 |
