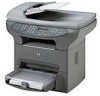
HP 3330mfp HP LaserJet 3300mfp Series - (English) Getting Started Guide - Page 24
To connect your 3320n product to a network using the HP Jetdirect 310x print server, light 1 blinks
 |
UPC - 088698451328
View all HP 3330mfp manuals
Add to My Manuals
Save this manual to your list of manuals |
Page 24 highlights
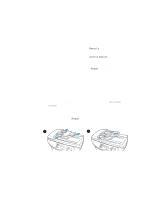
2 3 4 5 1 2 6 To connect your 3320n product to a network using the HP Jetdirect 310x print server Note If you have not connected a USB cable to the product, see "To connect a printer cable to your product" on page 12 before performing this procedure. 1 Locate the HP Jetdirect 310x print server that came with the product. 2 With the USB symbol on the cable facing up, plug the rectangular end of the USB cable (that is connected to the product) into the USB socket at the front of the print server. Make sure the plug is fully inserted. 3 Attach the print server to a 10Base-T or 100Base-Tx local network by plugging a network cable into the network port on the print server's rear panel. 4 Plug the print server power adapter into a power outlet. Plug the other end of the power adapter cable into the power socket on the rear of the print server. 5 The power/status light (1) blinks green for about 15 seconds and then turns solid green to indicate a successful power connection. The 10 or 100 LED light (2) indicates a successful network connection. 6 To print a configuration page, briefly press and release the test button on the print server's rear panel. A configuration page is printed by the HP LaserJet 3320n product. If a page does not print, see "Troubleshooting" on page 25. 20 2 Setting up your product ENWW
-
 1
1 -
2
-
3
-
4
-
5
-
6
-
7
-
8
-
9
-
10
-
11
-
12
-
13
-
14
-
15
-
16
-
17
-
18
-
 19
19 -
 20
20 -
 21
21 -
 22
22 -
 23
23 -
 24
24 -
 25
25 -
 26
26 -
 27
27 -
 28
28 -
 29
29 -
30
-
31
-
32
-
33
-
34
-
35
-
36
-
37
-
38
 |
 |
