HP 350546-B21 HP StorageWorks Ultrium Tape Drive Removable Model Getting Start - Page 17
Step 3: Set the drive’s SCSI ID
 |
UPC - 808736773836
View all HP 350546-B21 manuals
Add to My Manuals
Save this manual to your list of manuals |
Page 17 highlights
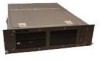
Step 3: Set the drive's SCSI ID To set the tape drive's SCSI ID you need to set the appropriate switch on the rear of the tape array. The number of address switches corresponds to the number of tape drives that can be inserted into the tape array. Each drive can be assigned any unused ID between 0 and 15. Do not use SCSI ID 7, which is reserved for the SCSI controller, or SCSI ID 0, which is typically assigned to the boot disk. 1 Decide which SCSI ID to use. For most operating systems you can run HP Library & Tape Tools from the HP StorageWorks Tape CD-ROM to check your computer's SCSI configuration. This will provide information about the SCSI bus and the SCSI IDs currently in use. To do this, select the 'troubleshoot with L&TT' option from the CD-ROM menu. (See also page 29.) 2 Set the appropriate switch. Figure 5 shows the address switch on the back panel of the HP StorageWorks Tape Array 5300. The HP StorageWorks Tape Array 5300 has four SCSI ID switches to enable the installation of up to four half-height drives. When installing two HP StorageWorks Ultrium full-height tape drives, use SCSI ID switches 1 and 2 only. 3 Make sure that a SCSI terminator is attached to the appropriate SCSI-OUT connector on the back of the tape array. Do not daisy-chain Ultrium 960 tape drives. Up to two Ultrium 460 tape drives may be daisychained, but is not recommended. If you do so, install your tape drives on an Ultra 320 SCSI bus. Similarly, up to two Ultrium 230 drives may be installed on an Ultra 160 SCSI bus. Do not mix drive families.. If you daisy-chain devices, make sure that each device on the same SCSI bus has a unique SCSI ID. Do not daisy-chain more than two devices on the same SCSI bus and make sure that the end device is terminated. 15
-
 1
1 -
2
-
3
-
4
-
5
-
6
-
7
-
8
-
9
-
10
-
11
-
 12
12 -
 13
13 -
 14
14 -
 15
15 -
 16
16 -
 17
17 -
 18
18 -
 19
19 -
 20
20 -
 21
21 -
 22
22 -
23
-
24
-
25
-
26
-
27
-
28
-
29
-
30
-
31
-
32
-
33
-
34
-
35
-
36
-
37
-
38
-
39
-
40
-
41
-
42
-
43
-
44
-
45
-
46
-
47
-
48
-
49
-
50
 |
 |
