HP 350546-B21 HP StorageWorks Ultrium Tape Drive Removable Model Getting Start - Page 27
Replacing the drive
 |
UPC - 808736773836
View all HP 350546-B21 manuals
Add to My Manuals
Save this manual to your list of manuals |
Page 27 highlights
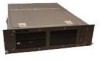
Replacing the drive HP StorageWorks Ultrium removable drives can be removed and replaced without powering down the tape array. However you should be aware of the following: • If all drives in the tape array are powered up when the system is turned on, the host will be aware of those drives. You can remove any of those drives and replace it with another drive as long as there is no activity on the bus. • Do not remove or add drives to a bus that already has drives connected and running, for example backing up or restoring data. Wait until there is no activity on the bus before removing or adding drives. • If a drive is not powered up or you place a drive in an empty slot after the system has been powered up, the system will have to be reset before the host will recognize the drive. • The SCSI IDs are controlled by the tape array, not by the drives themselves, so if you remove a drive and replace it with another the ID will not change. 1 Pull the extraction lever of the drive that you want to replace so that it is in the out position. (See Figure 9a.) 2 Using the extraction lever, pull the drive gently and firmly out of the tape array. (See Figure 9b.) 3 To insert another drive, follow the instructions in "Step 2: Install the drive" on page 13. 25
-
 1
1 -
2
-
3
-
4
-
5
-
6
-
7
-
8
-
9
-
10
-
11
-
12
-
13
-
14
-
15
-
16
-
17
-
18
-
19
-
20
-
21
-
 22
22 -
 23
23 -
 24
24 -
 25
25 -
 26
26 -
 27
27 -
 28
28 -
 29
29 -
 30
30 -
 31
31 -
 32
32 -
33
-
34
-
35
-
36
-
37
-
38
-
39
-
40
-
41
-
42
-
43
-
44
-
45
-
46
-
47
-
48
-
49
-
50
 |
 |
