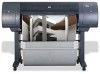
HP 4020 HP Designjet 4020 Printer series - Assembly Instructions: English - Page 2
Do Not Remove
 |
UPC - 884420909606
View all HP 4020 manuals
Add to My Manuals
Save this manual to your list of manuals |
Page 2 highlights
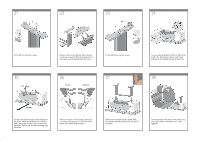
5 6 7 8 Remove the main printer box. 9 Remove the two packing pieces. 10 When you are unpacking the leg assembly, you will see that there is anti-slip material around two of the wheels on the feet. DO NOT REMOVE this material yet. Remove the first tray from the stand and bin assembly box. 11 2 holes 12 1 hole From the first tray, remove the two boxes marked with L and R. Place them on the floor as shown. Lower the cross-brace on to the L and R boxes. Right Left You now need to identify which is the left and the right side of the cross-brace. Now you will need the bag of screws and the screwdriver provided. You may notice that the screwdriver is slightly magnetic.
-
 1
1 -
 2
2 -
 3
3 -
 4
4 -
 5
5 -
 6
6 -
 7
7 -
 8
8 -
9
-
10
-
11
-
12
-
13
-
14
-
15
-
16
-
17
-
18
 |
 |

5
6
7
8
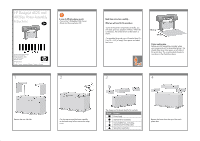
Remove the first tray from the stand and bin
assembly box.
When you are unpacking the leg assembly, you
will see that there is
anti-slip
material around
two of the wheels on the feet.
DO NOT REMOVE
this material yet.
Remove the main printer box.
Remove the two packing pieces.
9
10
11
12
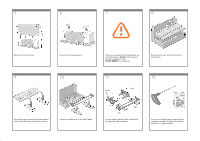
You now need to identify which is the left and
the right side of the cross-brace.
From the first tray, remove the two boxes marked
with L and R. Place them on the floor as shown.
Lower the cross-brace on to the L and R boxes.
2 holes
Left
Right
1 hole
Now you will need the bag of screws and the
screwdriver provided. You may notice that the
screwdriver is slightly magnetic.