HP 4020 HP Designjet 4020 Printer series - Assembly Instructions: English - Page 6
cleaner door. - printheads
 |
UPC - 884420909606
View all HP 4020 manuals
Add to My Manuals
Save this manual to your list of manuals |
Page 6 highlights
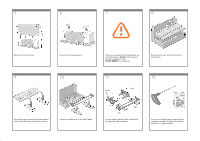
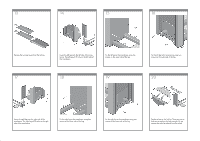
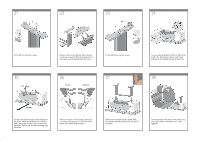
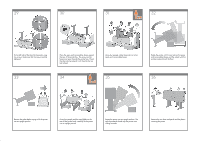
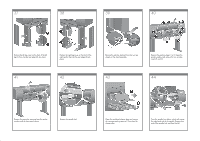
37 38 39 40 Position the left leg cover on the front of the left leg (1), then clip the rear edge (2) into place. Position the right leg cover on the front of the right leg (1), then clip the rear edge (2) into place. Remove the anti-slip material from the two rear wheels on the stand assembly. Remove the packing tapes 1 to 8. Open the printer window and remove the two window inserts 9 and 10. 41 42 43 44 Remove the protective covering from the printer window and the front panel screen. Remove the spindle lock. Open the printhead cleaner door and remove the carriage packing material. Then close the cleaner door. Press the spindle lever down, which will unseat the right-hand end of the spindle. Remove that end of the spindle first, and then the left.
-
 1
1 -
 2
2 -
 3
3 -
 4
4 -
 5
5 -
 6
6 -
 7
7 -
 8
8 -
 9
9 -
 10
10 -
 11
11 -
 12
12 -
13
-
14
-
15
-
16
-
17
-
18
 |
 |
