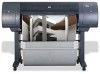
HP 4020 HP Designjet 4020 Printer series - Assembly Instructions: English - Page 5
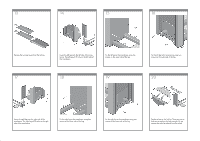
sliding forwards.
 |
UPC - 884420909606
View all HP 4020 manuals
Add to My Manuals
Save this manual to your list of manuals |
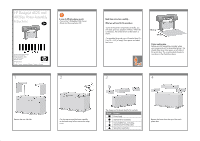
Page 5 highlights
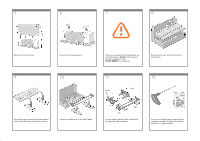
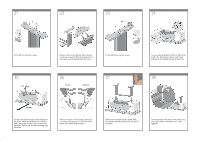
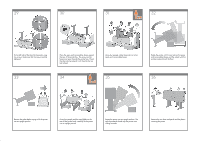
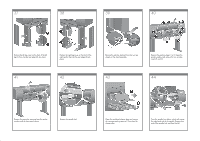
29 30 31 32 x4 Fix the left side of the stand to the printer using two screws. Make sure that the screws are fully tightened. 33 Place the spare and consumables boxes against the rear of the printer box. The arrows on the boxes must point towards the printer box. Check that the anti-slip material is still fixed to the two rear wheels. Using four people, rotate the printer on to the spare and consumables boxes. 34 35 x4 Rotate the printer until its rear rests on the spare and consumables boxes and the wheels with the anti-slip material touch the floor. 36 Remove the pallet before trying to lift the printer into an upright position. Using four people and the hand holds on the rear of the printer body, carefully lift the printer into an upright position. Rotate the printer into an upright position. The anti-slip material should stop the printer from sliding forwards. Remove the two foam end packs and the plastic covering the printer.
-
 1
1 -
 2
2 -
 3
3 -
 4
4 -
 5
5 -
 6
6 -
 7
7 -
 8
8 -
 9
9 -
 10
10 -
 11
11 -
12
-
13
-
14
-
15
-
16
-
17
-
18
 |
 |
