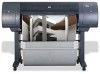
HP 4020 HP Designjet 4020 Printer series - Assembly Instructions: English - Page 3
side of the cross-brace. - 4 pin
 |
UPC - 884420909606
View all HP 4020 manuals
Add to My Manuals
Save this manual to your list of manuals |
Page 3 highlights
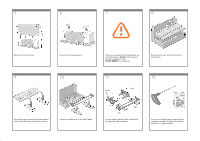
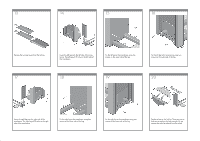
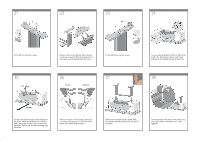
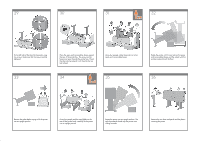
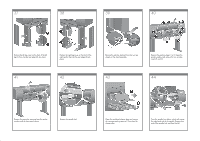
13 14 15 16 Remove the two leg covers from the left leg. Lower the left leg onto the left side of the crossbrace. The left leg will fit only on the left side of the cross-brace. Fix the left leg to the cross-brace using four screws on the inner side of the leg. Fix the left leg to the cross-brace using two screws on the outer side of the leg. 17 18 19 20 Lower the right leg onto the right side of the cross-brace. The right leg will fit only on the right side of the cross-brace. Fix the right leg to the cross-brace using four screws on the inner side of the leg. Fix the right leg to the cross-brace using two screws on the outer side of the leg. Position a foot on the left leg. There are pins to help you to position the foot correctly. Do not remove the anti-slip material from the wheel.
-
 1
1 -
 2
2 -
 3
3 -
 4
4 -
 5
5 -
 6
6 -
 7
7 -
 8
8 -
 9
9 -
10
-
11
-
12
-
13
-
14
-
15
-
16
-
17
-
18
 |
 |
