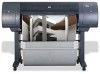
HP 4020 HP Designjet 4020 and 4520 Printer Series - User's Guide: English - Page 54
Submit a job with the Embedded Web Server, Save a job, Submit job, Add files, Move Up, Move Down
 |
UPC - 884420909606
View all HP 4020 manuals
Add to My Manuals
Save this manual to your list of manuals |
Page 54 highlights
Submit a job with the Embedded Web Server 1. Access the Embedded Web Server (see Access the Embedded Web Server on page 17). 2. Go to the Submit job page. 3. Select Add files and browse your computer to select the file to print. NOTE: Submitting a job to be printed via the Embedded Web Server does not require you to have the printer driver nor the file's native application installed on your computer. 4. If you want to submit more than one file, select the Add files button again and select the file(s) you want. You can change the order of multiple files by using the Move Up and Move Down buttons. 5. If you want to change the order in which the files are submitted, use the buttons on the right side of the screen to move the file up or down in priority. 6. If you are printing multiple copies of a document, by default all copies of page 1 will be printed, then all copies of page 2, and so on. Check the box called Collate under the Control Settings if you want one copy of the whole document to be printed, then the next copy of the whole document, and so on. NOTE: When Collate is used, each copy of the document is sent to the printer as a separate job. 7. Set the rest of the job options. If you leave an option set to Default, the setting saved in the job will be used. If the job contains no setting for that option, the setting in the printer will be used. The setting in the printer can be changed from the front panel, or in some cases from the Device Setup page in the Embedded Web Server. 8. Click the Print button at the top of the screen once you have selected all your settings. Save a job If you intend to reprint a job later with some changes to the job settings (such as size or quality), you can store the job inside your printer so that you will not need to resubmit it later. NOTE: If you want to reprint a job without changes, you can do that from the print queue without needing to save the job. 44 Chapter 5 How do I... (print job topics) ENWW Print job
-
 1
1 -
2
-
3
-
4
-
5
-
6
-
7
-
8
-
9
-
10
-
11
-
12
-
13
-
14
-
15
-
16
-
17
-
18
-
19
-
20
-
21
-
22
-
23
-
24
-
25
-
26
-
27
-
28
-
29
-
30
-
31
-
32
-
33
-
34
-
35
-
36
-
37
-
38
-
39
-
40
-
41
-
42
-
43
-
44
-
45
-
46
-
47
-
48
-
 49
49 -
 50
50 -
 51
51 -
 52
52 -
 53
53 -
 54
54 -
 55
55 -
 56
56 -
 57
57 -
 58
58 -
 59
59 -
60
-
61
-
62
-
63
-
64
-
65
-
66
-
67
-
68
-
69
-
70
-
71
-
72
-
73
-
74
-
75
-
76
-
77
-
78
-
79
-
80
-
81
-
82
-
83
-
84
-
85
-
86
-
87
-
88
-
89
-
90
-
91
-
92
-
93
-
94
-
95
-
96
-
97
-
98
-
99
-
100
-
101
-
102
-
103
-
104
-
105
-
106
-
107
-
108
-
109
-
110
-
111
-
112
-
113
-
114
-
115
-
116
-
117
-
118
-
119
-
120
-
121
-
122
-
123
-
124
-
125
-
126
-
127
-
128
-
129
-
130
-
131
-
132
-
133
-
134
-
135
-
136
-
137
-
138
-
139
-
140
-
141
-
142
-
143
-
144
-
145
-
146
-
147
-
148
-
149
-
150
-
151
-
152
-
153
-
154
-
155
-
156
-
157
-
158
-
159
-
160
-
161
-
162
-
163
-
164
-
165
-
166
-
167
-
168
-
169
-
170
-
171
-
172
-
173
-
174
-
175
-
176
-
177
-
178
-
179
-
180
-
181
-
182
-
183
-
184
-
185
-
186
-
187
-
188
-
189
-
190
-
191
-
192
-
193
-
194
-
195
-
196
-
197
-
198
-
199
-
200
-
201
-
202
-
203
-
204
-
205
-
206
-
207
-
208
-
209
-
210
-
211
-
212
-
213
-
214
-
215
-
216
-
217
-
218
-
219
-
220
-
221
-
222
-
223
-
224
-
225
-
226
-
227
-
228
-
229
-
230
-
231
-
232
-
233
-
234
-
235
 |
 |
