HP C4106A HP LaserJet 6L Printer - User Manual - Page 37
Blank
 |
View all HP C4106A manuals
Add to My Manuals
Save this manual to your list of manuals |
Page 37 highlights
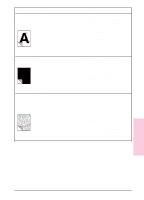
Problem Cause The bottom of the page is blank or part of a graphic's image is cut off. Your page may be too complex for the standard printer memory. Solution(s) Set the resolution to 300 dpi through your software or printer driver. You may need to install additional memory. See chapter 1, "Installing Memory Cards (DRAM)." Check your printer driver's online help for suggestions that are specific to your driver's settings. Pages are Paper is curled or wrinkled when using coming out of the Paper Output Bin. the printer curled or wrinkled. Use the Front Output Slot by pushing the Paper Path Lever to the lower position. This provides the straightest paper path. See "Selecting the Output Paper Path" in chapter 3. Use the Paper Input Support located behind the Paper Input Bin. See "Loading the Paper into the Printer" in chapter 1. Blank Page (Occasional) Paper may not be stored properly. Page length and margins are not set correctly for the paper size. Whenever possible, store paper in its sealed ream at room temperature. If you are printing on small paper and your page is blank, try printing on larger paper to see where the image is printing. Adjust the margins accordingly. Some sharing devices or networks may generate a blank page as a separator (contact your Network Administrator). If you are on a network, try connecting the printer directly to the computer. Your printer may be feeding two or more sheets of paper at a time because the paper is difficult to separate. Remove the paper from the Paper Input Bin and align the edges of the paper. "Break" the ream of paper by curving it into an upside-down u-shape; this may effectively decrease multi-feeds. You may also try turning the paper around to feed the opposite end first. Your software application may be sending an extra page-eject command. Check your software's printing configuration information. If you are using a word-processing program, check for a natural page break and a forced page break that are close to each other. 4-10 Troubleshooting EN
-
 1
1 -
2
-
3
-
4
-
5
-
6
-
7
-
8
-
9
-
10
-
11
-
12
-
13
-
14
-
15
-
16
-
17
-
18
-
19
-
20
-
21
-
22
-
23
-
24
-
25
-
26
-
27
-
28
-
29
-
30
-
31
-
 32
32 -
 33
33 -
 34
34 -
 35
35 -
 36
36 -
 37
37 -
 38
38 -
 39
39 -
 40
40 -
 41
41 -
 42
42 -
43
-
44
-
45
-
46
-
47
-
48
-
49
-
50
-
51
-
52
-
53
-
54
-
55
-
56
-
57
-
58
-
59
-
60
-
61
-
62
-
63
-
64
 |
 |
