HP D330 HP Compaq Business Desktops d330 Desktop Model - (English) Hardware Re - Page 32
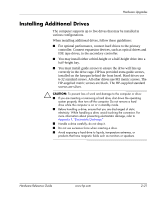
Installing an Optical Drive or other Removable Storage Device, An optical drive is a CD-ROM, CD-R/RW
 |
View all HP D330 manuals
Add to My Manuals
Save this manual to your list of manuals |
Page 32 highlights
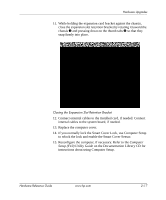
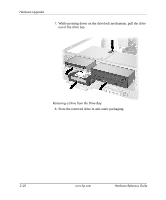
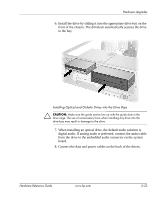
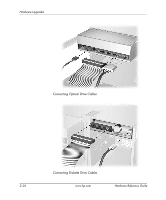
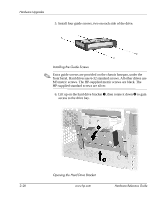
Hardware Upgrades Installing an Optical Drive or other Removable Storage Device ✎ An optical drive is a CD-ROM, CD-R/RW, DVD-ROM, DVD-R/RW, or CD-RW/DVD Combo drive. 1. If you have locked the Smart Cover Lock, use Computer Setup to unlock the lock. 2. Turn off the computer properly through the operating system and turn off any external devices. Disconnect the power cord from the power outlet and disconnect any external devices. 3. Remove the computer cover. See the "Removing the Computer Cover" procedure. 4. Remove the front bezel. See the "Removing the Front Bezel" procedure. ✎ If you are adding a diskette or optical drive in a bay that was previously empty, you must remove the corresponding bezel blank from the front bezel. 5. Install four guide screws in the lower holes on each side of the drive. Installing the Guide Screws ✎ Extra guide screws are provided on the chassis basepan, under the front bezel. Hard drives use 6-32 standard screws. All other drives use M3 metric screws. The HP-supplied metric screws are black. The HP-supplied standard screws are silver. 2-22 www.hp.com Hardware Reference Guide
-
 1
1 -
2
-
3
-
4
-
5
-
6
-
7
-
8
-
9
-
10
-
11
-
12
-
13
-
14
-
15
-
16
-
17
-
18
-
19
-
20
-
21
-
22
-
23
-
24
-
25
-
26
-
 27
27 -
 28
28 -
 29
29 -
 30
30 -
 31
31 -
 32
32 -
 33
33 -
 34
34 -
 35
35 -
 36
36 -
 37
37 -
38
-
39
-
40
-
41
-
42
-
43
-
44
-
45
-
46
-
47
-
48
-
49
-
50
-
51
-
52
-
53
-
54
-
55
-
56
-
57
-
58
-
59
-
60
-
61
-
62
-
63
-
64
-
65
-
66
 |
 |