HP D330 HP Compaq Business Desktops d330 Desktop Model - (English) Hardware Re - Page 39
system board connector., Recon the computer, if necessary. Refer to
 |
View all HP D330 manuals
Add to My Manuals
Save this manual to your list of manuals |
Page 39 highlights
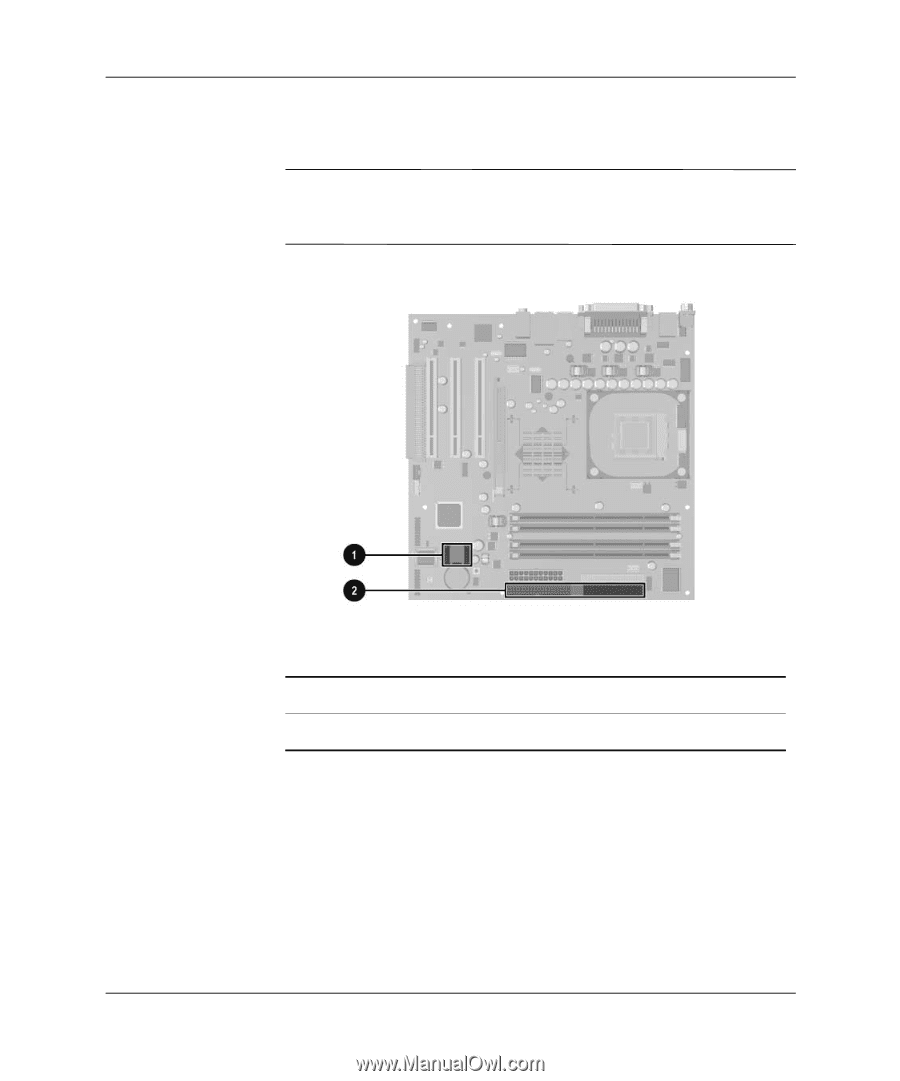
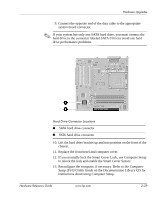
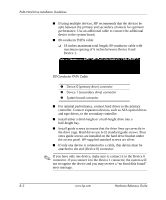
Hardware Upgrades 9. Connect the opposite end of the data cable to the appropriate system board connector. ✎ If your system has only one SATA hard drive, you must connect the hard drive to the connector labeled SATA 0 first to avoid any hard drive performance problems. Hard Drive Connector Locations 1 SATA hard drive connector 2 PATA hard drive connector 10. Lift the hard drive bracket up and into position on the front of the chassis. 11. Replace the front bezel and computer cover. 12. If you normally lock the Smart Cover Lock, use Computer Setup to relock the lock and enable the Smart Cover Sensor. 13. Reconfigure the computer, if necessary. Refer to the Computer Setup (F10) Utility Guide on the Documentation Library CD for instructions about using Computer Setup. Hardware Reference Guide www.hp.com 2-29
-
 1
1 -
2
-
3
-
4
-
5
-
6
-
7
-
8
-
9
-
10
-
11
-
12
-
13
-
14
-
15
-
16
-
17
-
18
-
19
-
20
-
21
-
22
-
23
-
24
-
25
-
26
-
27
-
28
-
29
-
30
-
31
-
32
-
33
-
 34
34 -
 35
35 -
 36
36 -
 37
37 -
 38
38 -
 39
39 -
 40
40 -
 41
41 -
 42
42 -
 43
43 -
 44
44 -
45
-
46
-
47
-
48
-
49
-
50
-
51
-
52
-
53
-
54
-
55
-
56
-
57
-
58
-
59
-
60
-
61
-
62
-
63
-
64
-
65
-
66
 |
 |