HP DeskJet Ultra Ink Advantage 2029 User Guide - Page 11
Tips for print success, correctly, and the product should have the appropriate settings.
 |
View all HP DeskJet Ultra Ink Advantage 2029 manuals
Add to My Manuals
Save this manual to your list of manuals |
Page 11 highlights
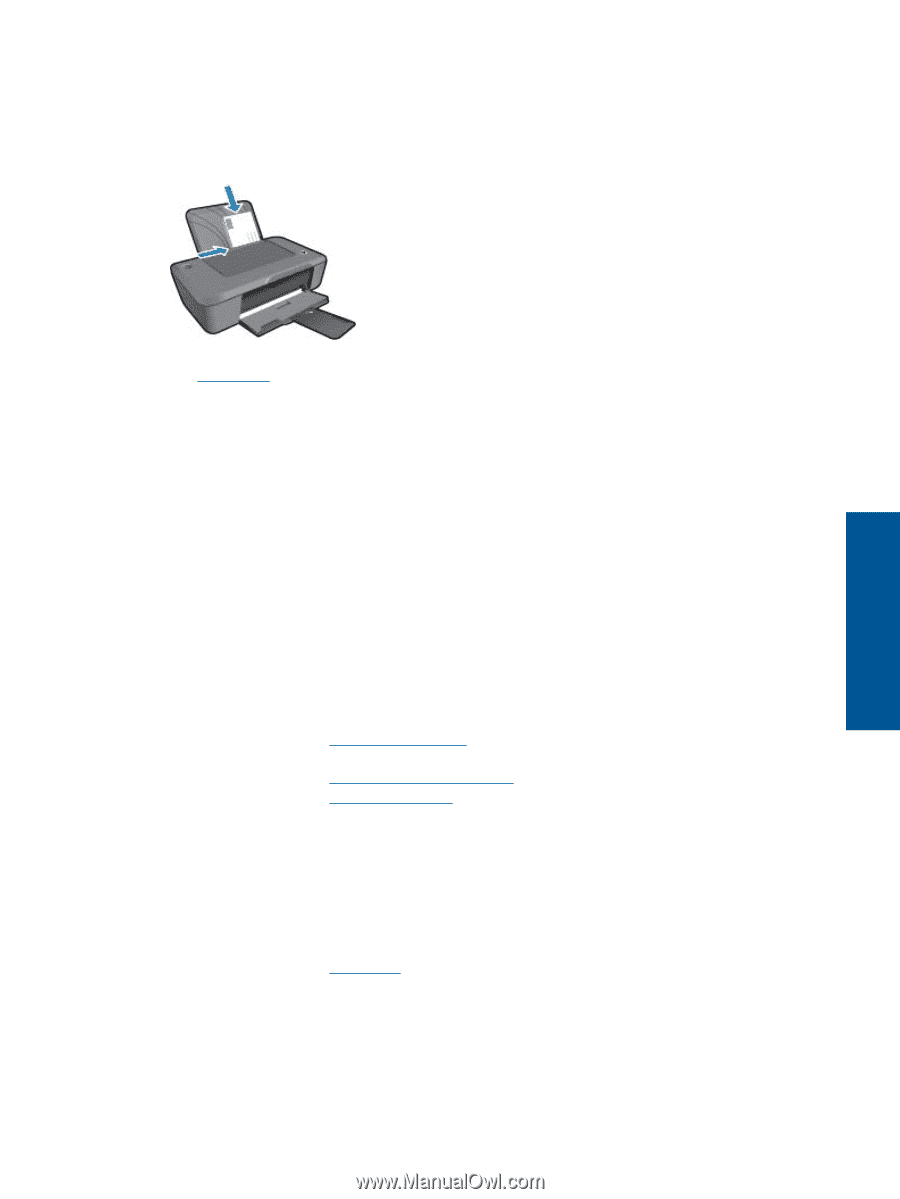
3. Place the envelopes in the right side of the tray. The side to be printed on should face up. The flap should be on the left side. 4. Push the envelopes into the printer until they stop. 5. Slide the paper guide firmly against the edge of the envelopes. Print See Load media for more information. 6. On the File menu in your software application, click Print. 7. Make sure the product is the selected printer. 8. Click the button that opens the Properties dialog box. Depending on your software application, this button might be called Properties, Options, Printer Setup, Printer, or Preferences. 9. Select the appropriate options. • On Paper/Quality tab, select a Plain paper type from the Media drop-down list. • Click the Advanced button, and select the appropriate envelope size from the Paper Size drop down menu. 10. Click OK, and then click Print or OK in the Print dialog box. Tips for print success To successfully print, the HP cartridges should be functioning properly with sufficient ink, the paper should be loaded correctly, and the product should have the appropriate settings. Cartridge tips • Use genuine HP ink cartridges. • Install both the black and tri-color cartridges correctly. For more information, see Replace the cartridges. • Check the estimated ink levels in the cartridges to make sure there is sufficient ink. For more information, see Check the estimated ink levels. • For more information, see Improve print quality. Paper loading tips • Load a stack of paper (not just one page). All of the paper in the stack should be the same size and type to avoid a paper jam. • Load paper with side to be printed on facing up. • Ensure that paper loaded in the input tray lays flat and the edges are not bent or torn. • Adjust the paper-width guide in the input tray to fit snugly against all paper. Make sure the paper-width guide does not bend the paper in the input tray. • For more information, see Load media. Tips for print success 9
-
 1
1 -
2
-
3
-
4
-
5
-
 6
6 -
 7
7 -
 8
8 -
 9
9 -
 10
10 -
 11
11 -
 12
12 -
 13
13 -
 14
14 -
 15
15 -
 16
16 -
17
-
18
-
19
-
20
-
21
-
22
-
23
-
24
-
25
-
26
-
27
-
28
-
29
-
30
-
31
-
32
-
33
-
34
-
35
-
36
-
37
-
38
-
39
-
40
-
41
-
42
-
43
-
44
 |
 |