HP Dx9000 Resources for Developing Touch-Friendly Applications for HP Business - Page 20
Window1.xaml.cs
 |
UPC - 884420541578
View all HP Dx9000 manuals
Add to My Manuals
Save this manual to your list of manuals |
Page 20 highlights
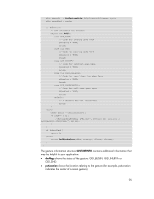
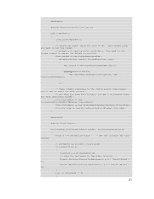
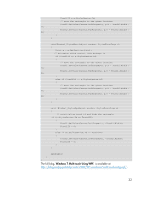
the two contact points using stylus events in his blog. First, he enabled touch events to the application. Then he subscribed to stylus events and identified the two touch points via the touch IDs. In the example, two squares, one black and one red appear at the touch down locations. The squares move accordingly to the touch contacts and disappear when the touches are released. Window1.xaml Window1.xaml.cs using System; using System.Collections.Generic; using System.Linq; using System.Text; using System.Windows; using System.Windows.Controls; using System.Windows.Data; using System.Windows.Documents; using System.Windows.Input; using System.Windows.Media; using System.Windows.Media.Imaging; using System.Windows.Navigation; using System.Windows.Shapes; using System.Windows.Interop; using System.Runtime.InteropServices; using System.Diagnostics; namespace MultitouchTest { public partial class Window1 : Window { #region Class Variables private int Touch1ID = 0; private int Touch2ID = 0; // id for first touch contact // id for second touch contact #endregion #region P/Invoke // just a little interop. It's different this time! [DllImport("user32.dll")] public static extern bool SetProp(IntPtr hWnd, string lpString, IntPtr hData); 20
-
 1
1 -
2
-
3
-
4
-
5
-
6
-
7
-
8
-
9
-
10
-
11
-
12
-
13
-
14
-
 15
15 -
 16
16 -
 17
17 -
 18
18 -
 19
19 -
 20
20 -
 21
21 -
 22
22 -
 23
23 -
 24
24 -
 25
25 -
26
-
27
-
28
-
29
-
30
-
31
-
32
-
33
-
34
-
35
-
36
-
37
 |
 |