HP ENVY m6-n000 ENVY m6 Notebook PC Maintenance and Service Guide - Page 49
Remove the Phillips PM2.5×6.5 screw, Open the display hinges
 |
View all HP ENVY m6-n000 manuals
Add to My Manuals
Save this manual to your list of manuals |
Page 49 highlights
6. Remove the three Phillips PM2.5×4.5 screws (1) (two on the left hinge, one on the right hinge) that secure the display assembly to the top cover. 7. Remove the Phillips PM2.5×6.5 screw (2) on the right hinge that secures the display assembly to the top cover. 8. Open the display hinges (1) as far as they will open. Component replacement procedures 41
-
 1
1 -
2
-
3
-
4
-
5
-
6
-
7
-
8
-
9
-
10
-
11
-
12
-
13
-
14
-
15
-
16
-
17
-
18
-
19
-
20
-
21
-
22
-
23
-
24
-
25
-
26
-
27
-
28
-
29
-
30
-
31
-
32
-
33
-
34
-
35
-
36
-
37
-
38
-
39
-
40
-
41
-
42
-
43
-
 44
44 -
 45
45 -
 46
46 -
 47
47 -
 48
48 -
 49
49 -
 50
50 -
 51
51 -
 52
52 -
 53
53 -
 54
54 -
55
-
56
-
57
-
58
-
59
-
60
-
61
-
62
-
63
-
64
-
65
-
66
-
67
-
68
-
69
-
70
-
71
-
72
-
73
-
74
-
75
-
76
-
77
-
78
-
79
-
80
-
81
-
82
-
83
-
84
-
85
-
86
 |
 |
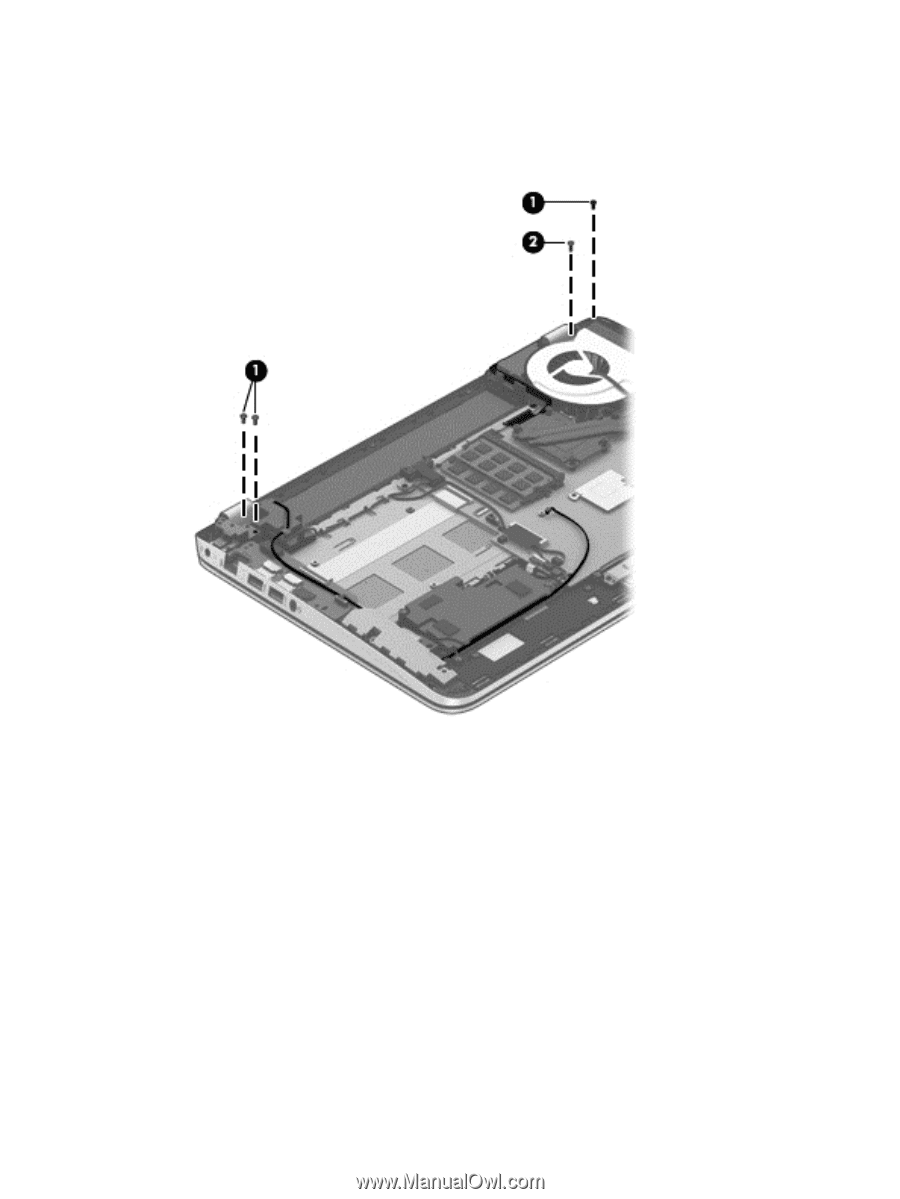
6.
Remove the three Phillips PM2.5×4.5 screws
(1)
(two on the left hinge, one on the right hinge) that
secure the display assembly to the top cover.
7.
Remove the Phillips PM2.5×6.5 screw
(2)
on the right hinge that secures the display assembly to the
top cover.
8.
Open the display hinges
(1)
as far as they will open.
Component replacement procedures
41