HP ENVY m6-n000 ENVY m6 Notebook PC Maintenance and Service Guide - Page 69
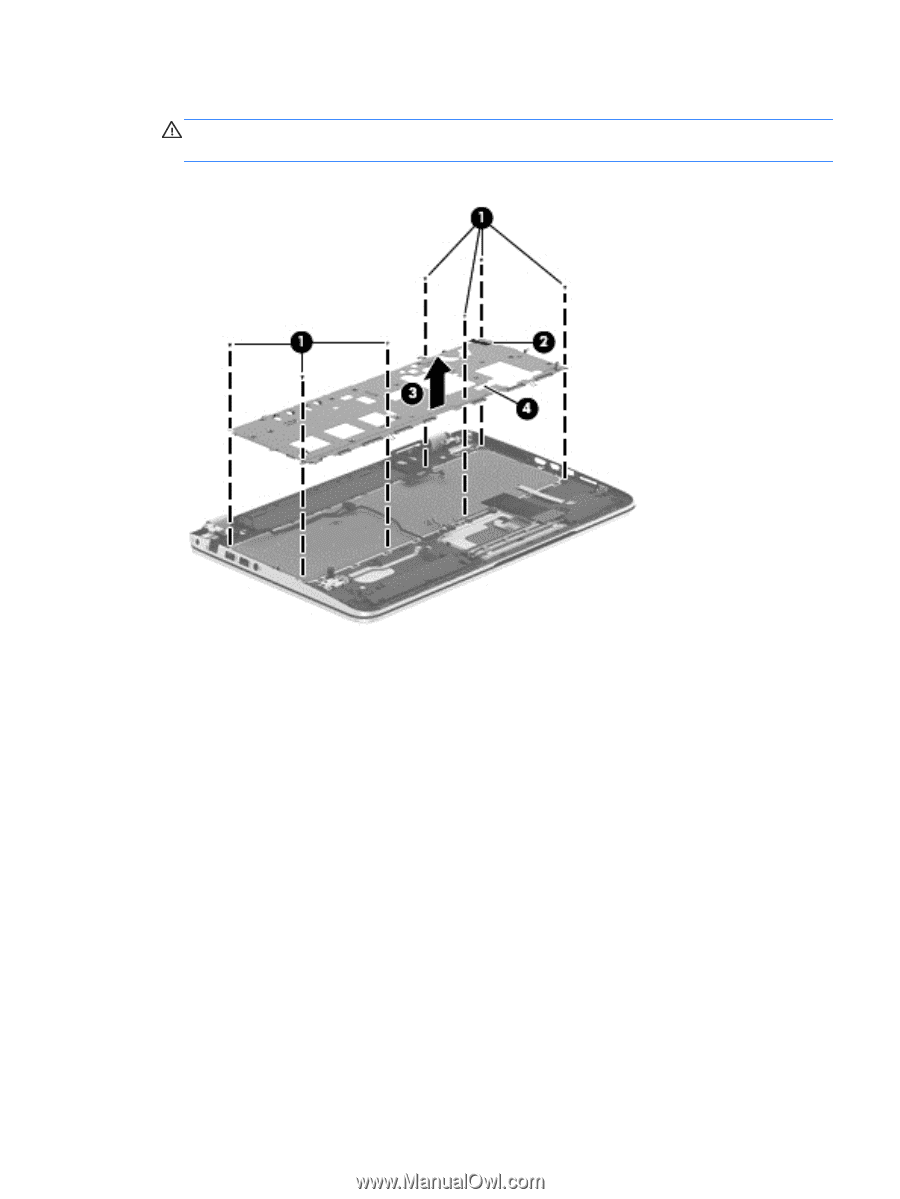
that secure the keyboard to the top cover., Remove the two Phillips PM2.0×2.9 screws
 |
View all HP ENVY m6-n000 manuals
Add to My Manuals
Save this manual to your list of manuals |
Page 69 highlights
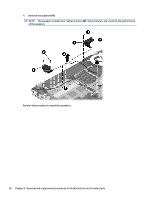
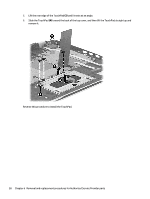
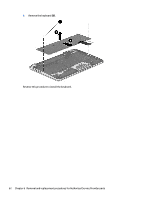
3. Remove the keyboard shield (3). CAUTION: When removing the keyboard shield, make sure the keyboard cable and backlight cable are not damaged when being released through the opening in the keyboard shield. The keyboard shield is available using spare part number 734817-001. 4. Partially open the computer. 5. Insert a thin tool into the keyboard release hole in the memory module compartment, and then press on the back of the keyboard until the keyboard disengages from the computer. 6. Turn the computer right-side up with the front toward you. 7. Remove the two Phillips PM2.0×2.9 screws (1) that secure the keyboard to the top cover. 8. Release the keyboard (2) by sliding it toward the TouchPad. Component replacement procedures 61
-
 1
1 -
2
-
3
-
4
-
5
-
6
-
7
-
8
-
9
-
10
-
11
-
12
-
13
-
14
-
15
-
16
-
17
-
18
-
19
-
20
-
21
-
22
-
23
-
24
-
25
-
26
-
27
-
28
-
29
-
30
-
31
-
32
-
33
-
34
-
35
-
36
-
37
-
38
-
39
-
40
-
41
-
42
-
43
-
44
-
45
-
46
-
47
-
48
-
49
-
50
-
51
-
52
-
53
-
54
-
55
-
56
-
57
-
58
-
59
-
60
-
61
-
62
-
63
-
 64
64 -
 65
65 -
 66
66 -
 67
67 -
 68
68 -
 69
69 -
 70
70 -
 71
71 -
 72
72 -
 73
73 -
 74
74 -
75
-
76
-
77
-
78
-
79
-
80
-
81
-
82
-
83
-
84
-
85
-
86
 |
 |
3.
Remove the keyboard shield
(3)
.
CAUTION:
When removing the keyboard shield, make sure the keyboard cable and backlight cable are
not damaged when being released through the opening in the keyboard shield.
The keyboard shield is available using spare part number 734817-001.
4.
Partially open the computer.
5.
Insert a thin tool into the keyboard release hole in the memory module compartment, and then press on
the back of the keyboard until the keyboard disengages from the computer.
6.
Turn the computer right-side up with the front toward you.
7.
Remove the two Phillips PM2.0×2.9 screws
(1)
that secure the keyboard to the top cover.
8.
Release the keyboard
(2)
by sliding it toward the TouchPad.
Component replacement procedures
61