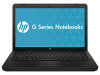
HP G56-125NR HP Notebook User Guide - SuSE Linux
HP G56-125NR Manual
 |
View all HP G56-125NR manuals
Add to My Manuals
Save this manual to your list of manuals |
HP G56-125NR manual content summary:
- HP G56-125NR | HP Notebook User Guide - SuSE Linux - Page 1
HP Notebook User Guide - HP G56-125NR | HP Notebook User Guide - SuSE Linux - Page 2
HP products and services are set forth in the express warranty statements accompanying such products and services. Nothing herein should be construed as constituting an additional warranty. HP latest information in this guide, go to the HP website at http://www.hp.com/ support. Software terms By - HP G56-125NR | HP Notebook User Guide - SuSE Linux - Page 3
the computer, do not place the computer directly on your lap or obstruct the computer air vents. Use the computer only on a hard, flat surface. Do not allow another hard surface, such as an adjoining optional printer, or a soft surface, such as pillows or rugs or clothing, to block airflow. Also, do - HP G56-125NR | HP Notebook User Guide - SuSE Linux - Page 4
iv Safety warning notice - HP G56-125NR | HP Notebook User Guide - SuSE Linux - Page 5
Keys ...7 Right side ...8 Left side ...9 Display ...10 Wireless antennas ...11 Bottom ...12 Additional hardware ...13 3 Networking Using an Internet service provider (ISP 15 Identifying wireless and network status icons 16 Creating a wireless connection ...16 Turning wireless devices on and off - HP G56-125NR | HP Notebook User Guide - SuSE Linux - Page 6
35 Resolving a low battery level when no power source is available 35 Resolving a low battery level when the computer cannot exit Hibernation 35 Conserving battery power 35 Storing a battery ...35 Disposing of a used battery 36 Replacing the battery ...36 Using external AC power ...36 Testing an - HP G56-125NR | HP Notebook User Guide - SuSE Linux - Page 7
7 Drives Handling drives ...38 Replacing or upgrading the hard drive 39 Removing the hard drive ...39 Installing the hard drive ...40 Using optical drives (select models only 42 Identifying the installed optical drive 42 Playing a CD ...42 Removing a CD ...42 8 External devices Using a USB device - HP G56-125NR | HP Notebook User Guide - SuSE Linux - Page 8
not open for removal of a CD 60 The computer does not detect the optical drive 61 A disc does not play ...61 A movie is not visible on an external disc does not begin, or it stops before completion 62 Contacting customer support ...62 Labels ...63 Appendix B Routine care Cleaning the display ...65 - HP G56-125NR | HP Notebook User Guide - SuSE Linux - Page 9
instructions, which may be provided with the software or on the manufacturer's website. ● Update programs and drivers-Update your programs and drivers go to http://www.hp.com/support to download updates from HP. Finding information The computer ● Battery disposal information Finding information 1 - HP G56-125NR | HP Notebook User Guide - SuSE Linux - Page 10
/ergo. Worldwide Telephone Numbers booklet HP support telephone numbers This booklet is provided with your computer. HP website To access this website, go to http://www.hp.com/ support. ● Support information ● Ordering parts and finding additional help ● Software, driver, and BIOS (Setup Utility - HP G56-125NR | HP Notebook User Guide - SuSE Linux - Page 11
2 Getting to know your computer ● Top ● Right side ● Left side ● Display ● Wireless antennas ● Bottom ● Additional hardware 3 - HP G56-125NR | HP Notebook User Guide - SuSE Linux - Page 12
off, quickly double-tap the TouchPad light. ● Off: TouchPad is on. ● Amber: TouchPad is off. Moves the pointer and selects or activates items on the screen. Press the left side of the TouchPad button to execute functions performed by the left button on an external mouse. Press the right side of - HP G56-125NR | HP Notebook User Guide - SuSE Linux - Page 13
Component (1) TouchPad light (2) Caps lock light (3) Power light (4) Wireless light Description ● Off: TouchPad is on. ● Amber: TouchPad is off. On: Caps lock is on. ● On: The computer is on. ● Blinking: The computer - HP G56-125NR | HP Notebook User Guide - SuSE Linux - Page 14
Button and speakers NOTE: Your computer may look slightly different from the illustration in this section. Component (1) Speaker grill (2) Power button Description Two integrated speakers produce sound. ● When the computer is off, press the button to turn on the computer. ● When the computer - HP G56-125NR | HP Notebook User Guide - SuSE Linux - Page 15
Keys NOTE: Your computer may look slightly different from the illustration in this section. Component (1) Send e-mail key (2) Media application key (3) Web browser key (4) Print key (5) Calculator key (6) Start menu key (7) Application key (8) Action keys Description Opens a new e-mail in your - HP G56-125NR | HP Notebook User Guide - SuSE Linux - Page 16
may look slightly different from the illustration in this section. Component (1) Optical drive (select models only) (2) Optical drive light (select models only) (3) USB port (4) AC adapter light (5) Power connector (6) Security cable slot Description Reads and writes to an optical disc. Blinking - HP G56-125NR | HP Notebook User Guide - SuSE Linux - Page 17
microphone, stereo array microphone, or monaural microphone. Produces sound when connected to optional powered stereo speakers, headphones, earbuds, a headset, or television audio. WARNING! To to the headphone jack, the computer speakers are disabled. On: The hard drive is in use. Left side 9 - HP G56-125NR | HP Notebook User Guide - SuSE Linux - Page 18
Display Component (1) Internal microphone (select models only) (2) Webcam (select models only) (3) Webcam light (select models only) Description Records sound. Records video and captures still photographs. On: The webcam is in use. 10 Chapter 2 Getting to know your computer - HP G56-125NR | HP Notebook User Guide - SuSE Linux - Page 19
Wireless antennas Your computer model has two antennas that send and receive signals from one or more wireless devices. These antennas are not visible from the outside of the computer. NOTE: For optimal transmission, keep the areas immediately around the antennas (shown in the previous illustration) - HP G56-125NR | HP Notebook User Guide - SuSE Linux - Page 20
automatically to cool internal components and prevent overheating. It is normal for the internal fan to cycle on and off during routine operation. Releases the battery from the battery bay. Contains the two memory module slots. Holds the hard drive. 12 Chapter 2 Getting to know your computer - HP G56-125NR | HP Notebook User Guide - SuSE Linux - Page 21
Additional hardware Component Description (1) Power cord* Connects an AC adapter to an AC outlet. (2) AC adapter Converts AC power to DC power. (3) Battery* Powers the computer when the computer is not plugged into external power. *Batteries and power cords vary in appearance by region and - HP G56-125NR | HP Notebook User Guide - SuSE Linux - Page 22
3 Networking ● Using an Internet service provider (ISP) ● Identifying wireless and network status icons ● Creating a wireless connection ● Using a WLAN ● Using Bluetooth wireless devices (select models only) ● Connecting to a local area network (LAN) Your computer may support one or both of the - HP G56-125NR | HP Notebook User Guide - SuSE Linux - Page 23
a modem. The ISP can help set up the modem, install a network cable to connect your wireless computer to the modem, and test the Internet service. NOTE: Your ISP will give you a user ID and password to access the Internet. Record this information and store it in a safe place. Using an - HP G56-125NR | HP Notebook User Guide - SuSE Linux - Page 24
Identifying wireless and network status icons Icon Name Wireless (connected) Description Indicates that one or more wireless devices are on. Network Connection icon status (connected) Network Connection icon status (disconnected) Indicates that the wired network is connected and active. If both - HP G56-125NR | HP Notebook User Guide - SuSE Linux - Page 25
Connections. Setting up a new WLAN Required equipment: ● A broadband modem (either DSL or cable) (1) and high-speed Internet service purchased from an Internet service provider (ISP) ● A wireless router (purchased separately) (2) ● The wireless computer (3) The illustration below shows an example of - HP G56-125NR | HP Notebook User Guide - SuSE Linux - Page 26
For help in setting up your WLAN, refer to the information provided by your router manufacturer or your ISP. Protecting your WLAN When you set up a WLAN or access an existing WLAN, always enable security features to protect your network from unauthorized access. WLANs in public areas (hotspots) like - HP G56-125NR | HP Notebook User Guide - SuSE Linux - Page 27
Using Bluetooth wireless devices (select models only) A Bluetooth device provides short-range wireless communications that replace the physical cable connections that traditionally link electronic devices such as the following: ● Computers ● Phones ● Audio devices The strength of Bluetooth is in - HP G56-125NR | HP Notebook User Guide - SuSE Linux - Page 28
2. Plug the other end of the cable into a network wall jack (2). WARNING! To reduce the risk of electric shock, fire, or damage to the equipment, do not plug a modem or telephone cable into the RJ-45 (network) jack. 20 Chapter 3 Networking - HP G56-125NR | HP Notebook User Guide - SuSE Linux - Page 29
4 Pointing devices and keyboard ● Using the keyboard ● Using the TouchPad Using the keyboard Action keys are customized actions that are assigned to specific keys at the top of the keyboard. The icons on the f1 through f12 keys represent the action key functions. To use an action key, press and hold - HP G56-125NR | HP Notebook User Guide - SuSE Linux - Page 30
image among display devices connected to the computer. For example, if a monitor is connected to the computer, pressing this key alternates the screen image from the computer display to the monitor display to simultaneous display on both the computer and the monitor. Most external monitors receive - HP G56-125NR | HP Notebook User Guide - SuSE Linux - Page 31
Using the TouchPad To turn the TouchPad on and off, quickly double-tap the TouchPad light. When the TouchPad light is amber, the TouchPad is off. To move the pointer, slide one finger across the TouchPad in the direction you want the pointer to go. Use the left and right TouchPad buttons like the - HP G56-125NR | HP Notebook User Guide - SuSE Linux - Page 32
may include the following: ● Integrated speakers ● Integrated microphones ● Integrated webcam ● Preinstalled multimedia software ● Multimedia buttons or keys ● Optical drive Using the media activity controls Depending on your computer model, you may have the following media activity controls that - HP G56-125NR | HP Notebook User Guide - SuSE Linux - Page 33
Audio Your computer enables you to use a variety of audio features: ● Play music. ● Record sound. ● Download music from the Internet. ● Create multimedia presentations. ● Transmit sound and images with instant messaging programs. ● Stream radio programs (select models only). ● Create or "burn" audio - HP G56-125NR | HP Notebook User Guide - SuSE Linux - Page 34
Adjusting the volume Depending on your computer model, you can adjust the volume using the following: ● Volume buttons ● Volume action keys ● Volume keys WARNING! To reduce the risk of personal injury, adjust the volume before putting on headphones, earbuds, or a headset. For additional safety - HP G56-125NR | HP Notebook User Guide - SuSE Linux - Page 35
Video Your computer has the following external video port: ● VGA VGA The external monitor port, or VGA port, is an analog display interface that connects an external VGA display device such as an external VGA monitor or a VGA projector to the computer. ▲ To connect a VGA display device, connect - HP G56-125NR | HP Notebook User Guide - SuSE Linux - Page 36
down the computer ● Setting power options ● Using battery power ● Using external AC power Shutting down the computer CAUTION the computer under any of the following conditions: ● When you need to replace the battery or access components inside the computer ● When you are connecting an external - HP G56-125NR | HP Notebook User Guide - SuSE Linux - Page 37
Suspend is initiated, the power light blinks and the screen clears. Your work is saved to memory, letting you exit the Suspend state faster than exiting Hibernation. If the computer is in the Suspend state for an extended period or if the battery reaches a critical battery level while in the Suspend - HP G56-125NR | HP Notebook User Guide - SuSE Linux - Page 38
work returns to the screen where you stopped working. Using the Power icon The Power icon is located in the notification area, at the far right of the taskbar. The Power icon allows you to quickly access power settings, view remaining battery charge, and select a different power plan. ● To display - HP G56-125NR | HP Notebook User Guide - SuSE Linux - Page 39
. WARNING! To reduce potential safety issues, use only the battery provided with the computer, a replacement battery provided by HP, or a compatible battery purchased from HP. Computer battery life varies, depending on power management settings, programs running on the computer, display brightness - HP G56-125NR | HP Notebook User Guide - SuSE Linux - Page 40
Inserting or removing the battery To insert the battery: ▲ Insert the battery (1) into the battery bay (2) until it is seated. The battery release latch (3) automatically locks the battery into place. To remove the battery: CAUTION: Removing a battery that is the sole power source for the computer - HP G56-125NR | HP Notebook User Guide - SuSE Linux - Page 41
remove it from the computer (3). Charging a battery WARNING! Do not charge the computer battery while you are onboard aircraft. The battery charges whenever the computer is plugged into external power through an AC adapter or an optional power adapter. The battery charges whether the computer is off - HP G56-125NR | HP Notebook User Guide - SuSE Linux - Page 42
set at the factory. Some lowbattery alerts and system responses can be changed using Power Management in Control Center. Preferences set using Power Management do not affect lights. Identifying low battery levels When a battery that is the sole power source for the computer reaches a low or critical - HP G56-125NR | HP Notebook User Guide - SuSE Linux - Page 43
as an accessory from HP Resolving a low battery level when a charged battery is available 1. Turn off the computer or initiate Hibernation. 2. Replace the discharged battery with a charged battery. 3. Turn on the computer. Resolving a low battery level when no power source is available ● Initiate - HP G56-125NR | HP Notebook User Guide - SuSE Linux - Page 44
only the AC adapter provided with the computer, a replacement AC adapter provided by HP, or a compatible AC adapter purchased from HP. Connect the computer to external AC power under any of the following conditions: WARNING! Do not charge the battery while you are onboard aircraft. ● When you are - HP G56-125NR | HP Notebook User Guide - SuSE Linux - Page 45
outlet. 4. Turn on the computer. ● If the power light turns on, the AC adapter is functioning properly. ● If the power light remains off, the AC adapter is not functioning and should be replaced. Contact technical support for information on obtaining a replacement AC power adapter. Using external AC - HP G56-125NR | HP Notebook User Guide - SuSE Linux - Page 46
7 Drives ● Handling drives ● Replacing or upgrading the hard drive ● Using optical drives (select models only) Handling drives Drives are fragile computer components that must be handled with care. Refer to the following cautions before handling drives. Additional cautions are included with the - HP G56-125NR | HP Notebook User Guide - SuSE Linux - Page 47
use X-rays instead of magnetism and do not damage drives. Replacing or upgrading the hard drive CAUTION: To prevent information loss or an unresponsive system: Shut down the computer before removing the hard drive from the hard drive bay. Do not remove the hard drive while the computer is on, in the - HP G56-125NR | HP Notebook User Guide - SuSE Linux - Page 48
the hard drive To install the hard drive: 1. Grasp the tabs (1) on the hard drive and lower the hard drive (2) into the hard drive bay, then press down on the hard drive to be sure that the drive is firmly seated. 2. Connect the hard drive cable (3) to the system board, and then replace the - HP G56-125NR | HP Notebook User Guide - SuSE Linux - Page 49
the hard drive cover with the notches on the computer. 4. Close the cover (2). 5. Tighten the hard drive cover screws (3). 6. Replace the battery. 7. Turn the computer right-side up. 8. Reconnect external power and external devices. 9. Turn on the computer. Replacing or upgrading the hard drive 41 - HP G56-125NR | HP Notebook User Guide - SuSE Linux - Page 50
group at the left sidebar. A list of all the devices installed in your computer, including your optical drive, is displayed. Playing a CD 1. Turn on the computer. 2. Press the release button (1) on the drive bezel to release the disc tray. 3. Pull out the tray (2). 4. Hold the disc by the edges to - HP G56-125NR | HP Notebook User Guide - SuSE Linux - Page 51
not fully accessible, tilt the disc carefully as you remove it. 3. Close the disc tray, and then place the disc in a protective case. Using optical drives (select models only) 43 - HP G56-125NR | HP Notebook User Guide - SuSE Linux - Page 52
keyboard, mouse, drive, printer, scanner, or hub. Devices can be connected to the system. Some USB devices may require additional support software, which is usually included with the device. For more information about device-specific software, refer to the manufacturer's instructions. The computer - HP G56-125NR | HP Notebook User Guide - SuSE Linux - Page 53
NOTE: When you connect a USB device, you may see a message in the notification area to let you know that the device is recognized by the system. Using a USB device 45 - HP G56-125NR | HP Notebook User Guide - SuSE Linux - Page 54
power cord. Using optional external drives Removable external drives expand your options for storing and accessing information. A USB drive can be added by connecting the drive to a USB port on the computer. USB drives include the following types: ● 1.44-megabyte diskette drive ● Hard drive module - HP G56-125NR | HP Notebook User Guide - SuSE Linux - Page 55
to the vacant expansion memory module slot or by upgrading the existing memory module in the primary memory module slot. WARNING! To reduce the risk of electric shock and damage to the equipment, unplug the power cord and remove all batteries before installing a memory module. CAUTION: Electrostatic - HP G56-125NR | HP Notebook User Guide - SuSE Linux - Page 56
away from the computer. 9. If you are replacing a memory module, remove the existing memory module: a. Pull away the retention clips (1) on each side of the memory module. The memory module tilts up. CAUTION: To prevent damage to the memory module, hold the memory module by the edges only. Do not - HP G56-125NR | HP Notebook User Guide - SuSE Linux - Page 57
and right edges of the memory module, until the retention clips snap into place. 11. Align the tabs (1) on the memory module compartment cover with the notch on the computer. 12. Close the cover (2). 13. Tighten the memory module compartment screws (3). 14. Replace the battery. 15. Turn the computer - HP G56-125NR | HP Notebook User Guide - SuSE Linux - Page 58
16. Reconnect external power and external devices. 17. Turn on the computer. 50 Chapter 9 Memory modules - HP G56-125NR | HP Notebook User Guide - SuSE Linux - Page 59
use of the computer Unauthorized access to Setup Utility (f10) Unauthorized access to the contents of a hard drive Unauthorized reset of Setup Utility (f10) passwords Power-on authentication using passwords. Administrator password in Setup Utility* DriveLock password in Setup Utility* Stringent - HP G56-125NR | HP Notebook User Guide - SuSE Linux - Page 60
NOTE: To reduce the risk of being locked out of the computer, record each password and store it in a secure place. Setting passwords in the operating system Operating system passwords Root password User password Function Protects access to an operating system root-level account. Protects access - HP G56-125NR | HP Notebook User Guide - SuSE Linux - Page 61
11 Backup and Recovery Recovery after a system failure is as good as your most recent backup. As you add new software and data files, you should continue to back up your system on a regular basis to maintain a reasonably current backup. 53 - HP G56-125NR | HP Notebook User Guide - SuSE Linux - Page 62
hard drive. All files you have created and any software installed on the computer are permanently removed. The recovery tool reinstalls the original operating system and HP programs and drivers that were installed at the factory. Software, drivers, and updates not installed by HP must be manually - HP G56-125NR | HP Notebook User Guide - SuSE Linux - Page 63
information You should back up your computer files on a regular schedule to maintain a current backup. You can manually back up your information to an optional external drive, a network drive, or discs. Back up your system at the following times: ● At regularly scheduled times ● Before the computer - HP G56-125NR | HP Notebook User Guide - SuSE Linux - Page 64
system (such as disk drives, display, keyboard, mouse, of system and extended memory. CAUTION: Use extreme displayed in the lower-left corner of the screen, press esc. When the Startup Menu is displayed in Setup Utility Setup Utility does not support the TouchPad. Navigation and selection are by - HP G56-125NR | HP Notebook User Guide - SuSE Linux - Page 65
● To select an item, press enter. ● To close a text box or return to the menu display, press esc. ● To display additional navigation and selection information while Setup Utility is open, press f1. Displaying system information 1. Start Setup Utility. 2. Select the Main menu. System information such - HP G56-125NR | HP Notebook User Guide - SuSE Linux - Page 66
A Troubleshooting and support ● Troubleshooting ● Contacting customer support ● Labels Troubleshooting The following sections describe several common issues and solutions. The computer is unable to start up If the computer does not turn on when you press the power button, the following suggestions - HP G56-125NR | HP Notebook User Guide - SuSE Linux - Page 67
's instructions. ● Be sure that all device connections are secure. ● Be sure that the device is receiving electrical power. ● Be sure that the device, especially if it is older, is compatible with the operating system. ● Be sure that the correct drivers are installed and updated. Troubleshooting 59 - HP G56-125NR | HP Notebook User Guide - SuSE Linux - Page 68
. ● Be sure that the cable or DSL modem and its power cord are properly connected and that the lights are on. ● Be sure of a paper clip (1) into the release access in the front bezel of the drive. 2. Press in gently on the paper clip until the disc tray is released, A Troubleshooting and support - HP G56-125NR | HP Notebook User Guide - SuSE Linux - Page 69
driver software may be missing or corrupted. 1. Remove any discs from the optical drive. to the devices until you locate your optical drive. If the drive is listed, it should be functioning correctly. blank area of the computer desktop, and select Screen resolution. b. Specify a primary display and - HP G56-125NR | HP Notebook User Guide - SuSE Linux - Page 70
new disc, and then burn from your hard drive. Contacting customer support If the information provided in this guide does not address your questions, you can contact HP Customer Support at: http://www.hp.com/go/contactHP. NOTE: For worldwide support, click Contact HP worldwide on the left side of the - HP G56-125NR | HP Notebook User Guide - SuSE Linux - Page 71
to the computer provide information you may need when you troubleshoot system problems or travel internationally with the computer: ● Serial number information available when you contact technical support. The serial number label is affixed inside the battery bay. ● Regulatory label-Provides - HP G56-125NR | HP Notebook User Guide - SuSE Linux - Page 72
B Routine care ● Cleaning the display ● Cleaning the TouchPad and keyboard 64 Appendix B Routine care - HP G56-125NR | HP Notebook User Guide - SuSE Linux - Page 73
water, cleaning fluids, or chemicals on the display. To remove smudges and lint, frequently clean the display with a soft damp, lint-free cloth. If the screen requires additional cleaning, use premoistened antistatic wipes or an antistatic - HP G56-125NR | HP Notebook User Guide - SuSE Linux - Page 74
Cleaning the TouchPad and keyboard Dirt and grease on the TouchPad can cause the pointer to jump around on the screen. To avoid this, clean the TouchPad with a damp cloth, and wash your hands frequently when using the computer. WARNING! To reduce the risk of electric - HP G56-125NR | HP Notebook User Guide - SuSE Linux - Page 75
be supplied by an AC or a DC power source. The AC power source must be rated at 100-240 V, 50-60 Hz. Although the computer can be powered from a standalone DC power source, it should be powered only with an AC adapter or a DC power source supplied and approved by HP for use with this computer. The - HP G56-125NR | HP Notebook User Guide - SuSE Linux - Page 76
Operating Nonoperating -15 m to 3,048 m -15 m to 12,192 m -50 ft to 10,000 ft -50 ft to 40,000 ft 68 Appendix C Specifications - HP G56-125NR | HP Notebook User Guide - SuSE Linux - Page 77
prevent damage to the computer, damage to a drive, or loss of information, observe these precautions: ● If removal or installation instructions direct you to unplug the computer, unplug it about static electricity or assistance with component removal or installation, contact Customer Support. 69 - HP G56-125NR | HP Notebook User Guide - SuSE Linux - Page 78
13 battery, replacing 32 bays battery 12 hard drive 12 Bluetooth device 19 Bluetooth label 63 buttons power 6 TouchPad 4 volume 26 C cables LAN 19 USB 44 calculator key, identifying 7 caps lock light, identifying 5 charging batteries 33 checking audio functions 26 compartments memory module - HP G56-125NR | HP Notebook User Guide - SuSE Linux - Page 79
12 lights caps lock 5 hard drive 9 optical drive 8 power 5, 8 TouchPad 4 webcam 10 wireless 5 local area network (LAN) connecting cable 19 low battery level 34 M media application key, identifying 7 media controls 24 memory module inserting 48 removing 48 memory module compartment identifying 12 - HP G56-125NR | HP Notebook User Guide - SuSE Linux - Page 80
USB devices connecting 44 description 44 removing 46 USB hubs 44 USB ports, identifying 8, 9, 44 V vents, identifying 9, 12 VGA port connecting 27 identifying 9 video, using 27 volume adjusting 26 buttons 26 keys 26 W web browser key, identifying 7 webcam light 10 using 26 wireless antennas 11
-
 1
1 -
 2
2 -
 3
3 -
 4
4 -
 5
5 -
 6
6 -
 7
7 -
8
-
9
-
10
-
11
-
12
-
13
-
14
-
15
-
16
-
17
-
18
-
19
-
20
-
21
-
22
-
23
-
24
-
25
-
26
-
27
-
28
-
29
-
30
-
31
-
32
-
33
-
34
-
35
-
36
-
37
-
38
-
39
-
40
-
41
-
42
-
43
-
44
-
45
-
46
-
47
-
48
-
49
-
50
-
51
-
52
-
53
-
54
-
55
-
56
-
57
-
58
-
59
-
60
-
61
-
62
-
63
-
64
-
65
-
66
-
67
-
68
-
69
-
70
-
71
-
72
-
73
-
74
-
75
-
76
-
77
-
78
-
79
-
80
 |
 |

HP Notebook User Guide