HP G62-229NR Service Guide - Page 57
Hard drive, available in the Hard Drive Hardware Kit.
 |
View all HP G62-229NR manuals
Add to My Manuals
Save this manual to your list of manuals |
Page 57 highlights
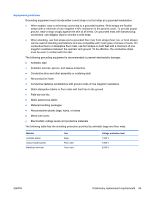
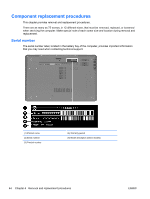
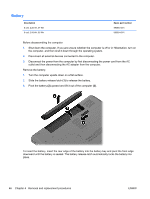
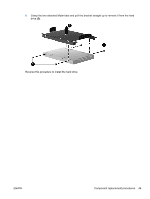
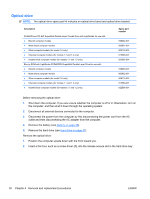
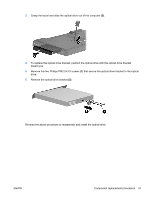
Hard drive NOTE: The hard drive spare part kit includes a hard drive bracket and hard drive connector. The hard drive bracket and hard drive connector, as well as the hard drive bracket screws, are also available in the Hard Drive Hardware Kit. Description 750 GB; 5400 RPM (for models 1.1 and 1.2 only) 640 GB; 5400 RPM 500 GB; 7200 RPM 320 GB; 7200 RPM 250 GB; 7200 RPM 160 GB; 7200 RPM (for models 1.0 and 1.2 only) Hard drive hardware kit (not illustrated, includes connector, bracket, and screws) Spare part number 603787-001 603785-001 634919-001 599055-001 599054-001 599053-001 599057-001 Before removing the hard drive: 1. Shut down the computer. If you are unsure whether the computer is off or in Hibernation, turn on the computer, and then shut it down through the operating system. 2. Disconnect all external devices connected to the computer. 3. Disconnect the power from the computer by first disconnecting the power cord from the AC outlet and then disconnecting the AC adapter from the computer. 4. Remove the battery (see Battery on page 46). Remove the hard drive: 1. Position the computer with the front toward you. 2. Loosen the two Phillips PM2.5×6.0 captive screws (1) that secure the hard drive cover to the computer. ENWW Component replacement procedures 47
-
 1
1 -
2
-
3
-
4
-
5
-
6
-
7
-
8
-
9
-
10
-
11
-
12
-
13
-
14
-
15
-
16
-
17
-
18
-
19
-
20
-
21
-
22
-
23
-
24
-
25
-
26
-
27
-
28
-
29
-
30
-
31
-
32
-
33
-
34
-
35
-
36
-
37
-
38
-
39
-
40
-
41
-
42
-
43
-
44
-
45
-
46
-
47
-
48
-
49
-
50
-
51
-
 52
52 -
 53
53 -
 54
54 -
 55
55 -
 56
56 -
 57
57 -
 58
58 -
 59
59 -
 60
60 -
 61
61 -
 62
62 -
63
-
64
-
65
-
66
-
67
-
68
-
69
-
70
-
71
-
72
-
73
-
74
-
75
-
76
-
77
-
78
-
79
-
80
-
81
-
82
-
83
-
84
-
85
-
86
-
87
-
88
-
89
-
90
-
91
-
92
-
93
-
94
-
95
-
96
-
97
-
98
-
99
-
100
-
101
-
102
-
103
-
104
-
105
-
106
-
107
-
108
-
109
-
110
-
111
-
112
-
113
-
114
-
115
-
116
-
117
-
118
-
119
-
120
-
121
-
122
-
123
-
124
-
125
-
126
-
127
-
128
-
129
-
130
-
131
-
132
-
133
-
134
-
135
-
136
-
137
-
138
-
139
-
140
-
141
-
142
-
143
-
144
-
145
-
146
 |
 |