HP Jetdirect 70x HP JetDirect 70X Home Print Server - (English) User's Guide - Page 17
Using WebScan
 |
View all HP Jetdirect 70x manuals
Add to My Manuals
Save this manual to your list of manuals |
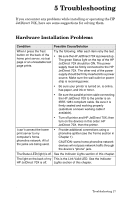
Page 17 highlights
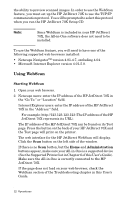
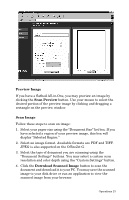
the ability to preview scanned images. In order to use the WebScan feature, you must set up the HP JetDirect 70X to use the TCP/IP communication protocol. You will be prompted to select this protocol when you run the HP JetDirect 70X Setup CD. Note: Since WebScan is included in your HP JetDirect 70X, the All-in-One software does not need to be installed. To use the WebScan feature, you will need to have one of the following supported web browsers installed: • Netscape NavigatorTM version 4.01-4.7, excluding 4.04. • Microsoft Internet Explorer version 4.01-5.0. Using WebScan Starting WebScan 1. Open your web browser. 2. Netscape users: enter the IP address of the HP JetDirect 70X in the "Go To:" or "Location" field. Internet Explorer users: enter the IP address of the HP JetDirect 70X in the "Address:" field. For example: http://123.123.123.123 (The IP address of the HP JetDirect 70X represents its URL). The IP address of the HP JetDirect 70X can be found on its Test page. Press the button on the back of your HP JetDirect 70X and the Test page will print on the printer. The web interface for the HP JetDirect WebScan will display. Click the Scan button on the left side of the window. If there is no Scan button, but the Home and Administration buttons appear, make sure your All-in-One is a supported device (See the Supported Printer list in Chapter 6 of this User's Guide). Make sure the All-in-One is correctly connected to the HP JetDirect 70X. If the page does not load on your web browser, check the WebScan section of the Troubleshooting chapter in this User's Guide. 12 Operations
-
 1
1 -
2
-
3
-
4
-
5
-
6
-
7
-
8
-
9
-
10
-
11
-
 12
12 -
 13
13 -
 14
14 -
 15
15 -
 16
16 -
 17
17 -
 18
18 -
 19
19 -
 20
20 -
 21
21 -
 22
22 -
23
-
24
-
25
-
26
-
27
-
28
-
29
-
30
-
31
-
32
-
33
-
34
-
35
-
36
-
37
 |
 |