HP LH4r HP Netserver LH 3 NetRAID-3Si Installation Guide - Page 55
Available unshared, Shared cluster disks, Remove, Network Name, Enable for cluster, Use for all
 |
View all HP LH4r manuals
Add to My Manuals
Save this manual to your list of manuals |
Page 55 highlights
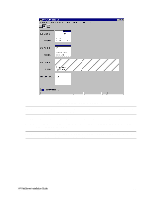
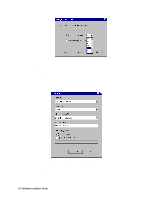
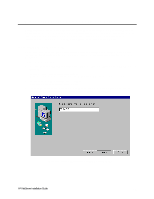
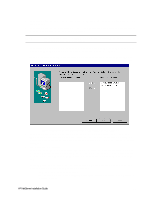
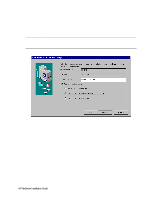
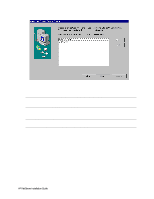
5. Setup prompts you for the location to store cluster files. Either accept the default or type a new location and click Next. 6. Setup prompts you for the cluster domain account. Provide a user name and password for an appropriate Microsoft Domain account for the cluster. Click Next. NOTE If you are unsure of the correct MS Domain account, consult the Windows NT documentation supplied with your system. 7. Setup presents a two-column list of Available unshared and Shared cluster disks. Use the Add and Remove buttons to place the disks in the desired columns. Click Next. Keep in mind that disks listed in the left column are reserved for the exclusive use of System B while disks listed in the right column are shared by both systems. Normally you would share all disks listed. Microsoft Cluster Server Setup, Assigning Shared Disks to the Cluster 8. Setup prompts you to select a disk (quorum disk) on which to store permanent cluster files. Cluster Administrator uses the disk you select to store synchronizing information about Systems A and B. The disk must always be available to the cluster. Select the disk that you will commit to keeping online then click Next. 9. Configure your LAN adapters. Setup scans the System's LAN adapters so they can be configured for cluster use and presents a dialog for each LAN adapter installed in your HP NetServer. Setup uses the IP address you specified during NT installation. Type a Network Name for the LAN Adapter, and check Enable for cluster use. HP recommends that you identify the LAN adapter according to use (for example, intra-cluster LAN). When you enable cluster use setup gives you three options: • Use for all communications Choose this option if you are configuring a client LAN adapter, and System A and B reside on the same IP subnet. HP NetServer Installation Guide 43
-
 1
1 -
2
-
3
-
4
-
5
-
6
-
7
-
8
-
9
-
10
-
11
-
12
-
13
-
14
-
15
-
16
-
17
-
18
-
19
-
20
-
21
-
22
-
23
-
24
-
25
-
26
-
27
-
28
-
29
-
30
-
31
-
32
-
33
-
34
-
35
-
36
-
37
-
38
-
39
-
40
-
41
-
42
-
43
-
44
-
45
-
46
-
47
-
48
-
49
-
 50
50 -
 51
51 -
 52
52 -
 53
53 -
 54
54 -
 55
55 -
 56
56 -
 57
57 -
 58
58 -
 59
59 -
 60
60 -
61
-
62
-
63
-
64
-
65
-
66
-
67
-
68
-
69
-
70
-
71
-
72
-
73
-
74
-
75
-
76
-
77
-
78
-
79
-
80
-
81
-
82
 |
 |
