HP LH4r HP Netserver LH 3 Surestore E Installation Guide - Page 59
Install Disk Modules
 |
View all HP LH4r manuals
Add to My Manuals
Save this manual to your list of manuals |
Page 59 highlights
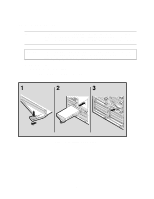
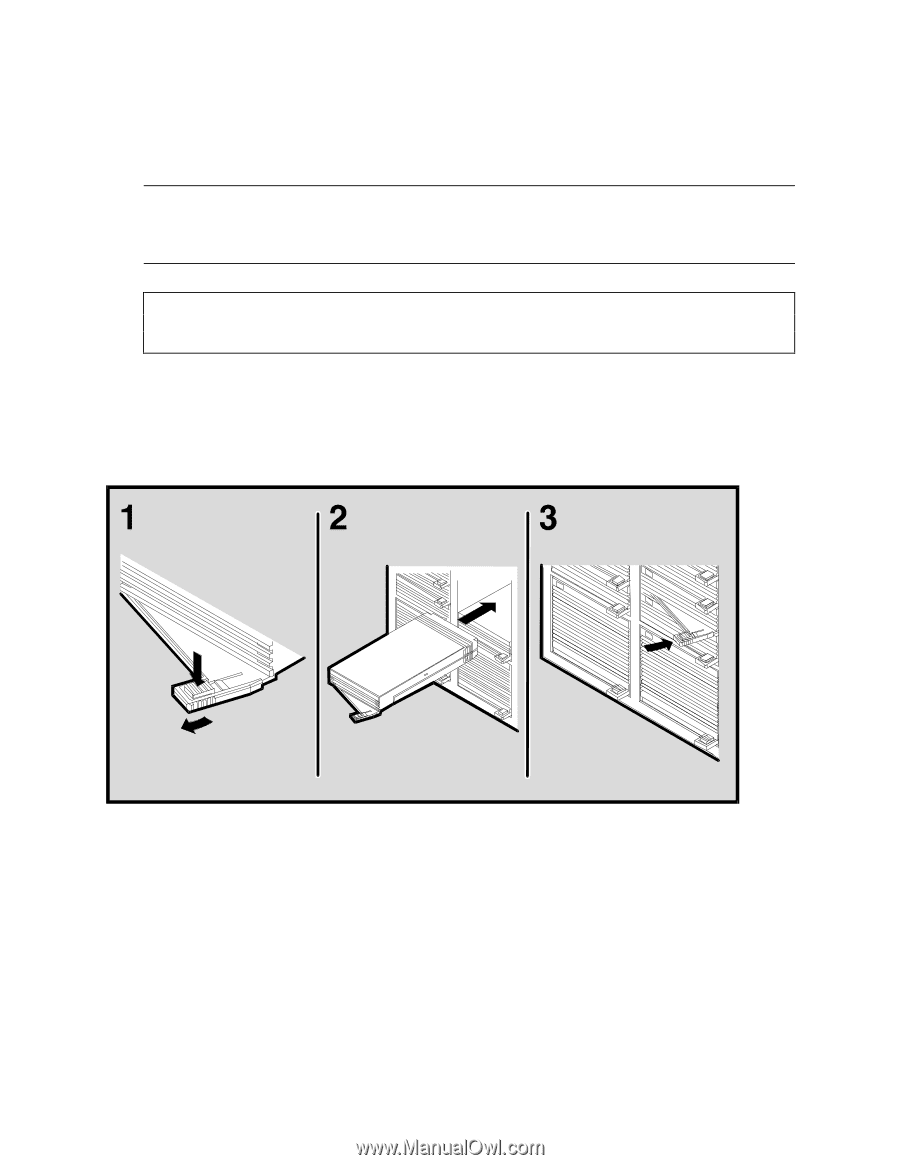
Install Disk Modules NOTE To improve enclosure cooling and balance the load on the internal SCSI buses, the disk modules should be installed from left to right and from top to bottom. Disk module SCSI addresses are automatically preset by the backplane inside the disk array enclosure upon insertion. CAUTION The module lever must be pulled all the way out or the module will jam in the slot upon insertion. Also, always handle the disk modules carefully when they are out of the disk array enclosure, since they are susceptible to shock and vibration. 1. Pull out the module lever. 2. Insert the module into the disk array. 3. Push in the module lever to lock the module in place. Figure 4. Installing Disk Modules 9
-
 1
1 -
2
-
3
-
4
-
5
-
6
-
7
-
8
-
9
-
10
-
11
-
12
-
13
-
14
-
15
-
16
-
17
-
18
-
19
-
20
-
21
-
22
-
23
-
24
-
25
-
26
-
27
-
28
-
29
-
30
-
31
-
32
-
33
-
34
-
35
-
36
-
37
-
38
-
39
-
40
-
41
-
42
-
43
-
44
-
45
-
46
-
47
-
48
-
49
-
50
-
51
-
52
-
53
-
 54
54 -
 55
55 -
 56
56 -
 57
57 -
 58
58 -
 59
59 -
 60
60 -
 61
61 -
 62
62 -
 63
63 -
 64
64 -
65
-
66
-
67
-
68
-
69
-
70
 |
 |
9
Install Disk Modules
NOTE
To improve enclosure cooling and balance the load on the internal SCSI buses, the disk
modules should be installed from left to right and from top to bottom. Disk module SCSI
addresses are automatically preset by the backplane inside the disk array enclosure upon
insertion.
CAUTION
The module lever must be pulled all the way out or the module will jam in the slot upon
insertion. Also, always handle the disk modules carefully when they are out of the disk
array enclosure, since they are susceptible to shock and vibration.
1.
Pull out the module lever.
2.
Insert the module into the disk array.
3.
Push in the module lever to lock the module in place.
Figure 4. Installing Disk Modules