HP LH4r HP Netserver LH 3 Surestore E Installation Guide - Page 63
Power Up the Disk Array, Con the Disk Array Using the Control Panel
 |
View all HP LH4r manuals
Add to My Manuals
Save this manual to your list of manuals |
Page 63 highlights
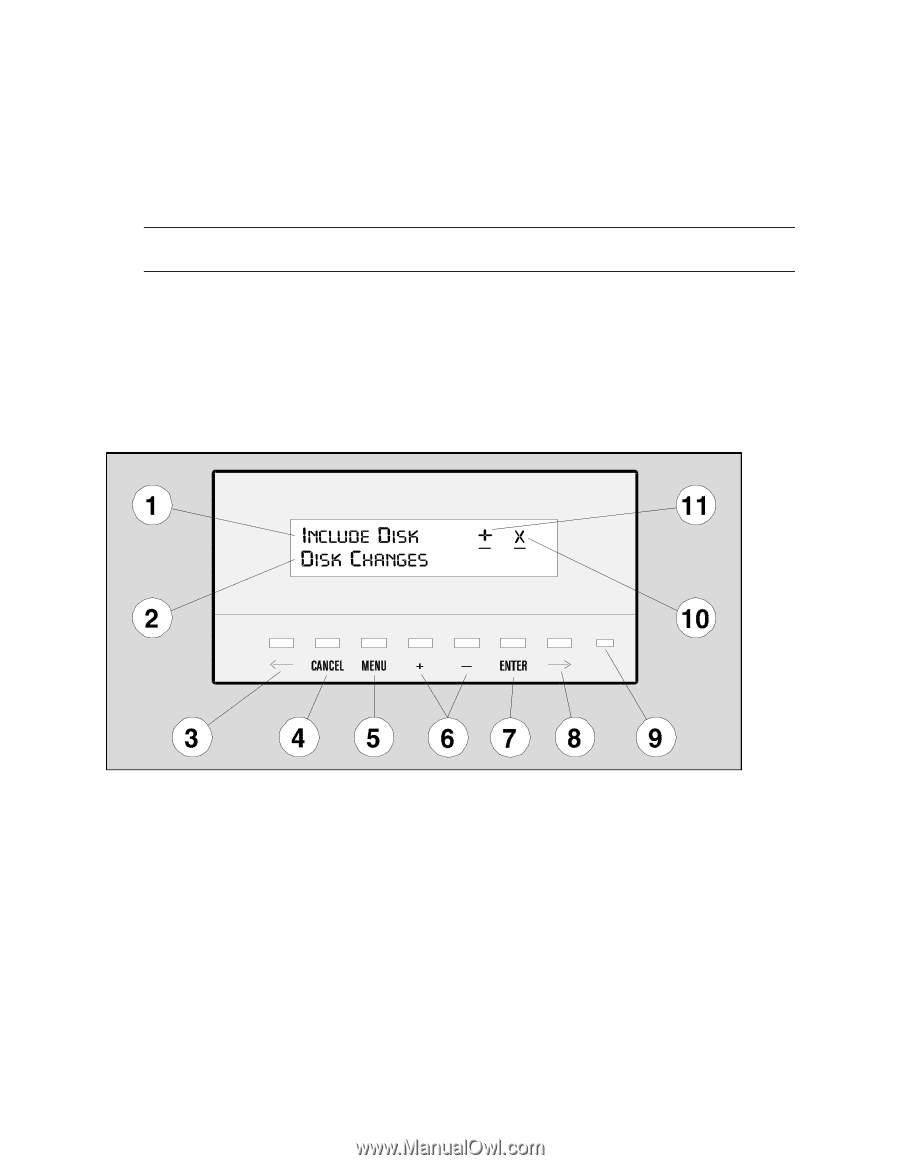
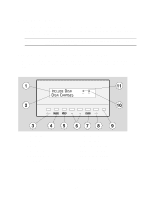
Power Up the Disk Array 1. Lift the power/standby switch door up, then press the power/standby switch to the power on (in) position. 2. Wait for the control panel to display "Ready", indicating that the disk array has successfully completed its initialization and is ready for use. NOTE If the controller batteries are fully discharged, it may take up seven minutes for the disk array to display "READY" status. Configure the Disk Array Using the Control Panel Several disk array operating settings must be configured before the disk array will operate properly in the Windows NT cluster environment. These settings are changed using the control panel located on the front of the disk array. 1 - Available Choice 2 - Selection History 3 - Scroll Text Left 4 - Cancel Selection 5 - Display Main Menu 6 - Scroll Menus/Items 7 - Select Menu/Items 8 - Scroll Text Right 9 - Control Panel Status Light 10 - Controller Indicator (x or y) 11 - Menu/Item Scroll Indicator Figure 8. Control Panel Display and Function Keys 13
-
 1
1 -
2
-
3
-
4
-
5
-
6
-
7
-
8
-
9
-
10
-
11
-
12
-
13
-
14
-
15
-
16
-
17
-
18
-
19
-
20
-
21
-
22
-
23
-
24
-
25
-
26
-
27
-
28
-
29
-
30
-
31
-
32
-
33
-
34
-
35
-
36
-
37
-
38
-
39
-
40
-
41
-
42
-
43
-
44
-
45
-
46
-
47
-
48
-
49
-
50
-
51
-
52
-
53
-
54
-
55
-
56
-
57
-
 58
58 -
 59
59 -
 60
60 -
 61
61 -
 62
62 -
 63
63 -
 64
64 -
 65
65 -
 66
66 -
 67
67 -
 68
68 -
69
-
70
 |
 |