HP Model 744 HP Model 744 Owner's Guide - Page 48
GSC Expansion Kit, Preliminary Requirements, GSC Expansion Kit Installation
 |
View all HP Model 744 manuals
Add to My Manuals
Save this manual to your list of manuals |
Page 48 highlights
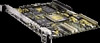
Installing Accessories GSC Expansion Kit GSC Expansion Kit The GSC expansion kit consists of two parts: the adapter fixture and the front panel extension. This section provides step-by-step instructions for installing the GSC expansion kit onto the Model 744. Preliminary Requirements Perform the following steps before installing the adapter (GSC expansion kit) fixture onto your Model 744 Board Computer: 1 If the Model 744 Board Computer is already installed in your system chassis, you must remove it. See Chapter 3 of this manual for instructions on removing and replacing the Model 744. 2 Place the Model 744 on a static-free mat on a clean, level surface. GSC Expansion Kit Installation Follow these steps to install the expansion kit onto the Model 744: 1 Place the expansion adapter so that you line up the four M2.5x12 screw holes that flank the DIN connectors. See Figure 2-2. 2 Insert the four M2.5x12 screws one at a time, finger tighten, then snug down with a screwdriver. Do not overtighten. 3 Insert the two M2.5x6 screws, finger tighten, then snug down with a screwdriver. 4 Remove the copper EMI gasketing from the front panel of the Model 744 Board Computer. 5 Place the panel extension over the front panel so that the four tabs on the bottom of the extension panel line up and slip into their respective slots on the top of the front panel. 6 Insert the four front panel screws, finger tighten, then snug down with a screwdriver, as shown in Figure 2-3. 2-8
-
 1
1 -
2
-
3
-
4
-
5
-
6
-
7
-
8
-
9
-
10
-
11
-
12
-
13
-
14
-
15
-
16
-
17
-
18
-
19
-
20
-
21
-
22
-
23
-
24
-
25
-
26
-
27
-
28
-
29
-
30
-
31
-
32
-
33
-
34
-
35
-
36
-
37
-
38
-
39
-
40
-
41
-
42
-
 43
43 -
 44
44 -
 45
45 -
 46
46 -
 47
47 -
 48
48 -
 49
49 -
 50
50 -
 51
51 -
 52
52 -
 53
53 -
54
-
55
-
56
-
57
-
58
-
59
-
60
-
61
-
62
-
63
-
64
-
65
-
66
-
67
-
68
-
69
-
70
-
71
-
72
-
73
-
74
-
75
-
76
-
77
-
78
-
79
-
80
-
81
-
82
-
83
-
84
-
85
-
86
-
87
-
88
-
89
-
90
-
91
-
92
-
93
-
94
-
95
-
96
-
97
-
98
-
99
-
100
-
101
-
102
-
103
-
104
-
105
-
106
-
107
-
108
-
109
-
110
-
111
-
112
-
113
-
114
-
115
-
116
-
117
-
118
-
119
-
120
-
121
-
122
-
123
-
124
-
125
-
126
-
127
-
128
-
129
-
130
-
131
-
132
-
133
-
134
-
135
-
136
-
137
-
138
-
139
-
140
-
141
-
142
-
143
-
144
-
145
-
146
-
147
-
148
-
149
-
150
-
151
-
152
-
153
-
154
 |
 |
