HP OmniBook 5500 HP OmniBook 5500 - User Guide, Windows for Workgroups - Page 21
To reboot from drive C, To reboot from a floppy disk, To reset the OmniBook
 |
View all HP OmniBook 5500 manuals
Add to My Manuals
Save this manual to your list of manuals |
Page 21 highlights
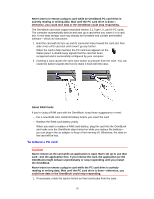
To reboot from drive C Rebooting restarts the OmniBook software-your current work session is discarded and the operating system rereads the system files to determine the proper configuration. 1. If possible, exit Windows. 2. If the OmniBook floppy drive is installed, make sure there's no disk in the drive. 3. Press CTRL+ALT+DEL. 4. When the OmniBook displays a list of configurations, press SPACEBAR to stop the 5-second time-out-then press a number key and ENTER to select a particular configuration. If you do nothing, the OmniBook uses its default configuration, option 1. If your system doesn't reboot properly, you can reboot from the floppy drive using the Support Utility disk that came with the OmniBook. See "To reboot from a floppy disk." To reboot from a floppy disk 1. Install the OmniBook floppy drive. See "To install the floppy drive." 2. Insert a boot disk-you can use your Support Utility disk. 3. Press CTRL+ALT+DEL to reboot from the floppy disk. To reset the OmniBook If the OmniBook unexpectedly hangs up in a state where nothing seems to work, you may need to reset it. When you reset the system, the OmniBook • Discards your current work session. • Resets and checks the hardware. • Rereads the system files. 1. If the floppy drive is installed, make sure there's no disk in the drive. 2. Insert a ball-point pen tip or other slender object into the small opening on the left side of the computer below the ac adapter socket. Push in momentarily-the system resets and reboots. 21
-
 1
1 -
2
-
3
-
4
-
5
-
6
-
7
-
8
-
9
-
10
-
11
-
12
-
13
-
14
-
15
-
 16
16 -
 17
17 -
 18
18 -
 19
19 -
 20
20 -
 21
21 -
 22
22 -
 23
23 -
 24
24 -
 25
25 -
 26
26 -
27
-
28
-
29
-
30
-
31
-
32
-
33
-
34
-
35
-
36
-
37
-
38
-
39
-
40
-
41
-
42
-
43
-
44
-
45
-
46
-
47
-
48
-
49
-
50
-
51
-
52
-
53
-
54
-
55
-
56
-
57
-
58
-
59
-
60
-
61
-
62
-
63
-
64
-
65
-
66
-
67
-
68
-
69
-
70
-
71
-
72
-
73
-
74
-
75
-
76
-
77
-
78
-
79
-
80
-
81
-
82
-
83
-
84
-
85
-
86
-
87
-
88
-
89
-
90
-
91
 |
 |
