HP P1505 HP LaserJet P1000 and P1500 Series - Software Technical Reference - Page 24
Con the Macintosh print driver, CD language groupings - printer driver
 |
UPC - 883585164776
View all HP P1505 manuals
Add to My Manuals
Save this manual to your list of manuals |
Page 24 highlights
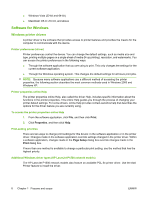
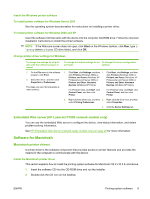
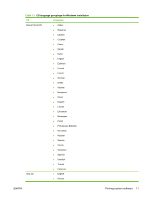
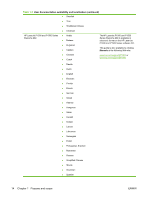
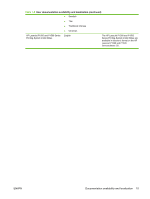
3. Double-click the Installer icon. 4. Follow the instructions on the computer screen. 5. Print a test page or a page from any software program to make sure that the software is correctly installed. If installation fails, reinstall the software. If this fails, see the Known Issues and Workarounds section of the Install Notes. The Install Notes are located on the software CD or at the support Web site (www.hp.com/support/ljP1000 or www.hp.com/support/ljP1500). Configure the Macintosh print driver Use one of the following methods to open the Macintosh printer driver from your computer: Operating System To change the settings for all print jobs until the software program is closed To change the print job default settings (for example, turn on Print on Both Sides by default) To change the configuration settings (for example, add a tray or enable/disable manual two-sided printing) Macintosh OS X v10.3.9 1. On the File menu, click Print. 2. Change the settings that you want on the various pop-up menus. 1. On the File menu, click Print. 2. Change the settings that you want on the various pop-up menus. 1. Open Printer Setup Utility by selecting the hard drive, clicking Applications, clicking Utilities, then double-clicking Printer Setup Utility. 3. On the Presets pop-up 2. menu, click Save as and type a name for the preset. 3. These settings are saved in the Presets menu. To use the new settings, you must select the saved preset option every time you open a program and print. Click the print queue. On the Printers menu, click Show Info. Macintosh OS X v10.4.3 and above 1. On the File menu, click Print. 2. Change the settings that you want on the various pop-up menus. 1. On the File menu, click Print. 2. Change the settings that you want on the various pop-up menus. 1. Open Printer Setup Utility by selecting the hard drive, clicking Applications, clicking Utilities, then double-clicking Printer Setup Utility. 3. On the Presets pop-up 2. Click the print queue. menu, click Save as and type a name for the preset. 3. On the Printers menu, click Show Info. 4. These settings are saved in the Presets menu. To use the new settings, you must select the saved preset option every time you open a program and print. CD language groupings The following table presents the Windows language groups that are included on the software CD for the product. 10 Chapter 1 Purpose and scope ENWW
-
 1
1 -
2
-
3
-
4
-
5
-
6
-
7
-
8
-
9
-
10
-
11
-
12
-
13
-
14
-
15
-
16
-
17
-
18
-
 19
19 -
 20
20 -
 21
21 -
 22
22 -
 23
23 -
 24
24 -
 25
25 -
 26
26 -
 27
27 -
 28
28 -
 29
29 -
30
-
31
-
32
-
33
-
34
-
35
-
36
-
37
-
38
-
39
-
40
-
41
-
42
-
43
-
44
-
45
-
46
-
47
-
48
-
49
-
50
-
51
-
52
-
53
-
54
-
55
-
56
-
57
-
58
-
59
-
60
-
61
-
62
-
63
-
64
-
65
-
66
-
67
-
68
-
69
-
70
-
71
-
72
-
73
-
74
-
75
-
76
-
77
-
78
-
79
-
80
-
81
-
82
-
83
-
84
-
85
-
86
-
87
-
88
-
89
-
90
-
91
-
92
-
93
-
94
-
95
-
96
-
97
-
98
-
99
-
100
-
101
-
102
-
103
-
104
-
105
-
106
-
107
-
108
-
109
-
110
-
111
-
112
-
113
-
114
-
115
-
116
-
117
-
118
-
119
-
120
-
121
-
122
-
123
-
124
-
125
-
126
-
127
-
128
-
129
-
130
-
131
-
132
-
133
-
134
-
135
-
136
-
137
-
138
-
139
-
140
-
141
-
142
-
143
-
144
-
145
-
146
-
147
-
148
-
149
-
150
-
151
-
152
-
153
-
154
 |
 |