HP Pavilion 14-ab000 ab000 through 14 - ab099 Maintenance and Service Guide 1 - Page 16
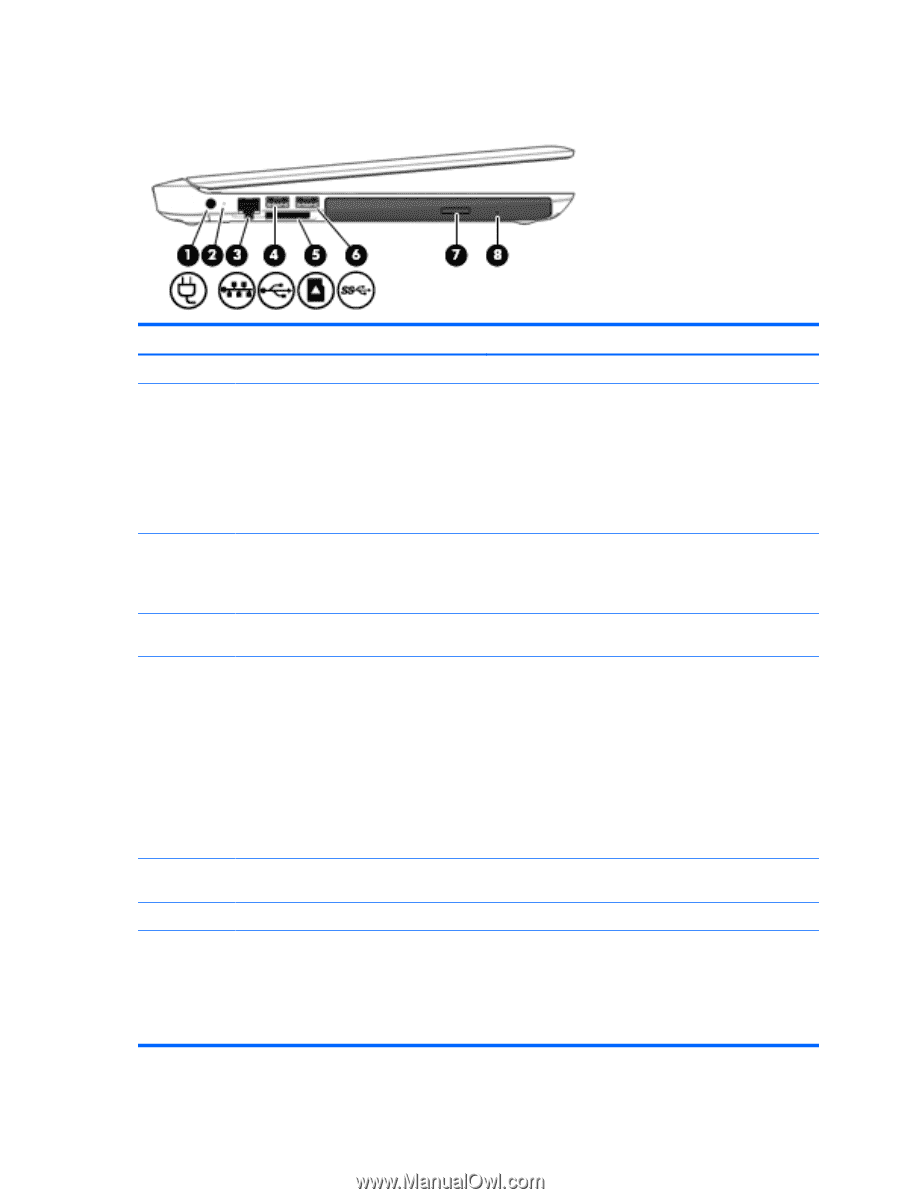
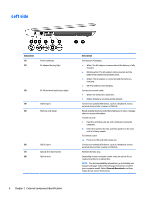
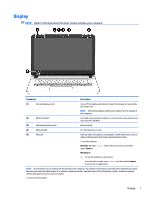
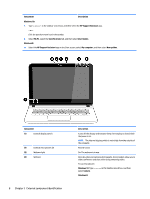
Left side
 |
View all HP Pavilion 14-ab000 manuals
Add to My Manuals
Save this manual to your list of manuals |
Page 16 highlights
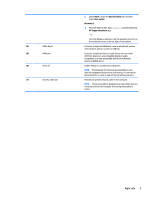
Left side Component (1) (2) Power connector AC adapter/battery light (3) RJ-45 (network) jack/status lights (4) USB 2.0 port (5) Memory card reader (6) USB 3.0 port (7) Optical drive eject button (8) Optical drive Description Connects an AC adapter. ● White: The AC adapter is connected and the battery is fully charged. ● Blinking white: The AC adapter is disconnected and the battery has reached a low battery level. ● Amber: The AC adapter is connected and the battery is charging. ● Off: The battery is not charging. Connects a network cable. ● White: The network is connected. ● Amber: Activity is occurring on the network. Connects an optional USB device, such as a keyboard, mouse, external drive, printer, scanner or USB hub. Reads optional memory cards that enable you to store, manage, share or access information. To insert a card: 1. Hold the card label-side up, with connectors facing the computer. 2. Insert the card into the slot, and then push in on the card until it is firmly seated. To remove a card: ▲ Press in on the card until it pops out. Connects an optional USB device, such as a keyboard, mouse, external drive, printer, scanner or USB hub. Releases the disc tray. Depending on your computer model, reads an optical disc or reads and writes to an optical disc. NOTE: For disc compatibility information, go to the Help and Support web page. Follow the web page instructions to select your computer model. Select Drivers & Downloads, and then follow the on-screen instructions. 6 Chapter 2 External component identification
-
 1
1 -
2
-
3
-
4
-
5
-
6
-
7
-
8
-
9
-
10
-
 11
11 -
 12
12 -
 13
13 -
 14
14 -
 15
15 -
 16
16 -
 17
17 -
 18
18 -
 19
19 -
 20
20 -
 21
21 -
22
-
23
-
24
-
25
-
26
-
27
-
28
-
29
-
30
-
31
-
32
-
33
-
34
-
35
-
36
-
37
-
38
-
39
-
40
-
41
-
42
-
43
-
44
-
45
-
46
-
47
-
48
-
49
-
50
-
51
-
52
-
53
-
54
-
55
-
56
-
57
-
58
-
59
-
60
-
61
-
62
-
63
-
64
-
65
-
66
-
67
-
68
-
69
-
70
-
71
-
72
-
73
-
74
-
75
-
76
-
77
-
78
-
79
-
80
-
81
-
82
-
83
-
84
-
85
-
86
-
87
-
88
-
89
-
90
-
91
-
92
-
93
-
94
-
95
-
96
-
97
-
98
-
99
-
100
-
101
-
102
-
103
-
104
-
105
-
106
-
107
-
108
-
109
-
110
-
111
-
112
 |
 |