HP Pavilion 14-n100 Maintenance and Service Guide - Page 95
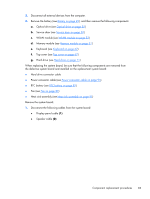
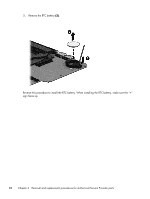
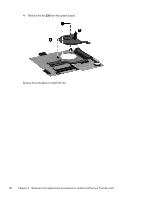
Turn the system board upside down, with the front toward you., and to the right at an angle.
 |
View all HP Pavilion 14-n100 manuals
Add to My Manuals
Save this manual to your list of manuals |
Page 95 highlights
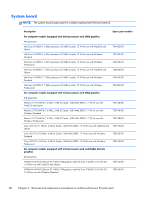
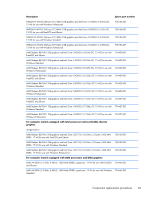
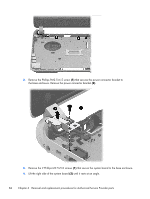
5. Carefully remove from the power connector (3). Remove the system board (4) by sliding it up and to the right at an angle. 6. Remove the hard drive connector cable: a. Turn the system board upside down, with the front toward you. Component replacement procedures 85
-
 1
1 -
2
-
3
-
4
-
5
-
6
-
7
-
8
-
9
-
10
-
11
-
12
-
13
-
14
-
15
-
16
-
17
-
18
-
19
-
20
-
21
-
22
-
23
-
24
-
25
-
26
-
27
-
28
-
29
-
30
-
31
-
32
-
33
-
34
-
35
-
36
-
37
-
38
-
39
-
40
-
41
-
42
-
43
-
44
-
45
-
46
-
47
-
48
-
49
-
50
-
51
-
52
-
53
-
54
-
55
-
56
-
57
-
58
-
59
-
60
-
61
-
62
-
63
-
64
-
65
-
66
-
67
-
68
-
69
-
70
-
71
-
72
-
73
-
74
-
75
-
76
-
77
-
78
-
79
-
80
-
81
-
82
-
83
-
84
-
85
-
86
-
87
-
88
-
89
-
 90
90 -
 91
91 -
 92
92 -
 93
93 -
 94
94 -
 95
95 -
 96
96 -
 97
97 -
 98
98 -
 99
99 -
 100
100 -
101
-
102
-
103
-
104
-
105
-
106
-
107
-
108
-
109
-
110
-
111
-
112
-
113
-
114
-
115
-
116
-
117
-
118
-
119
-
120
-
121
-
122
-
123
-
124
-
125
-
126
-
127
-
128
-
129
-
130
-
131
-
132
-
133
-
134
-
135
-
136
-
137
-
138
-
139
-
140
-
141
-
142
 |
 |
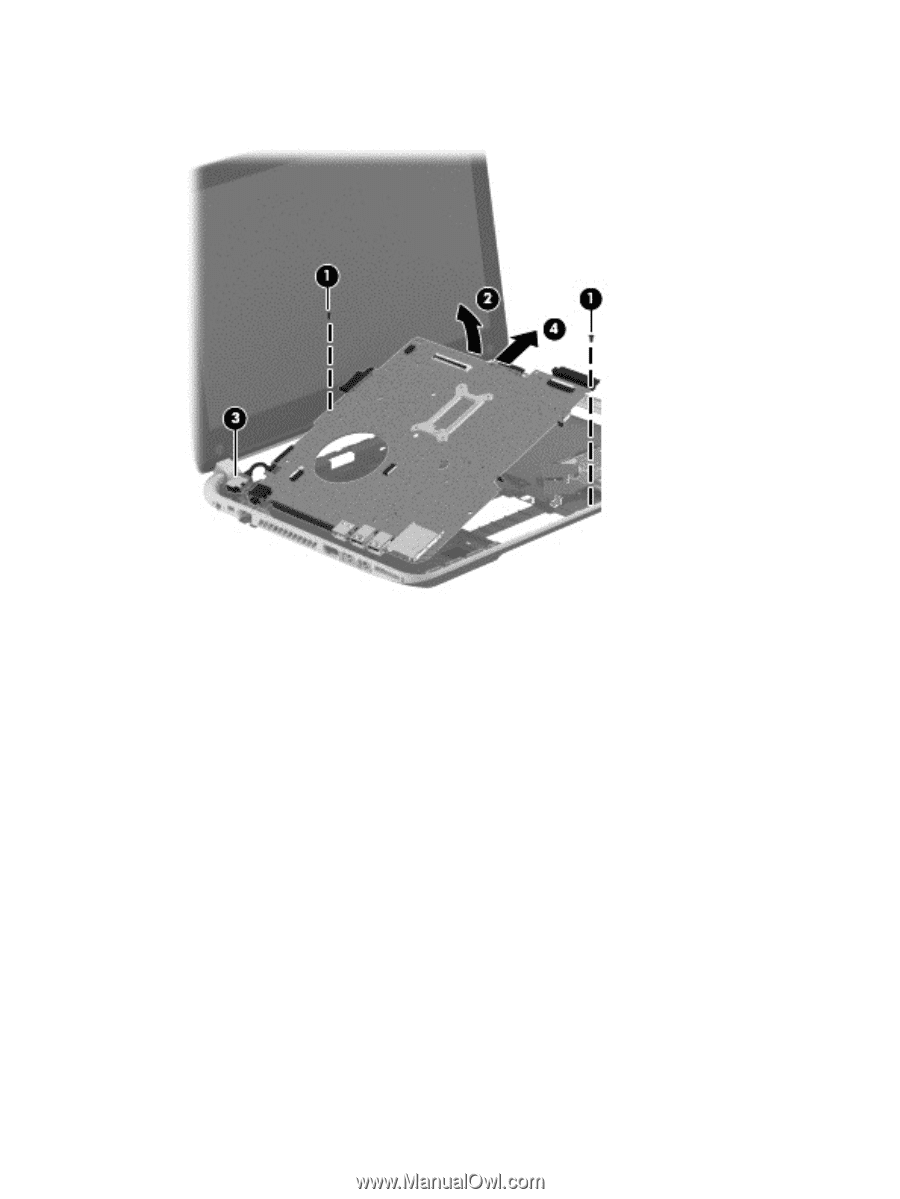
5.
Carefully remove from the power connector
(3)
. Remove the system board
(4)
by sliding it up
and to the right at an angle.
6.
Remove the hard drive connector cable:
a.
Turn the system board upside down, with the front toward you.
Component replacement procedures
85