HP Pavilion Slimline s5100 Upgrade and Service - Page 18
Removing and Replacing the Hard Disk Drive, Before You Begin, Read This First
 |
View all HP Pavilion Slimline s5100 manuals
Add to My Manuals
Save this manual to your list of manuals |
Page 18 highlights
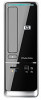
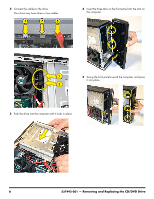
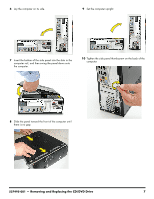
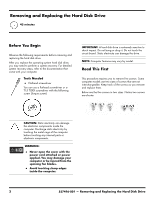
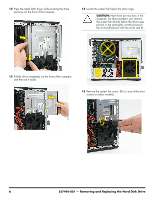
Removing and Replacing the Hard Disk Drive 45 minutes Before You Begin Observe the following requirements before removing and replacing the hard disk drive. After you replace the operating system hard disk drive, you may need to perform a system recovery. For detailed system recovery steps, refer to the documentation that came with your computer. Tools Needed Flathead screwdriver You can use a flathead screwdriver or a T15 TORX screwdriver with the following screw (Torque screw). IMPORTANT: A hard disk drive is extremely sensitive to shock impact. Do not bang or drop it. Do not touch the circuit board. Static electricity can damage the drive. NOTE: Computer features may vary by model. Read This First This procedure requires you to remove five screws. Some computer models use two sizes of screws that are not interchangeable. Keep track of the screws as you remove and replace them. Below are the five screws in two sizes. Notice two screws are shorter. CAUTION: Static electricity can damage the electronic components inside the computer. Discharge static electricity by touching the metal cage of the computer before touching any internal parts or electronic components. WARNING: Never open the cover with the power cord attached or power applied. You may damage your computer or be injured from the spinning fan blades. Avoid touching sharp edges inside the computer. 2 537496-001 - Removing and Replacing the Hard Disk Drive
-
 1
1 -
2
-
3
-
4
-
5
-
6
-
7
-
8
-
9
-
10
-
11
-
12
-
 13
13 -
 14
14 -
 15
15 -
 16
16 -
 17
17 -
 18
18 -
 19
19 -
 20
20 -
 21
21 -
 22
22 -
 23
23 -
24
-
25
-
26
-
27
-
28
-
29
-
30
-
31
-
32
-
33
-
34
-
35
-
36
-
37
-
38
-
39
-
40
-
41
-
42
-
43
-
44
-
45
-
46
-
47
-
48
-
49
-
50
-
51
-
52
-
53
-
54
-
55
-
56
 |
 |