HP Pavilion Slimline s5100 Upgrade and Service - Page 26
the computer, slide the drive cage up to engage the, aligns under the screw hole in the computer rai1
 |
View all HP Pavilion Slimline s5100 manuals
Add to My Manuals
Save this manual to your list of manuals |
Page 26 highlights
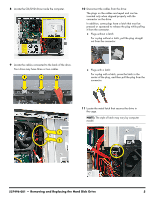
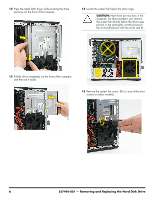
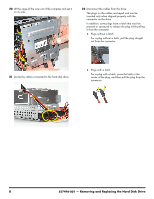
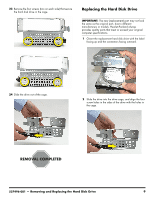
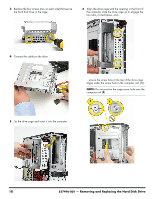
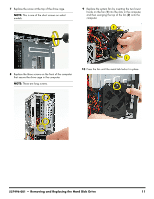
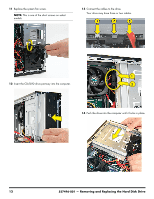
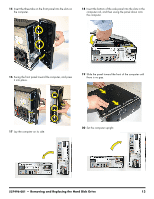
3 Replace the four screws (two on each side) that secure the hard disk drive in the cage. 6 Align the drive cage with the opening in the front of the computer, slide the drive cage up to engage the two tabs, circled below, and... 4 Connect the cables to the drive. ...ensure the screw hole at the top of the drive cage aligns under the screw hole in the computer rai1 (1). NOTE: Do not position the cage screw hole over the computer rail (2). 5 Tip the drive cage and insert it into the computer. 10 537496-001 - Removing and Replacing the Hard Disk Drive
-
 1
1 -
2
-
3
-
4
-
5
-
6
-
7
-
8
-
9
-
10
-
11
-
12
-
13
-
14
-
15
-
16
-
17
-
18
-
19
-
20
-
 21
21 -
 22
22 -
 23
23 -
 24
24 -
 25
25 -
 26
26 -
 27
27 -
 28
28 -
 29
29 -
 30
30 -
 31
31 -
32
-
33
-
34
-
35
-
36
-
37
-
38
-
39
-
40
-
41
-
42
-
43
-
44
-
45
-
46
-
47
-
48
-
49
-
50
-
51
-
52
-
53
-
54
-
55
-
56
 |
 |
10
537496-001
— Removing and Replacing the Hard Disk Drive
3
Replace the four screws (two on each side) that secure
the hard disk drive in the cage.
4
Connect the cables to the drive.
5
Tip the drive cage and insert it into the computer.
6
Align the drive cage with the opening in the front of
the computer, slide the drive cage up to engage the
two tabs, circled below, and...
...ensure the screw hole at the top of the drive cage
aligns under the screw hole in the computer rai1 (
1
).
NOTE:
Do not position the cage screw hole over the
computer rail (
2
).