HP Pavilion Slimline s5100 Upgrade and Service - Page 24
Plugs without a latch, it from the connector.
 |
View all HP Pavilion Slimline s5100 manuals
Add to My Manuals
Save this manual to your list of manuals |
Page 24 highlights
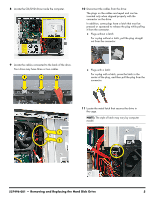
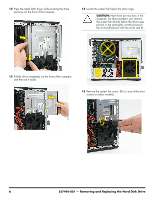
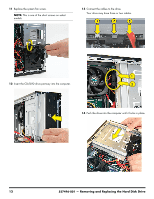
20 Lift the cage all the way out of the computer and set it on its side. 22 Disconnect the cables from the drive: The plugs on the cables are keyed and can be inserted only when aligned properly with the connector on the drive. In addition, some plugs have a latch that must be pressed or squeezed to release the plug while pulling it from the connector. Plugs without a latch: For a plug without a latch, pull the plug straight out from the connector. 21 Locate the cables connected to the hard disk drive. Plugs with a latch: For a plug with a latch, press the latch in the center of the plug, and then pull the plug from the connector. 8 537496-001 - Removing and Replacing the Hard Disk Drive
-
 1
1 -
2
-
3
-
4
-
5
-
6
-
7
-
8
-
9
-
10
-
11
-
12
-
13
-
14
-
15
-
16
-
17
-
18
-
 19
19 -
 20
20 -
 21
21 -
 22
22 -
 23
23 -
 24
24 -
 25
25 -
 26
26 -
 27
27 -
 28
28 -
 29
29 -
30
-
31
-
32
-
33
-
34
-
35
-
36
-
37
-
38
-
39
-
40
-
41
-
42
-
43
-
44
-
45
-
46
-
47
-
48
-
49
-
50
-
51
-
52
-
53
-
54
-
55
-
56
 |
 |
8
537496-001
— Removing and Replacing the Hard Disk Drive
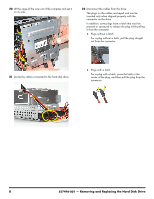
20
Lift the cage all the way out of the computer and set it
on its side.
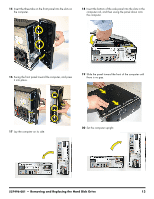
21
Locate the cables connected to the hard disk drive.
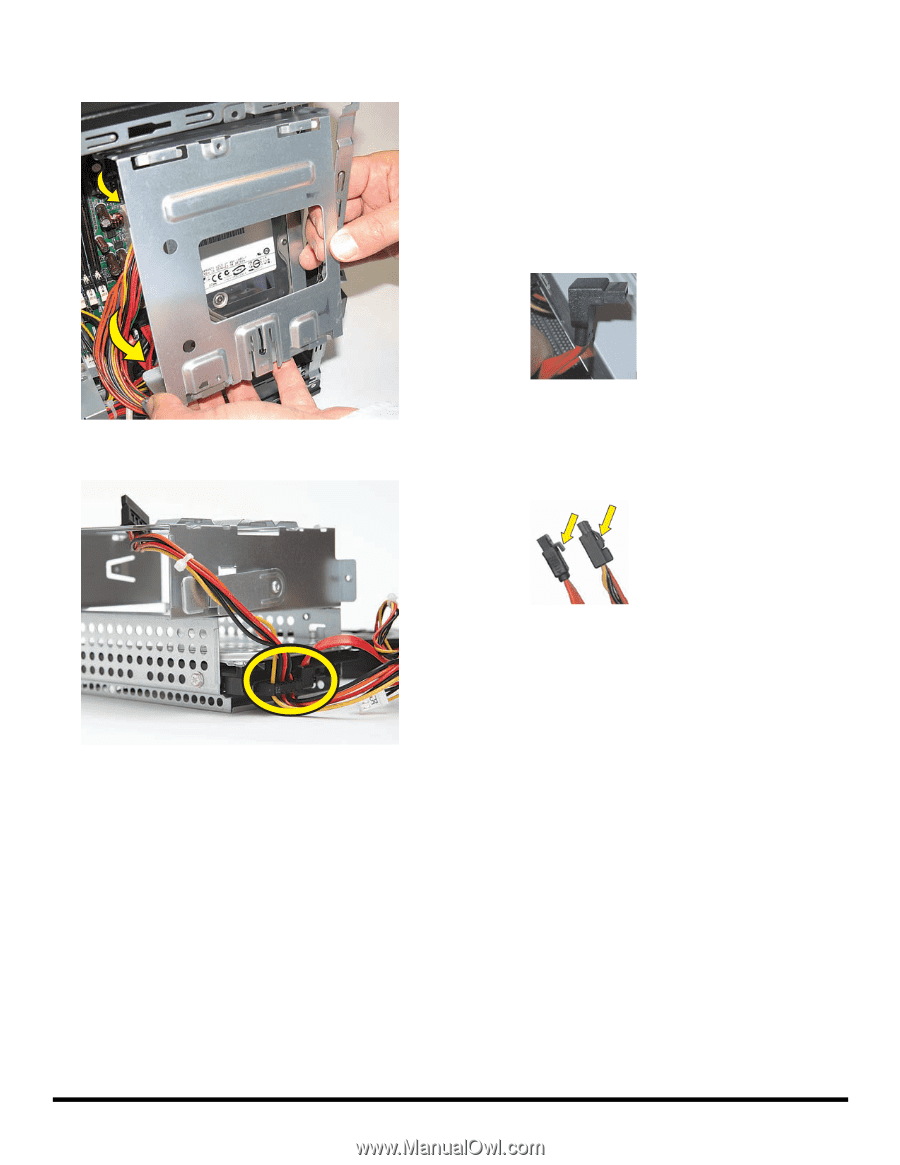
22
Disconnect the cables from the drive:
The plugs on the cables are keyed and can be
inserted only when aligned properly with the
connector on the drive.
In addition, some plugs have a latch that must be
pressed or squeezed to release the plug while pulling
it from the connector.
±
Plugs without a latch:
For a plug without a latch, pull the plug straight
out from the connector.
±
Plugs with a latch:
For a plug with a latch, press the latch in the
center of the plug, and then pull the plug from the
connector.