HP Pavilion Slimline s5100 Upgrade and Service - Page 22
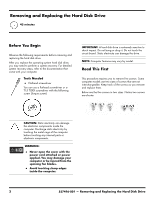
CAUTION, computer. For this procedure, you remove
 |
View all HP Pavilion Slimline s5100 manuals
Add to My Manuals
Save this manual to your list of manuals |
Page 22 highlights
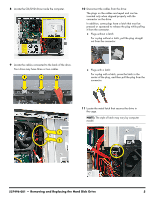
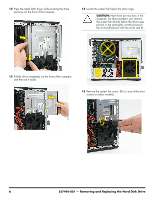
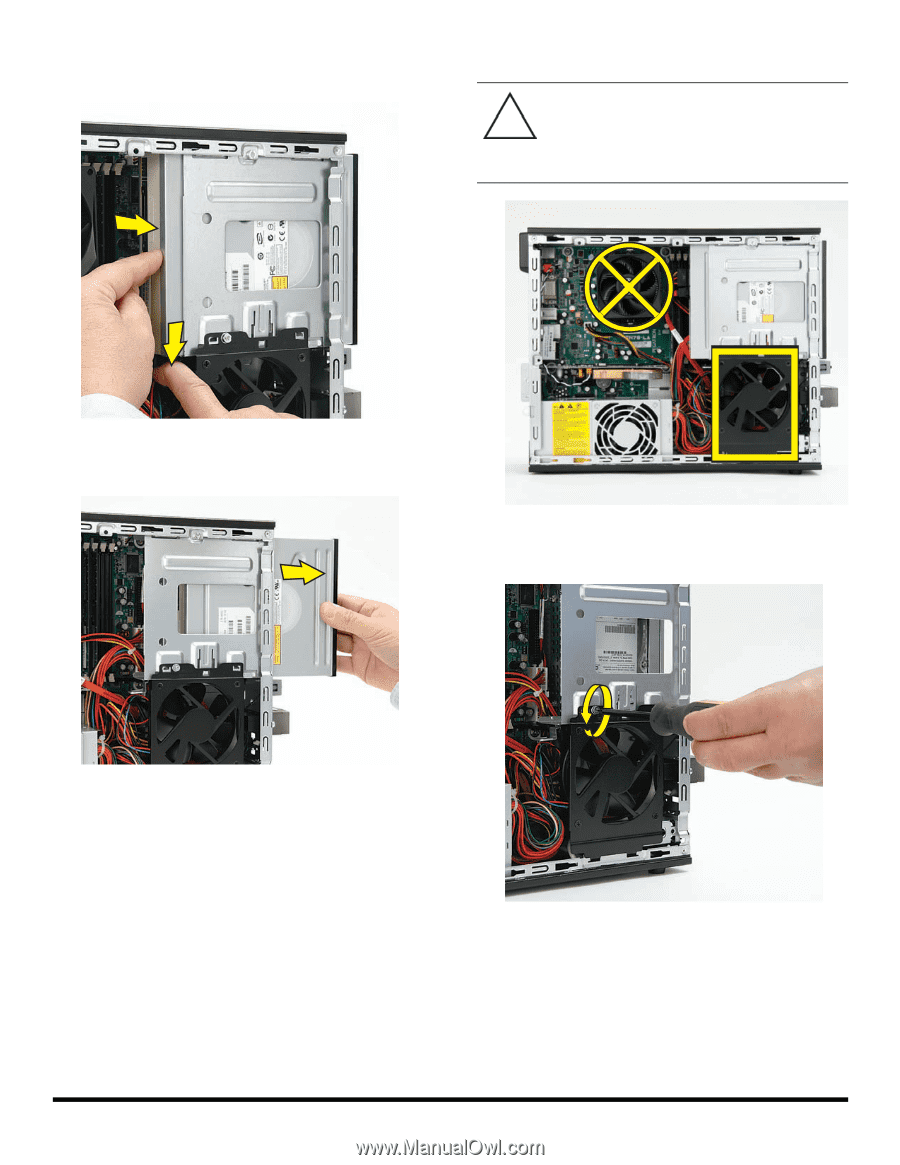
12 Press the metal latch down while pushing the drive partway out the front of the computer. 14 Locate the system fan below the drive cage. CAUTION: Note there are two fans in the computer. For this procedure, you remove the system fan directly below the drive cage (shown in the rectangle), not the processor fan to the left (shown with the circle and X). 13 Pull the drive completely out the front of the computer, and then set it aside. 15 Remove the system fan screw. (This is one of the short screws on select models.) 6 537496-001 - Removing and Replacing the Hard Disk Drive
-
 1
1 -
2
-
3
-
4
-
5
-
6
-
7
-
8
-
9
-
10
-
11
-
12
-
13
-
14
-
15
-
16
-
 17
17 -
 18
18 -
 19
19 -
 20
20 -
 21
21 -
 22
22 -
 23
23 -
 24
24 -
 25
25 -
 26
26 -
 27
27 -
28
-
29
-
30
-
31
-
32
-
33
-
34
-
35
-
36
-
37
-
38
-
39
-
40
-
41
-
42
-
43
-
44
-
45
-
46
-
47
-
48
-
49
-
50
-
51
-
52
-
53
-
54
-
55
-
56
 |
 |
6
537496-001
— Removing and Replacing the Hard Disk Drive
12
Press the metal latch down while pushing the drive
partway out the front of the computer.
13
Pull the drive completely out the front of the computer,
and then set it aside.
14
Locate the system fan below the drive cage.
15
Remove the system fan screw. (This is one of the short
screws on select models.)
CAUTION:
Note there are two fans in the
computer. For this procedure, you remove
the system fan directly below the drive cage
(shown in the rectangle), not the processor
fan to the left (shown with the circle and X).