HP Pavilion Slimline s5100 Upgrade and Service - Page 23
one of the short screws on select models., Remove the screw at the top of the drive cage. This is
 |
View all HP Pavilion Slimline s5100 manuals
Add to My Manuals
Save this manual to your list of manuals |
Page 23 highlights
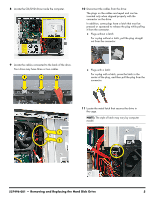
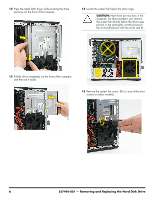
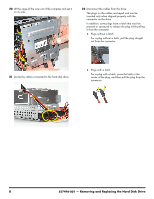
16 Push in the metal tab (1) above the fan as you tip out the top of the fan (2), and lift the fan (3) partway out of the computer. Without disconnecting the fan, set it aside. 18 Remove the three screws on the front of the computer that secure the drive cage in the computer. (These are long screws.) 1 2 3 17 Remove the screw at the top of the drive cage. (This is one of the short screws on select models.) 19 Remove the drive cage by moving it downward to release it, and then lifting it partway out of the computer. 537496-001 - Removing and Replacing the Hard Disk Drive 7
-
 1
1 -
2
-
3
-
4
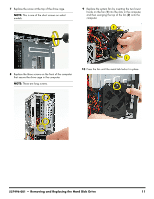
-
5
-
6
-
7
-
8
-
9
-
10
-
11
-
12
-
13
-
14
-
15
-
16
-
17
-
 18
18 -
 19
19 -
 20
20 -
 21
21 -
 22
22 -
 23
23 -
 24
24 -
 25
25 -
 26
26 -
 27
27 -
 28
28 -
29
-
30
-
31
-
32
-
33
-
34
-
35
-
36
-
37
-
38
-
39
-
40
-
41
-
42
-
43
-
44
-
45
-
46
-
47
-
48
-
49
-
50
-
51
-
52
-
53
-
54
-
55
-
56
 |
 |
537496-001
— Removing and Replacing the Hard Disk Drive
7
16
Push in the metal tab (
1
) above the fan as you tip out
the top of the fan (
2
), and lift the fan (
3
) partway out
of the computer. Without disconnecting the fan, set
it aside.
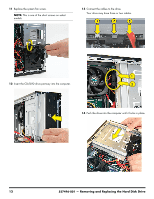
17
Remove the screw at the top of the drive cage. (This is
one of the short screws on select models.)
18
Remove the three screws on the front of the computer
that secure the drive cage in the computer. (These are
long screws.)
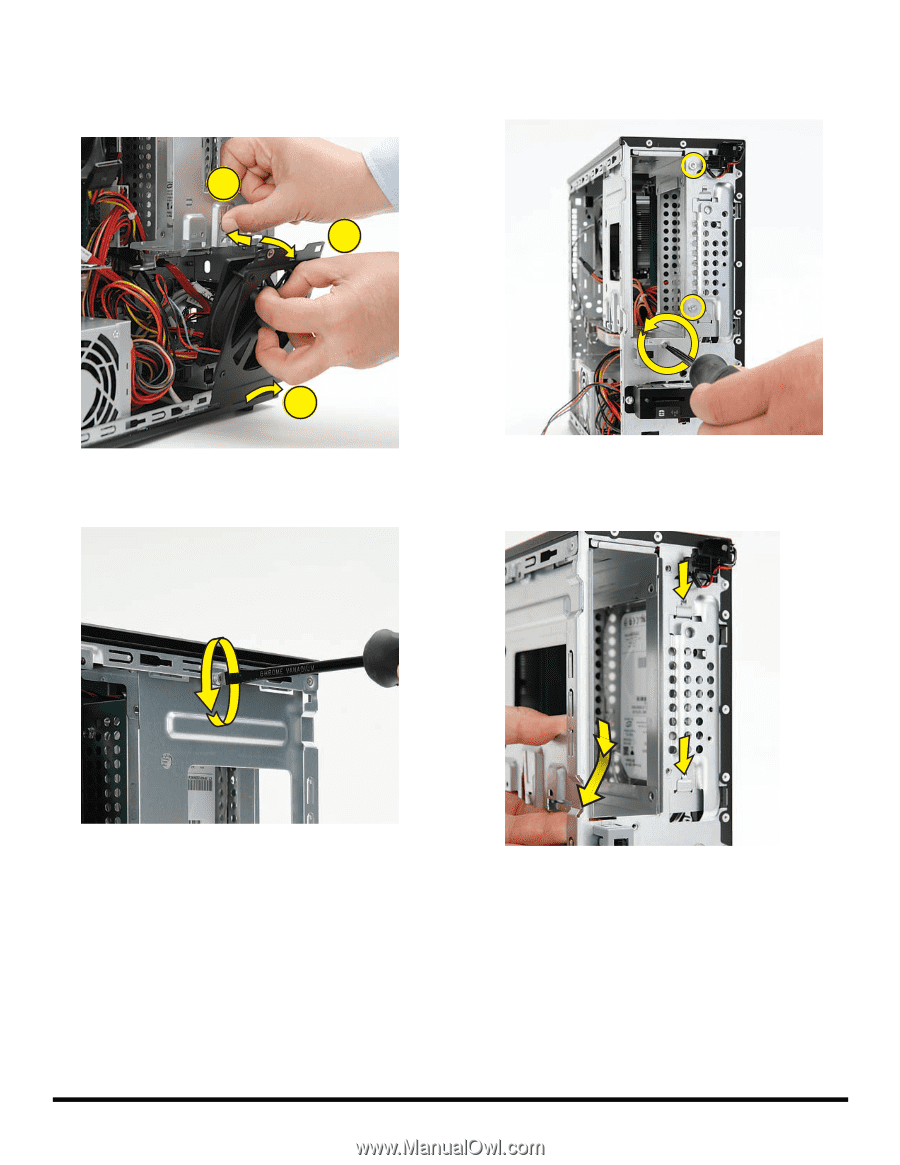
19
Remove the drive cage by moving it downward to
release it, and then lifting it partway out of the
computer.
1
2
3