HP Pavilion dm1-2000 HP Pavilion dm1 Notebook PC - Maintenance and Service Gui - Page 52
Drives, Description, Spare part number, Hard drive, Hard Drive Mounting Kit, Solid-state drive
 |
View all HP Pavilion dm1-2000 manuals
Add to My Manuals
Save this manual to your list of manuals |
Page 52 highlights
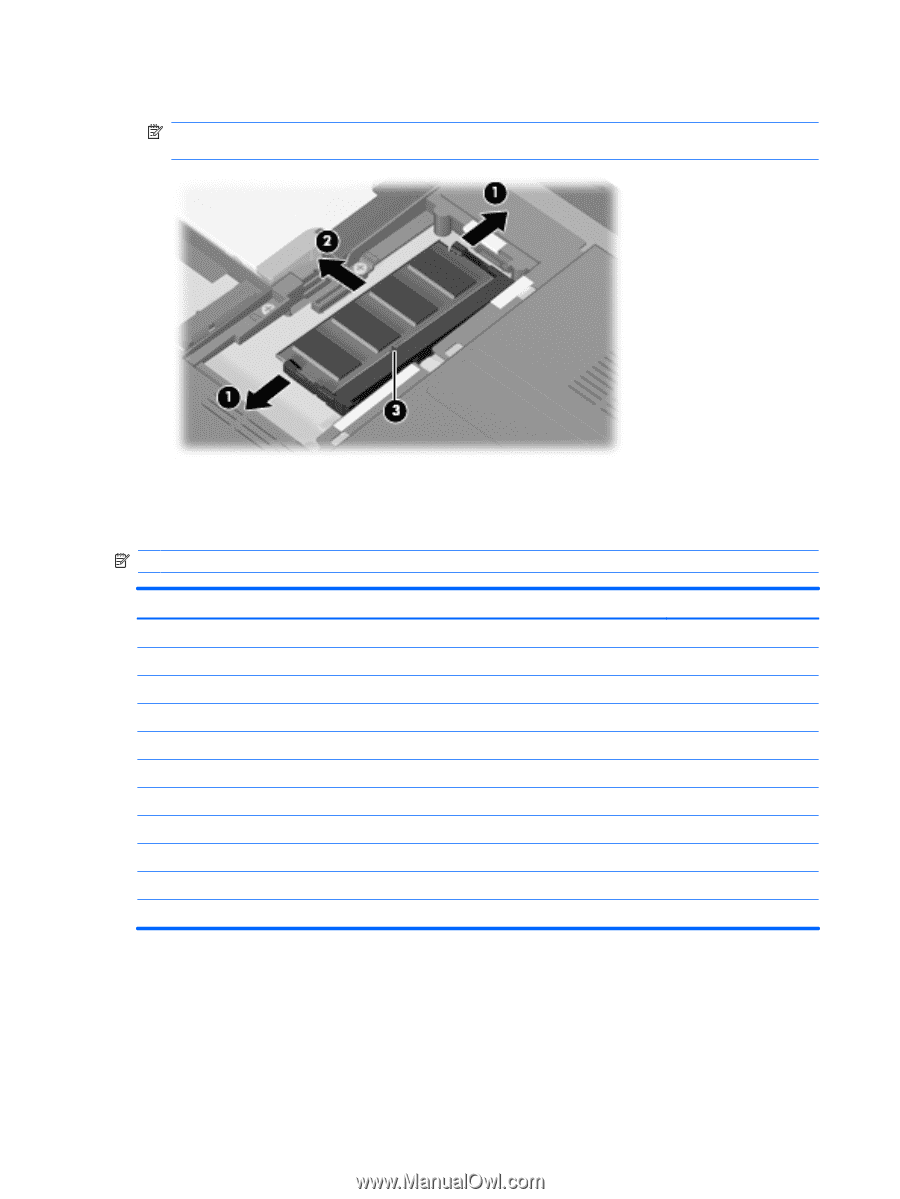
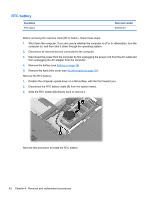
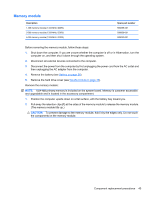
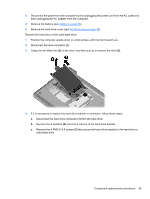
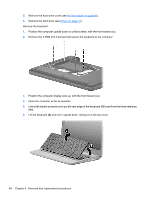
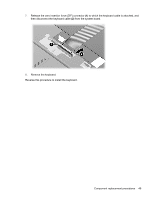
3. Grasp the edge of the memory module (2), and then pull it out of the memory module slot. NOTE: Memory modules are designed with a notch (3) to prevent incorrect insertion into the memory module slot. Reverse this procedure to install a memory module. Drives NOTE: The hard drive spare part kit and solid-state drive spare kit include a bracket. Description Hard drive (includes hard drive bracket): ● 500-GB, 7200-rpm ● 500-GB, 7200-rpm (for use with WWAN models only) ● 320-GB, 7200-rpm ● 320-GB, 7200-rpm (for use with WWAN models only) ● 250-GB, 7200-rpm ● 250-GB, 7200-rpm (for use with WWAN models only) ● 160-GB, 7200-rpm ● 160-GB, 7200-rpm (for use with WWAN models only) Hard Drive Mounting Kit (includes mounting bracket and screws) Solid-state drive, 128-GB Spare part number 609774-001 616991-001 609773-001 616990-001 609772-001 616989-001 611689-001 616988-001 608645-001 608639-001 Before removing the hard drive or the solid-state drive, follow these steps: 1. Shut down the computer. If you are unsure whether the computer is off or in Hibernation, turn the computer on, and then shut it down through the operating system. 2. Disconnect all external devices connected to the computer. 44 Chapter 4 Removal and replacement procedures
-
 1
1 -
2
-
3
-
4
-
5
-
6
-
7
-
8
-
9
-
10
-
11
-
12
-
13
-
14
-
15
-
16
-
17
-
18
-
19
-
20
-
21
-
22
-
23
-
24
-
25
-
26
-
27
-
28
-
29
-
30
-
31
-
32
-
33
-
34
-
35
-
36
-
37
-
38
-
39
-
40
-
41
-
42
-
43
-
44
-
45
-
46
-
 47
47 -
 48
48 -
 49
49 -
 50
50 -
 51
51 -
 52
52 -
 53
53 -
 54
54 -
 55
55 -
 56
56 -
 57
57 -
58
-
59
-
60
-
61
-
62
-
63
-
64
-
65
-
66
-
67
-
68
-
69
-
70
-
71
-
72
-
73
-
74
-
75
-
76
-
77
-
78
-
79
-
80
-
81
-
82
-
83
-
84
-
85
-
86
-
87
-
88
-
89
-
90
-
91
-
92
-
93
-
94
-
95
-
96
-
97
-
98
-
99
-
100
-
101
-
102
-
103
-
104
-
105
-
106
-
107
-
108
-
109
-
110
-
111
 |
 |