HP Pavilion dm1-2000 HP Pavilion dm1 Notebook PC - Maintenance and Service Gui - Page 53
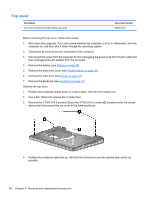
Remove the 4 isolators, Disconnect the hard drive connector
 |
View all HP Pavilion dm1-2000 manuals
Add to My Manuals
Save this manual to your list of manuals |
Page 53 highlights
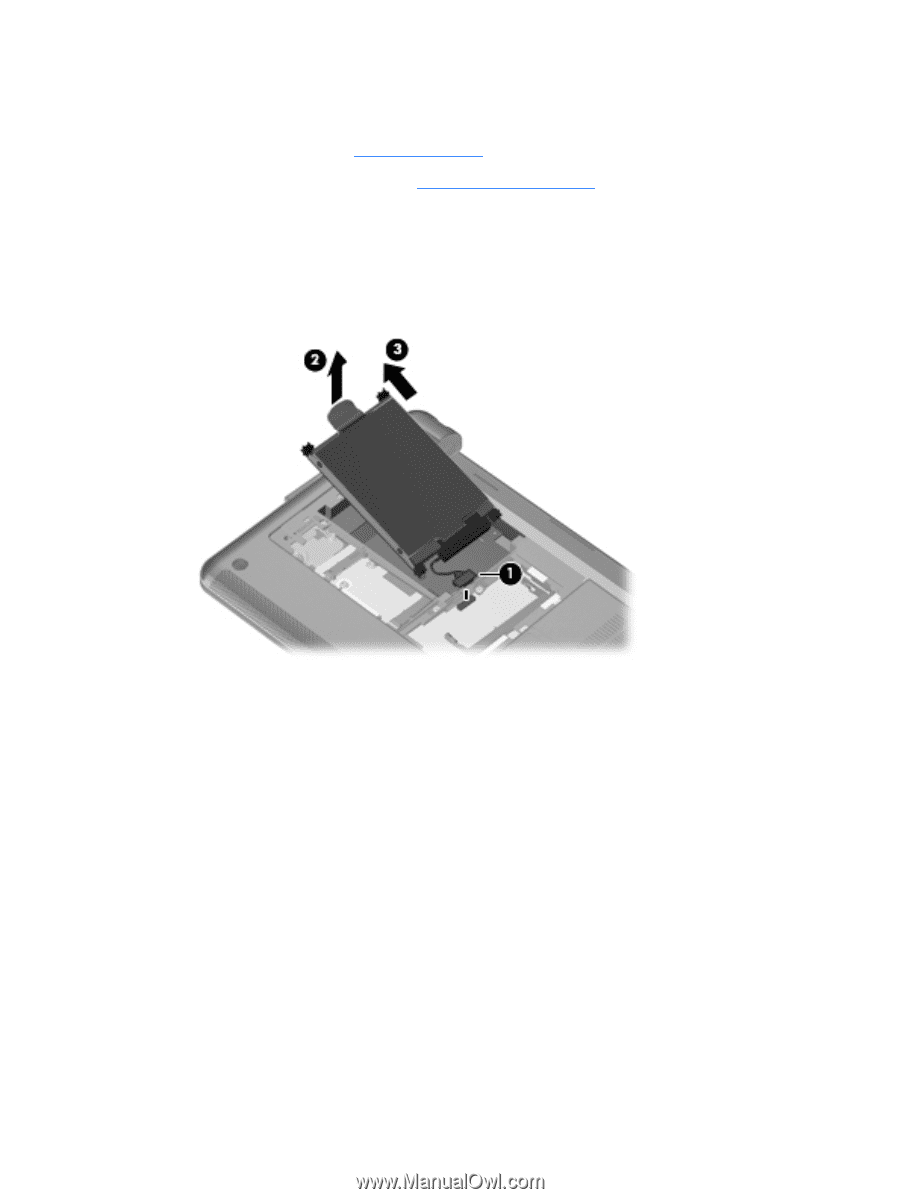
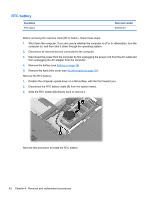
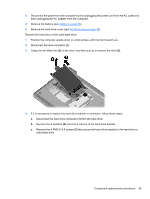
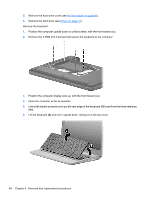
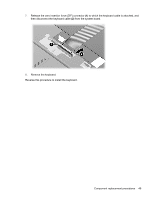
3. Disconnect the power from the computer by first unplugging the power cord from the AC outlet and then unplugging the AC adapter from the computer. 4. Remove the battery (see Battery on page 36). 5. Remove the hard drive cover (see WLAN module on page 38). Remove the hard drive or the solid-state drive: 1. Position the computer upside down on a flat surface, with the front toward you. 2. Disconnect the drive connector (1). 3. Grasp the left Mylar tab (2) on the drive, and then pull up to remove the drive (3). 4. If it is necessary to replace the hard drive bracket or connector, follow these steps: a. Disconnect the hard drive connector (1) from the hard drive. b. Remove the 4 isolators (2) from the 4 corners of the hard drive bracket. c. Remove the 4 PM3.0×3.5 screws (3) that secure the hard drive bracket to the hard drive or solid-state drive. Component replacement procedures 45
-
 1
1 -
2
-
3
-
4
-
5
-
6
-
7
-
8
-
9
-
10
-
11
-
12
-
13
-
14
-
15
-
16
-
17
-
18
-
19
-
20
-
21
-
22
-
23
-
24
-
25
-
26
-
27
-
28
-
29
-
30
-
31
-
32
-
33
-
34
-
35
-
36
-
37
-
38
-
39
-
40
-
41
-
42
-
43
-
44
-
45
-
46
-
47
-
 48
48 -
 49
49 -
 50
50 -
 51
51 -
 52
52 -
 53
53 -
 54
54 -
 55
55 -
 56
56 -
 57
57 -
 58
58 -
59
-
60
-
61
-
62
-
63
-
64
-
65
-
66
-
67
-
68
-
69
-
70
-
71
-
72
-
73
-
74
-
75
-
76
-
77
-
78
-
79
-
80
-
81
-
82
-
83
-
84
-
85
-
86
-
87
-
88
-
89
-
90
-
91
-
92
-
93
-
94
-
95
-
96
-
97
-
98
-
99
-
100
-
101
-
102
-
103
-
104
-
105
-
106
-
107
-
108
-
109
-
110
-
111
 |
 |