HP Pavilion dm1-2000 HP Pavilion dm1 Notebook PC - Maintenance and Service Gui - Page 56
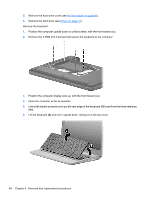
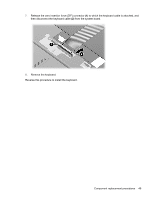
loose from the three retaining, Open the computer as far as possible.
 |
View all HP Pavilion dm1-2000 manuals
Add to My Manuals
Save this manual to your list of manuals |
Page 56 highlights
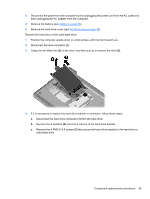
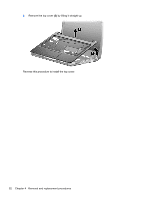
5. Remove the hard drive cover (see WLAN module on page 38). 6. Remove the hard drive (see Drives on page 44). Remove the keyboard: 1. Position the computer upside down on a flat surface, with the front toward you. 2. Remove the 4 PM2.0×5.5 screws that secure the keyboard to the computer. 3. Position the computer display-side up, with the front toward you. 4. Open the computer as far as possible. 5. Use a flat-bladed screwdriver to pry the rear edge of the keyboard (1) loose from the three retaining tabs. 6. Lift the keyboard (2) and turn it upside down, resting it on the top cover. 48 Chapter 4 Removal and replacement procedures
-
 1
1 -
2
-
3
-
4
-
5
-
6
-
7
-
8
-
9
-
10
-
11
-
12
-
13
-
14
-
15
-
16
-
17
-
18
-
19
-
20
-
21
-
22
-
23
-
24
-
25
-
26
-
27
-
28
-
29
-
30
-
31
-
32
-
33
-
34
-
35
-
36
-
37
-
38
-
39
-
40
-
41
-
42
-
43
-
44
-
45
-
46
-
47
-
48
-
49
-
50
-
 51
51 -
 52
52 -
 53
53 -
 54
54 -
 55
55 -
 56
56 -
 57
57 -
 58
58 -
 59
59 -
 60
60 -
 61
61 -
62
-
63
-
64
-
65
-
66
-
67
-
68
-
69
-
70
-
71
-
72
-
73
-
74
-
75
-
76
-
77
-
78
-
79
-
80
-
81
-
82
-
83
-
84
-
85
-
86
-
87
-
88
-
89
-
90
-
91
-
92
-
93
-
94
-
95
-
96
-
97
-
98
-
99
-
100
-
101
-
102
-
103
-
104
-
105
-
106
-
107
-
108
-
109
-
110
-
111
 |
 |
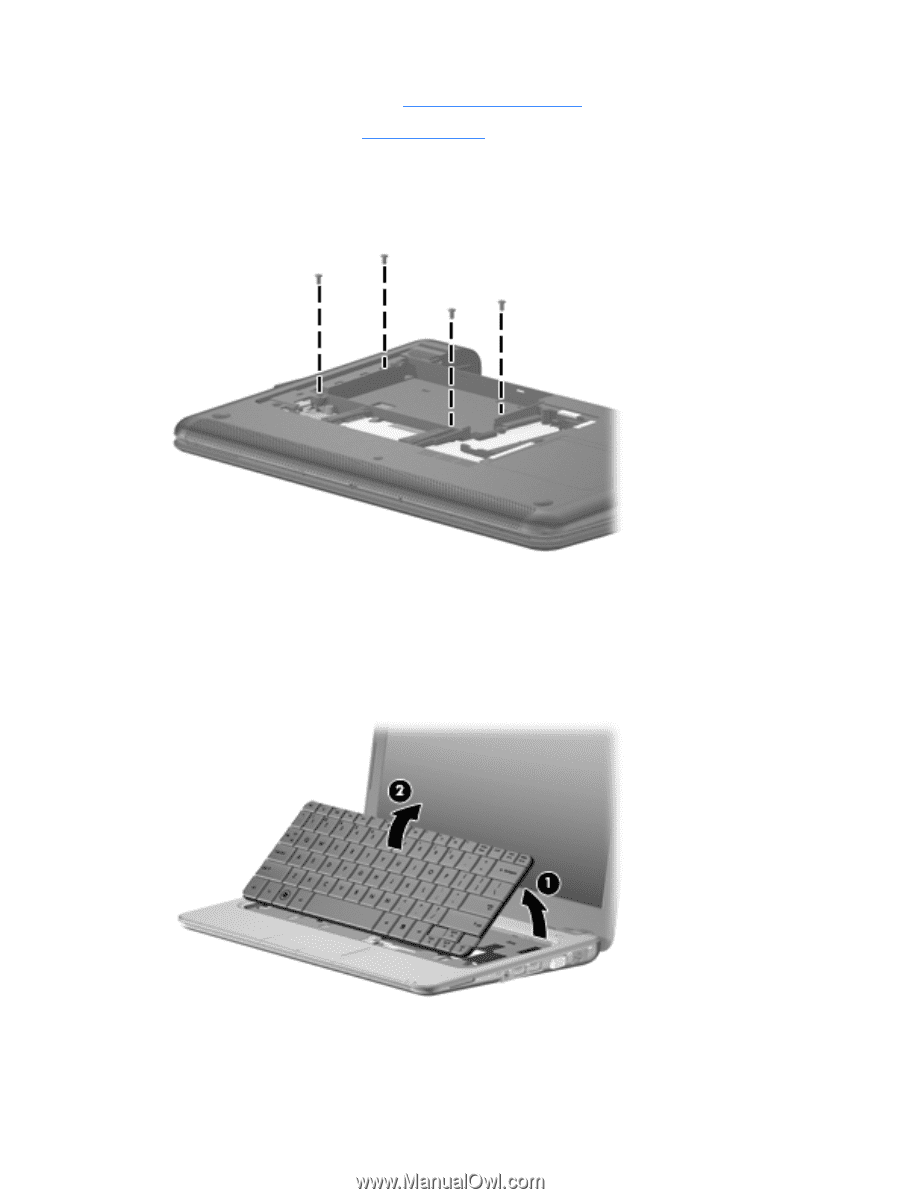
5.
Remove the hard drive cover (see
WLAN module
on page
38
).
6.
Remove the hard drive (see
Drives
on page
44
).
Remove the keyboard:
1.
Position the computer upside down on a flat surface, with the front toward you.
2.
Remove the 4 PM2.0×5.5 screws that secure the keyboard to the computer.
3.
Position the computer display-side up, with the front toward you.
4.
Open the computer as far as possible.
5.
Use a flat-bladed screwdriver to pry the rear edge of the keyboard
(1)
loose from the three retaining
tabs.
6.
Lift the keyboard
(2)
and turn it upside down, resting it on the top cover.
48
Chapter 4
Removal and replacement procedures